
BMW Angel Eyes, Complete Buyer's Guide
Affiliate disclosure. BimmerTalk is a proud partner of the Amazon Associates Program and Turner Motorsport. We may earn a small commission on qualifying purchases through our links, at no extra cost to you. Read the full disclosure.
I remember the exact moment I stopped thinking of BMW headlights as just headlights. It was 2003, I was maybe nineteen, standing in a Tesco car park in Krakow at about 10pm. A silver E39 5 Series pulled in across the lot, and those four glowing white rings just floated through the dark toward me. Nothing else on the road looked like that. Nothing else even came close. I stood there in the rain like an absolute idiot, just staring. The guy who got out clearly thought I was about to steal his car. I wasn't - I was just trying to figure out how those rings worked, why they looked so alive, so alien and yet so right on a German saloon. That was the moment BMW's angel eyes went from "a thing I knew about" to "a thing I needed to understand completely."
Twenty-plus years later I'm driving a G20 330i and I've spent more hours crawling around inside BMW headlight housings than I care to admit. I've installed CCFLs on E39s in minus-ten-degree Polish winters, I've wired RGB kits for show cars, I've coded out bulb-out errors at midnight with a laptop balanced on a mudguard. Angel eyes - or corona rings, if you want to use the official BMW terminology - are the most recognizable visual signature this brand has ever produced. More than the kidney grille. More than the Hofmeister kink. Those rings defined what a BMW looked like for an entire generation, and the aftermarket around them has grown into something genuinely complex and occasionally maddening.
This article is the complete guide. Not a quick "here are five options" list - I mean the full picture. We're going through the history of how corona rings evolved from the original E38 7 Series all the way to the current G-chassis era. We're covering every type of technology on the market, how to identify which system your specific car uses, what to buy, what to avoid, how to install them without destroying your housings, and crucially - what's legal and what will get your MOT failed or your car impounded depending on where you live. If you've been Googling "BMW angel eyes" for an hour and you're more confused than when you started, you're in the right place.

1994-present
Factory Years
E38 7 Series
First Model
95mm-120mm
Halo Diameter Range
30-90 min
Typical Install Time
A Short History of BMW's Coronas
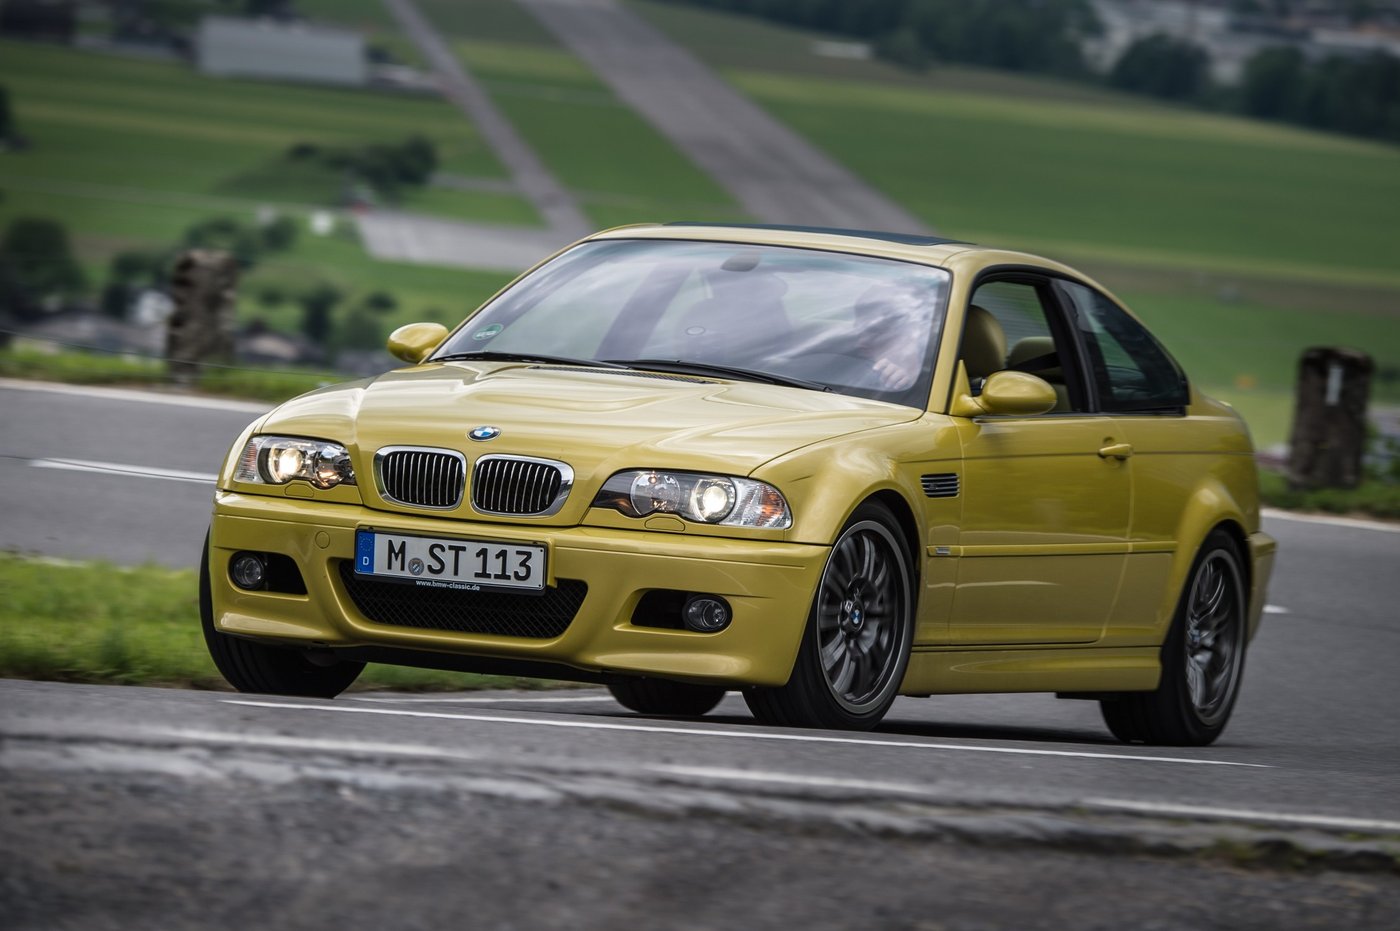
Most people think angel eyes started with the E46 or maybe the E39. They're wrong. The corona ring first appeared on the E38 7 Series in 1994 - BMW's flagship luxury saloon, which is exactly the right place to debut something that bold. The designers at BMW wanted a distinctive daytime running light signature at a time when most European carmakers were still figuring out whether DRLs were even worth having. Instead of a simple amber side marker or a strip of bulbs, they went with a glass tube bent into a ring and positioned around the main headlight reflector. Internally BMW called them "Corona-Ringe" - corona rings - and the name stuck in every workshop manual I've ever read. The English-speaking world eventually landed on "angel eyes" and that's what everyone calls them now, including me.
From the E38, the technology spread fast. The E39 5 Series launched in 1996 with the same CCFL ring system and that's the car that really put them on the cultural map - the E39 sold in massive numbers and it looked stunning with those rings glowing in traffic. The E53 X5 followed in 1999, and the E46 3 Series got them the same year on the facelift models. By the early 2000s, a BMW without corona rings started to look a bit plain. The rings had become part of the brand identity in a way that even BMW's marketing team probably didn't fully anticipate when they first signed off on the E38 design.
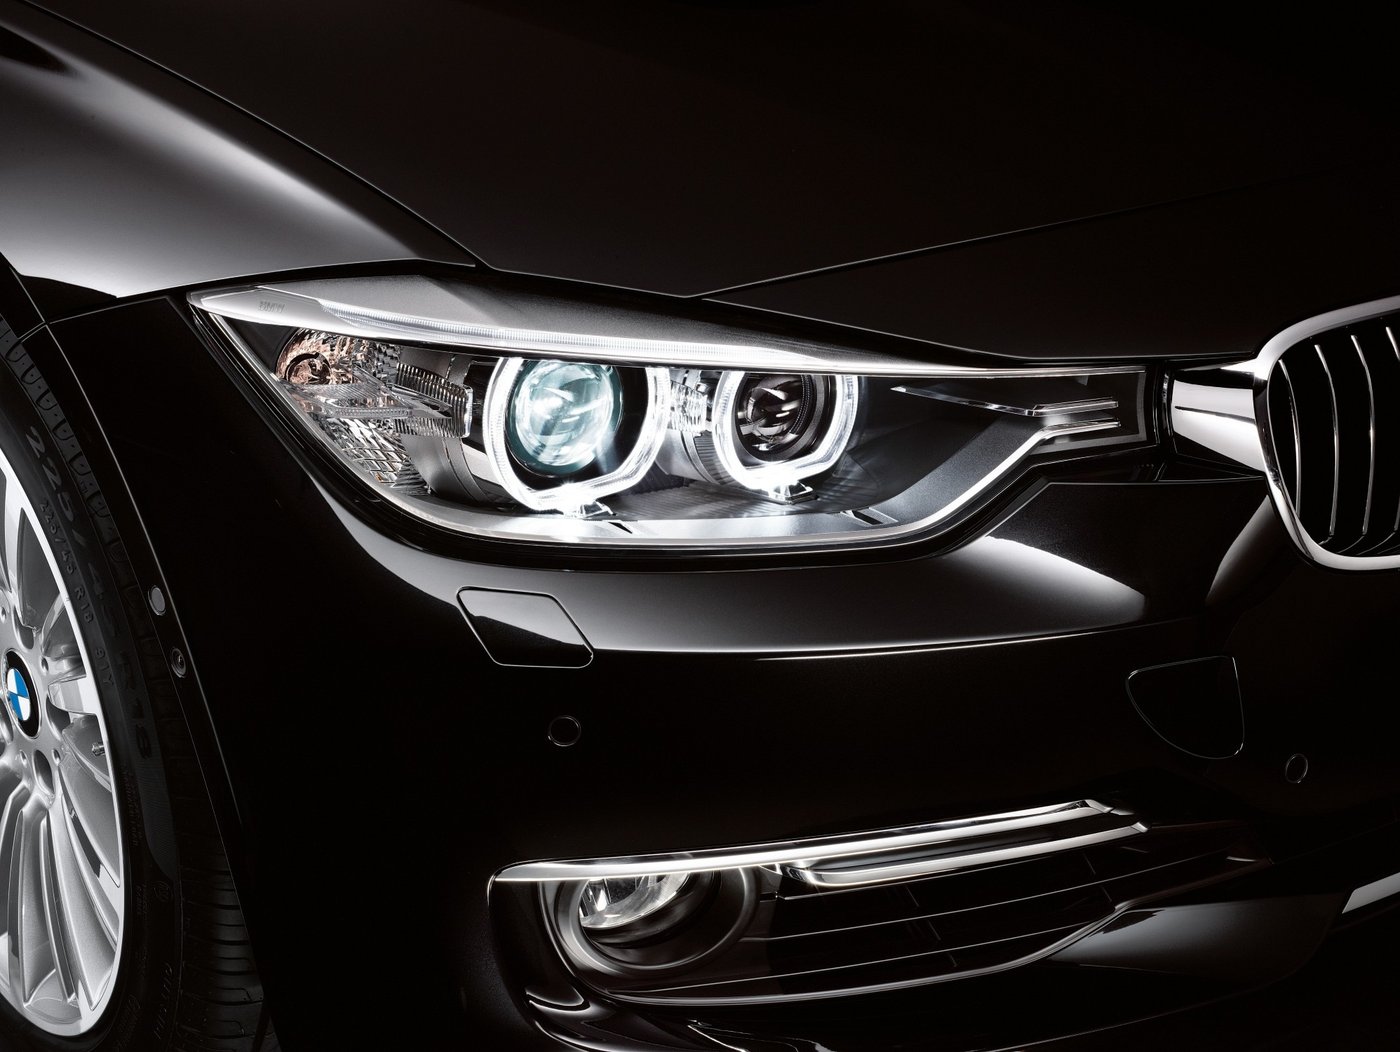
The original factory technology across all those E-chassis cars was CCFL - Cold Cathode Fluorescent Lamp. Glass tubes, fluorescent gas, high-frequency inverters tucked into the headlight housing. It was clever for the era and it produced that warm, slightly yellow-white glow that purists still chase. Then came the E90 3 Series in 2005. BMW started transitioning to LED marker rings, though early pre-LCI E90s actually still used CCFL in some markets - it was a messy period where you couldn't always tell just by looking at the car what was actually inside the housing. The E90 LCI from 2008 onward used proper LED rings and the difference in crispness was immediately obvious.
The F-chassis era - F30 3 Series from 2012, F10 5 Series, F15 X5 and so on - made the rings sharper, whiter, and more angular. The organic roundness of the CCFL era gave way to something more precise. BMW engineering had tightened up the light distribution, the color temperature became more consistent, and the integration with daytime running lights became standard rather than optional. Then with the G-chassis - my G20 included - the traditional round halo ring evolved into a more hexagonal, multi-element LED DRL design. It's still distinctive, still unmistakably BMW, but it's a different aesthetic from the simple glowing ring of the E39 era.
Here's the thing though: ask any serious BMW enthusiast which angel eyes are the real angel eyes, and nine times out of ten they'll point you back to the E39 or the E46. The simplicity of a perfect glowing ring against a dark headlight housing, slightly warm in color, softly illuminating the front of the car - that's what people mean when they say "angel eyes." Everything that came after is an evolution, but the E39 CCFL ring is the original, and it still looks right in a way that nothing else has quite matched.
The Four Types of Angel Eyes Explained
If you're shopping for aftermarket angel eyes right now, you'll encounter four distinct technologies. They're not interchangeable, they don't all suit every car or every use case, and the cheapest option is rarely the best option even when they claim identical specs. Here's what's actually in the box when you buy each type, and what that means for your build.
CCFL (Cold Cathode Fluorescent Lamp)
CCFL is the original factory technology and if you're building an E39, E46, or early E53 the way it was meant to look, this is the technology to match. Understanding how it works helps you understand why it behaves the way it does. A CCFL ring is a sealed glass tube - literally bent into a halo shape - filled with a gas mixture that includes mercury vapor and a fluorescent coating on the inside of the glass. A small electronic inverter (usually mounted somewhere inside the headlight housing or wired to a ballast nearby) drives that gas with a high-frequency AC signal, typically around 50,000 Hz. The gas excites, emits UV, the fluorescent coating converts it to visible light, and you get that smooth, continuous glow with no individual light sources visible.
The result is what makes CCFL special - it's an organic, even glow with no hotspots, no dot pattern, just a smooth ring of warm-white light. BMW's factory units ran at around 6-8W per ring, producing that slight warm tint that reads almost cream-white in daylight and pure white at night. Typical lifespan is quoted at around 50,000 hours which sounds impressive but the failure mode is harsh - CCFL doesn't dim gradually like an LED, it just stops working one day. Cold weather is another weakness. Below about minus five degrees Celsius you'll get flickering on startup as the gas needs to warm up, and in really brutal cold the rings can take a minute or two to reach full brightness.
The glass tubes are also fragile in ways that LEDs aren't. Vibration, rough roads, and any physical shock to the headlight housing can crack a tube. I've seen E39s with one ring dead from nothing more than a pothole hit at the wrong angle. Replacement CCFL kits are still widely available and relatively cheap ($30-$80 a pair with inverters), and the color match to factory is essentially perfect. If you're restoring a classic E-chassis and you want it to look exactly right, CCFL is the answer. If you want something more robust for a daily driver, read on.
SMD (Surface Mount Device) LED
SMD LEDs are the most common aftermarket angel eye upgrade technology and for good reason - they hit the best balance of cost, brightness, reliability, and ease of installation. An SMD angel eye ring is a flexible circuit board bent into a halo shape, with individual surface-mount LED chips soldered at regular intervals around the ring. The whole assembly is typically encased in a silicone or epoxy jacket for moisture resistance.
The number of individual LEDs on the ring matters a lot. Cheap rings might have 60-80 LEDs and you'll see the individual dot pattern when you look at them, especially in photos. Quality rings run 200 diodes or more for a much smoother appearance. I've installed both and the difference is obvious from ten meters away. For anything that's going on a car you care about, I won't bother with anything under 180 diodes per ring. The extra few quid is worth it every time.
SMD LEDs run significantly cooler than CCFL inverters, which matters inside a sealed headlight housing where heat buildup can cause premature failure of other components. Lifespan is rated at 80,000+ hours and the failure mode is gradual dimming rather than sudden death, so you get warning. The main color consideration is temperature - most SMD angel eyes are sold at 6000K which is a crisp, clean white that matches well with xenon projectors. If you want something slightly warmer that reads more like the factory CCFL look, hunt for 5000K units. Avoid anything over 6500K - it starts looking blue and cheap, like someone installed bathroom lighting in your headlights.
CAN bus compatibility is the gotcha with SMD LEDs and I'll cover this in detail in the buying section. Short version - BMW's electrical system monitors bulb load, and underpowered LEDs trigger dashboard warnings. Budget rings often cause this. Quality rings either include resistors or use sufficient current draw to keep the system happy.
CREE / COB (Chip-on-Board) LED
COB technology is the newest addition to the angel eye market and it's genuinely different in how it produces light. Rather than dozens of individual small LEDs on a circuit board, a COB angel eye uses a single high-density LED chip - sometimes one per ring, sometimes a few - with a diffuser lens or coating over it. The result is extremely intense, very directional light output. When it's pointed right, it's the brightest angel eye option on the market by a meaningful margin.
The most common application for COB/CREE angel eyes is the H8 bulb socket format used on BMW's E90, E70 X5, F30, and various other models from roughly 2005 onward. These cars didn't use ring assemblies at the factory - they used a reflector inside the housing that the bulb illuminated. Swapping to a CREE H8 LED bulb is a direct plug-in replacement that massively outperforms the stock halogen H8. On the right housing, the output is genuinely impressive.
Watch the power claims carefully. The market is absolutely full of listings claiming "80W" or "120W" CREE units that are, in reality, drawing 30-50W at most. This matters partly for realistic expectations and partly because genuinely high-wattage units can cause heat issues inside the housing. The 30-50W real-world units are fine. The marketing numbers are just noise. For maximum brightness and that modern, crisp white look, COB is the right choice - but verify your housing type before buying, because these are not universal fitments.
RGB (Multi-Color)
I'll be honest with you: I love RGB angel eyes in the right context and I'd never put them on a road car. RGB units use multi-color LED chips - typically a red, green, and blue LED in each package - controlled by a small Bluetooth module that lives somewhere in the engine bay or behind the headlight. You pair a phone app, and you can set any color, breathing patterns, color cycles, music sync, whatever you want. On a show car sitting in a car park under event lighting, they look absolutely spectacular.
On public roads, they are illegal in nearly every jurisdiction I'm aware of. In the UK, EU, USA, Canada, and Australia, displaying colored lights from the front of a vehicle that aren't factory-approved indicators or emergency lights is an offense. Red or blue at the front is particularly serious in most countries because those colors are reserved for emergency vehicles. Even white-only use of RGB rings could be questioned if an officer decides to examine whether the system can produce other colors. I'm not going to help you get a fine or a failed MOT by underplaying this. If you want RGB, put them on a show car, a static display vehicle, or something that never moves on a public road. Full stop.
Quality varies massively in the RGB market. The cheap end produces washed-out, inconsistent colors and app connectivity that drops constantly. Better units cost more but produce genuinely vivid, consistent color. For a show car build where color accuracy matters, spend at least $80-$100 per pair. The $25 eBay specials will embarrass you under proper lighting.
| Tech | Lifespan | Brightness | Best For | Real-World Price |
|---|---|---|---|---|
| CCFL | ~50k hrs | Medium (warm glow) | Classic E-chassis factory look | $30-$80 pair |
| SMD LED | 80k+ hrs | High (crisp white) | All-around daily driver upgrade | $40-$120 pair |
| CREE/COB | 80k+ hrs | Very High | Max brightness, H8 sockets | $35-$110 pair |
| RGB | 60k hrs | High (variable) | Show cars only - not street legal | $50-$150 pair |
CCFL
- Lifespan
- ~50k hrs
- Brightness
- Medium (warm glow)
- Best For
- Classic E-chassis factory look
- Real-World Price
- $30-$80 pair
SMD LED
- Lifespan
- 80k+ hrs
- Brightness
- High (crisp white)
- Best For
- All-around daily driver upgrade
- Real-World Price
- $40-$120 pair
CREE/COB
- Lifespan
- 80k+ hrs
- Brightness
- Very High
- Best For
- Max brightness, H8 sockets
- Real-World Price
- $35-$110 pair
RGB
- Lifespan
- 60k hrs
- Brightness
- High (variable)
- Best For
- Show cars only - not street legal
- Real-World Price
- $50-$150 pair
How to Choose the Right Angel Eyes for YOUR BMW
Here's where most people go wrong: they find angel eyes they like the look of, they check that the listing says the right model years, and they buy. Then the kit arrives and either it doesn't fit the housing they have, it triggers constant dashboard errors, or the color temperature looks completely wrong against their existing lights. I've made every one of these mistakes at least once, so let me save you the grief.
Identify Your Headlight Type First
This is step zero and it matters more than any other factor. BMW fitted multiple different headlight systems across the same model years and even the same model ranges, and angel eye kits are almost always specific to one housing type.
Halogen housings use a reflector bowl behind a halogen bulb - the light bounces off a shaped mirror surface. These are the most common setup on older E-chassis cars and on base-spec versions of models that offered xenon as an option. The corona ring inside a halogen housing sits as a separate ring element mounted around the main reflector.
Xenon/HID housings use a projector - a lens system with a cutoff shield that controls the light beam more precisely. These were optional on E46 and E39, and became standard on many E90 trim levels. The projector bowl is what distinguishes these housings externally (look for the distinctive round lens inside the housing visible through the outer lens). Aftermarket angel eye kits designed for halogen housings will not fit correctly in xenon housings. The ring mounting points, diameters, and internal geometry are different. Buying the wrong type wastes money and potentially damages your existing housing trying to make it work.
Full LED housings - found on F30 LCI and most G-chassis cars - are different territory entirely. The factory rings on these are integrated LED elements, not separate add-on rings, and aftermarket upgrades typically mean either OEM-spec replacement LED arrays or coding-based changes to how the existing rings behave. This is a different conversation from the bolt-in ring kits we're discussing here.
The simplest way to confirm which housing you have: open the bonnet, unclip the rear access cover on the headlight (usually a quarter-turn cap or two), shine a torch in, and take a photo. You'll be able to see clearly whether there's a projector lens or a reflector bowl. Do this before you buy anything. It takes three minutes and it might save you fifty quid and a week of waiting for a return.
Factory vs Aftermarket LED Marker Bulbs
If your BMW uses H8 bulb sockets for the angel eyes - common on E90, E92, E70, E71, E82, E84, F25, F26, and several other models from 2005 onward - you have the easiest possible upgrade path available to you. The factory H8 halogen bulb is dim, warm-yellow, and makes the rings look completely anaemic next to modern HID or LED headlights. Swapping to a quality H8 LED bulb is a two-minute job per side. You literally unplug the old bulb, plug in the new one, and you're done. No housing removal, no headlight aim disruption, no sealant, nothing.
The improvement is dramatic. A good H8 LED will triple or quadruple the perceived brightness of the ring and shift the color to a clean white that actually matches xenon projectors properly. For any E90, F30 non-LCI, or X5/X6 E70 owner who hasn't done this yet, it's genuinely the best five-minute, thirty-quid improvement available for the front end of your car. Just make sure you buy CAN bus compatible units - more on that below.
CAN Bus Compatibility
BMW's electrical architecture monitors the resistance load of every bulb in the system. The car knows what resistance a factory H8 halogen should present, and when you swap in an LED that draws significantly less current, the system flags it as a failed bulb. You'll get a "Check lamp" or similar warning on the instrument cluster, potentially on every startup. It's annoying, it might mean other warnings get buried, and on some models it affects the behavior of the DRL system.
The solution is either a kit that includes CAN bus load resistors (small devices wired in parallel that make up the missing resistance) or LED units that include integrated electronics to simulate the correct load. These are typically marketed as "error free" or "CAN bus compatible." Take those claims with a small amount of skepticism - some cheap units claim CAN bus compatibility but don't actually work on all BMW modules. Buying from a BMW-specific supplier rather than a generic lighting site reduces the risk here considerably. If you do end up with error messages, standalone load resistors are cheap ($5-$15 per pair) and can be added to any LED installation as a fix.
Color Temperature
Color temperature gets talked about a lot and it's actually worth understanding rather than just picking "the whitest one." The Kelvin scale for light goes from warm (low number, yellow-orange) through neutral white to cool blue-white at the high end. For angel eyes specifically:
4300K is warm white, very close to factory halogen color. If your main headlights are halogen and you're not upgrading them, 4300K angel eyes will look consistent and deliberate. If you have xenon or LED headlights, 4300K angel eyes will look noticeably warmer and slightly yellow by comparison - probably not what you want.
6000K is the standard crisp white that matches well with xenon HID headlights. This is the most popular choice and works well on the vast majority of builds. It's clean, it's bright, and it doesn't read as blue under normal conditions.
7000K creeps into blue-white territory. Some people like this for an aggressive, modern look. I think it starts to look slightly cheap in daylight, but at night it's actually quite striking. Personal preference at this point.
8000K and above is where I'd firmly say avoid it. The light becomes visibly blue in daylight, it reads as low-quality, and it creates a color mismatch with essentially any headlight system on the planet. I've seen too many E46s and E39s ruined by owners chasing the bluest possible rings. It's not the move.
My personal recommendation for almost every build: 6000K for cars with xenon or LED headlights, 4300K if you're keeping halogen mains. Simple rule, right result every time.
Installation Walkthrough - What Actually Happens When You Install Angel Eyes
People dramatically over- or under-estimate how hard this install is. Here's the honest version for every major BMW chassis. I've done most of these in driveways, in the dark, with basic hand tools. None of them require professional training. Some of them do require patience and a willingness to work carefully around hot glass - but none of them are beyond a competent home mechanic who reads the steps before picking up a screwdriver.
The H8 Bulb Swap - Easiest Install Possible (E90/E92/E70/E71/E82/E84/F25/F26/Early F30)
This is genuinely the easiest headlight modification you can do on a modern BMW. No housing removal, no heat guns, no sealant. Just a bulb swap. I've done it in a supermarket car park in under fifteen minutes per side, including the time spent fumbling with the boot cover clips in the dark.
Open the bonnet and find the rear access cover on the headlight - it's either a rubber cap that pulls off or a quarter-turn plastic cover depending on the year and market. Remove that cover and look inside. The H8 angel eye bulb is separate from the main low and high beam bulbs - it'll be positioned toward the top of the housing on most models. Twist it about thirty degrees counter-clockwise and it pulls straight out. Unplug the connector. Plug in the new LED unit. Twist it clockwise to lock it in place. If your kit came with a load resistor, loop the resistor wire between the back of the connector and a solid metal bracket nearby, secure it with a zip tie so it can't rattle, and replace the rear cover. That's the whole job. Test before you close anything up.
Time per side: 10-15 minutes. Difficulty: easy. Risk of destroying something: essentially zero if you're not forcing anything.
Full Halo Ring Install - E36/E39/E46/E38 Without Projectors
This is the install that intimidates people the most, and I understand why - you're baking glass in an oven and prying apart a headlight assembly. When I describe it out loud to people who haven't done it before, I can watch them decide to pay a shop to do it instead. But if you follow the steps in order and don't rush the heat stage, it's very manageable.
Step 1. Remove the headlight assembly from the car. On the E46 the bumper doesn't usually need to come off - there are three or four screws accessible from inside the engine bay and the assembly pulls forward once they're out. On the E39 your life is much easier if you remove the lower front grille section first, as it gives you access to the lower headlight fasteners without contorting yourself. Pop the indicators off at the same time. Once the assembly is out, disconnect the wiring harness and take it somewhere with good lighting to work on. A kitchen table is fine. Yes, I do this.
Step 2. Bake the headlight housing at 200-250 degrees Fahrenheit (90-120 degrees Celsius) for 5-8 minutes. The goal is to soften the butyl tape sealant that holds the lens to the housing body - not to melt anything. Most modern kitchen ovens are accurate enough for this. Put the housing lens-side up on a baking tray, slide it in, set a timer. When you take it out, put on gloves immediately - the lens will be genuinely hot and the butyl will be soft and sticky. Use a plastic trim tool or a wide flat-blade screwdriver wrapped in tape to gently work around the seam and pry the lens away from the housing. Work around the perimeter in stages, not one spot at a time. It should separate with moderate pressure once the butyl is warm. If it's fighting you badly, it needs more time in the oven.
Step 3. With the lens off, clean the interior of both the lens and the reflector bowl. Old dust, condensation residue, and fingerprints all show once the light is on. A soft cloth and some isopropyl alcohol works well. Don't touch the reflector surface with your bare fingers - the oils from your skin will leave marks that you'll see lit up at night and won't be able to reach to clean again once it's sealed.
Step 4. Fit the CCFL or LED rings into position. Most kits include either small plastic clips that hook onto the reflector rim or lengths of 3M double-sided tape. The clip method is more secure and easier to adjust. The tape method works fine if you use quality automotive-grade tape (not office stationery tape - I've seen that particular mistake and it ends badly when the housing heats up in summer). Position the ring so it sits centered around the reflector opening and lies flat against the housing surface. Check from multiple angles before committing.
Step 5. Route the wiring from the ring through to the rear of the housing. Most housings have an existing rubber dust boot or grommet at the back that you can route additional wires through if you're careful about not overstretching the rubber. Alternatively, drill a small hole in the rear cover - 8-10mm is usually enough - and seal it afterward with an appropriate rubber grommet. Run the wire cleanly and make sure it can't touch any hot surfaces or moving components once the headlight is back in the car.
Step 6. Reseal the lens back onto the housing with fresh butyl tape before reassembly. Heat both housing and lens briefly to make the new butyl tacky, press firmly together, and allow to cool before reinstalling. Clean up any butyl squeeze-out with your fingers while it's still warm.
Inverter and Power Routing
CCFL kits ship with small inverter bricks - usually one per ring - that convert your car's 12V DC to the high-frequency AC the CCFL tubes need. The standard power tap is the parking light circuit, which gives you rings on whenever the sidelights are on. This is the right place to wire them. Tapping the main headlight circuit means the rings only work with full headlights on, which misses the whole point of having them as daytime markers. The parking light live wire is easy to find - most BMW wiring diagrams are freely available online, and a multimeter takes a minute to confirm.
SMD LED rings run directly off 12V and don't need inverters, which makes the wiring genuinely simple - positive to switched 12V (parking light circuit), negative to any solid ground point on the headlight mounting bracket. Use ring terminals, not just bare wire twisted around a bolt. Vibration will loosen bare wire over time and you'll get intermittent issues that are maddening to diagnose.
High-power CREE kits occasionally pull enough current to warrant a relay in the circuit. Combined current draw above 5A on a circuit that wasn't designed for it is asking for trouble. Most quality aftermarket rings draw well under this, but if you're running a particularly powerful kit and you're unsure, a standard 30A automotive relay costs about three pounds and takes twenty minutes to wire in. It's cheap insurance.
On wire routing - keep wiring away from heat sources. In most BMW engine bays this means staying well clear of the exhaust manifold area, the turbo housing on 4-cylinder engines, and any coolant lines that run hot. Secure wires with plastic zip ties to existing loom brackets rather than letting them hang loose. Before final assembly, apply a small amount of dielectric grease into every connector you've made. Every single one. It takes one minute and it's the difference between a connection that lasts five years and one that corrodes in eighteen months.
Projector vs Halogen Fitment Details
Projector housings have a physically different internal geometry from halogen reflector housings, and angel eye rings are not universal between the two. The projector lens assembly is a fixed circular unit that sits proud of the housing, and the ring has to fit neatly around the outside of it. The reflector bowl is a more open parabolic shape with different mounting points entirely.
Most reputable aftermarket kits that cover both types include two ring sizes in the box. The key is identifying which size you need before you start and not assuming the larger one is correct. The correct ring should fit snugly around the projector or reflector edge without any forcing and without any gap large enough to let it rotate freely. Too small and it won't seat - don't try to make it fit by stretching or heating the ring. Too large and it will float inside the housing and contact the outer lens when temperatures change. Neither condition is acceptable and neither can be bodged into working long-term. Measure the internal diameter of your reflector bowl or projector rim before ordering if the listing doesn't specify sizes clearly.
Legal Status - What's Actually Allowed on Public Roads
I'm not a lawyer and this isn't legal advice. What it is: honest, direct information based on my understanding of how these regulations work, because most angel eye articles I've read either ignore this topic entirely or treat it so vaguely as to be useless. Here's the real picture for the markets most of you are in.
United States
DOT regulations generally allow white angel eyes wired as daytime running lights or as parking lights. White light at the front of the vehicle from non-headlight sources is typically permissible as long as it doesn't create glare or impersonate emergency lighting. Practically speaking, aftermarket halos wired to the parking light circuit and producing white light are unlikely to attract attention from law enforcement in most states.
The color restriction is where it gets serious. Any color other than white or amber at the front of a vehicle is illegal on public roads in essentially every US state. This covers blue, red, green, purple, and yes - the RGB mode your new kit can do. Running RGB angel eyes set to anything other than white while driving is a ticketable offense in every state I'm aware of. It's not a grey area. California has stricter headlight modification laws than most states and is more likely to enforce even marginal modifications, so if you're based there, be more conservative in what you run.
RGB systems are legal to own and install, provided you only use them in white mode on public roads. The fact that the system can produce blue or red is not itself illegal - it's actually displaying those colors on a moving vehicle on public roads that creates the offense. Whether you trust yourself to always remember to switch modes is your call, but bear in mind that "I didn't realise it was set to rainbow mode" is not going to carry much weight with a traffic officer.
European Union and UK
ECE regulations covering lighting in Europe are, if anything, more prescriptive than US DOT rules. The short version: white at the front for headlights, DRLs, and parking lights. Amber for front indicators. Red and amber at the rear. No exceptions for aftermarket modifications regardless of how tasteful or subtle you think they are.
If you want to run angel eyes as daytime running lights specifically, the relevant standard is ECE R87. For a light source to legally function as a DRL, it must meet specific luminous intensity requirements (at least 400 candela in normal conditions), must be linked to the ignition and not the headlight switch, and must dim appropriately when the main headlights are switched on. Most aftermarket angel eye kits do not meet ECE R87. This means you cannot legally market them as DRL replacements in EU or UK markets, and a strict MOT examiner or TUV inspector will fail a vehicle where the factory DRL function has been replaced by non-compliant aftermarket rings.
The practical workaround that most people use in Europe - and the approach I'd recommend if you want to keep road legality - is to wire your aftermarket halos as supplemental parking lights rather than as DRL replacements. They switch on with your sidelights, they supplement your factory DRL rather than replacing it, and they don't interact with the DRL circuit. This approach keeps the factory lighting functions intact and reduces the likelihood of a fail at MOT or TUV, though I won't tell you it makes you immune to an examiner who decides to take a close look.
Racing and Track Use
Closed course, private property, track days - do what you want. No road traffic law applies when your car doesn't leave the property. RGB mode on full rainbow cycling, twelve rings, competition green halos - nobody is writing you a ticket in a paddock. Same for static show meets, car park gatherings, and anything where the car is parked and on display.
Just don't drive to the show with RGB mode running. It's a short journey and the risk feels low until it isn't.
Troubleshooting Common Problems
These are the issues I've diagnosed dozens of times, from my own cars and from friends who called me after a forum post didn't solve their problem. Most of them have straightforward fixes once you correctly identify the cause - which usually isn't what people first assume.
Flicker on Cold Starts
Symptom: rings flicker or pulse for 30-60 seconds after you switch the parking lights on, then settle into steady output. Only happens in cold weather. Happens every morning in winter but rarely in summer.
Cause: this is CCFL-specific and it's normal behavior. The gas inside the tube needs to reach operating temperature before it produces stable light output. In temperatures below about five degrees Celsius, that warm-up period extends noticeably. The inverter is working correctly - the tube is just cold.
Fix: wait 60 seconds after switching on. The flicker almost always stabilizes on its own. If you're still getting persistent flicker after two minutes regardless of temperature, that's a different story - it points to a failing inverter rather than cold gas behavior. Inverters are cheap to replace and usually available individually rather than as a full kit repurchase. If you replace the inverter and still get issues, test the tube itself with a known-good inverter before concluding the tube has failed.
"Bulb Out" Warning on Dashboard
Symptom: angel eyes installed and working visually, but the instrument cluster shows a parking light or DRL warning on startup, or on every journey. Sometimes it clears after a few seconds, sometimes it persists.
Cause. BMW's CAN bus monitors the resistance load of each bulb circuit. A standard H8 halogen bulb presents a specific resistance. Most LED replacements draw significantly less current and present a much lower load. The car interprets this as a failed bulb and flags it accordingly.
Fix: there are two routes. First - buy CAN bus compatible LED units that either include integrated load simulation electronics or come with separate resistors. If you've already bought standard LEDs and you're getting this error, adding standalone load resistors wired in parallel with your LED is the fix. A 6-ohm, 50-watt resistor per circuit is the standard specification and you can source them for a few pounds each. Wire them in parallel between positive and negative at the connector, mount them against a metal surface (they get warm under load), and the error should disappear. Second route - some BMWs can be coded via software to ignore specific bulb load errors, which eliminates the need for resistors entirely. If you have coding access via ISTA, NCS Expert, or BimmerCode for appropriate models, this is the cleaner solution.
One Ring Brighter Than the Other
Symptom: left and right rings are obviously different in brightness under normal use. Not a flicker issue - one is consistently noticeably dimmer than the other.
Cause: four main possibilities. A failed diode cluster within the ring itself (several LEDs in one section have died). A bad ground connection on the dim side. A damaged wire somewhere in the circuit creating voltage drop. Or mismatched rings if the two sides came from different batches or suppliers.
Fix: start with the ground. Remove the ground connection on the dim side, clean both surfaces with sandpaper or a wire brush, and reattach firmly. This solves the problem more often than you'd expect - ground quality is the most overlooked variable in automotive electrical troubleshooting. If the ground is fine, swap the left and right rings physically and test again. If the dimness follows the ring to the other side, the ring itself has failed diodes and needs replacing. If the dimness stays on the same side of the car regardless of which ring is fitted there, the fault is in the wiring or the circuit for that side.
Headlight Fogging After Install
Symptom: condensation visible on the inside of the headlight lens within a day or two of reinstalling. Worse after rain or car washing. Might clear when the car is driven and the housing warms up, then come back overnight.
Cause: the butyl seal wasn't reformed correctly after opening the housing. Either there wasn't enough butyl applied, there were gaps in the bead, or a drill hole made for wire routing wasn't sealed properly with a grommet.
Fix: bake the housing again to soften what remains of the old butyl. Use a plastic tool to scrape all remaining old butyl out of the channel - leaving the old under new doesn't create a reliable seal. Apply a fresh, thick bead of new butyl tape, heat it slightly so it's pliable, press the lens firmly back onto the housing and work around the perimeter applying even pressure. If you drilled a hole for wire routing, fit a rubber grommet sized to the hole diameter and apply a small amount of silicone around the grommet flange once it's seated. Let everything cool completely before reinstalling. This is annoying the second time but it solves the problem for good if you do it properly.
Rings Too Dim Compared to Headlights
Symptom: with headlights on, the angel eyes are barely visible - especially in daylight. People expected them to glow brightly alongside the main beam.
Cause: this is actually working as designed and it's worth understanding why. Angel eyes are parking lights or daytime running lights - they're not intended to supplement or compete with main beam output. The power level they operate at is deliberately lower than headlight output. When your xenon or LED main beams are on, they're producing significantly more light than any angel eye ring will.
Fix: if you genuinely want brighter rings that remain visible alongside main beam headlights, you need to wire them to a higher-power circuit with a separate switch rather than piggybacking the parking light circuit at standard voltage. This involves some electrical work - a relay, a dedicated fuse, a switch or automatic trigger - and is beyond the scope of a basic install. It's doable, but it's a separate project. For most people, the practical answer is that the rings are doing exactly what they should and look great when the headlights are off or in parking light mode, which is their intended operating condition.
Things I've Learned Installing Dozens of Sets
Fifteen years of wrenching on BMWs and however many angel eye installs later, these are the habits that separate a job you do once from a job you do twice. None of them are complicated. Most of them are the kind of obvious-in-hindsight things that someone should have told you before you started.
Test before you seal. Every single time. I know people who have sealed a headlight with a faulty ring inside because they assumed it worked. Opening a freshly sealed headlight is deeply annoying. Spend five minutes with wires hanging out of the housing to verify both rings light up, both ground properly, and neither flickers before you apply any butyl tape. This is the rule I will never stop repeating.
Buy 20% more wire than you think you need. Running 10cm short of your routing target when a wire is already half-threaded through a grommet and you're working upside down in a wheel arch is a specific kind of misery. Too long is fine - bundle and zip tie the excess. Too short means you're ordering more wire and waiting.
Keep your original H8 bulbs. If you're doing a bulb swap, the originals go in a labeled bag in the glovebox. Some MOT stations and state inspectors will fail a vehicle for non-standard bulb types in the angel eye position. Having the originals means you can swap back in twenty minutes for an inspection and swap the LEDs back afterward. This is especially worth doing if you're in the UK or a US state known for strict equipment checks.
Dielectric grease on every connection. I've said it twice already and I'll say it again. Every connector, every terminal, every spade plug. One small tube lasts years and costs very little. It prevents the oxidation that turns intermittent faults into expensive diagnosis sessions. Apply it to the terminal before connecting, not just to the outside of the connector after.
Take photos before you disassemble anything. Your phone camera is a free wiring diagram. Three minutes photographing how the existing wiring is routed, which bolt goes where, and what clips hold what will save you thirty minutes of head-scratching during reassembly. I started doing this religiously about a decade ago and I've never regretted it.
Watch where you mount LED drivers. LED constant-current drivers generate heat during operation. If you tuck them against a plastic surface that already warms up in engine bay temperatures, you'll shorten their lifespan. Mount drivers against metal wherever possible, with a small amount of thermal paste if the mounting surface is appropriate. Airflow helps too - don't bundle them inside a completely sealed space with no ventilation.
Match color temperature to your headlights. Yellow halogen main beams next to 6000K white halos look exactly as mismatched as you'd expect. If you're keeping halogen headlights, run 4300-4500K angel eyes. If you have xenon or LED mains, 6000K halos will match. This is the detail that separates a build that looks considered from one that looks like parts from different cars.
Be suspicious of rendered product photos. If every image in an eBay or Amazon listing shows a perfect photorealistic render with no actual photographs of the physical product, that's a strong signal that the seller doesn't have real product to photograph. Real product photos show real quality - or the lack of it. Reflections on the ring, wire quality, connector types, how the circuit board is finished - all of this is visible in genuine photos and invisible in renders. Buy from sellers who show actual physical units, ideally installed in a real car.
Best Angel Eyes by BMW Chassis - My Actual Picks
I've installed, tested, or had customers come in with every one of these setups. Here's what actually works per chassis, broken down so you can find yours and move on with your life. I'm not going to pad this out with "it depends" hedging - I'll tell you exactly what I'd do if it were my car, and why.
E36 3 Series (1990-2000)
The E36 is harder than people think because the headlight housings vary meaningfully by trim and facelift year. The pre-facelift cars from 1990 to 1996 use a single-piece ellipsoid headlight on higher trims and a separate inner/outer unit on base cars - and they're not interchangeable. The post-facelift from 1996 onward cleaned up the housing shape a bit, which is actually a better canvas for a halo ring install. None of the factory E36s came with angel eyes from the factory, so anything you put in there is a retrofit - you're starting from scratch rather than upgrading existing hardware.
For a classic look on the E36, warm CCFL sits at around 5000-6000K and looks period-correct against the older headlight aesthetic. If you want serious brightness and a crisper white, an LED ring kit at 7000K is the move. I'd skip anything above 8000K on an E36 - it pushes into territory that looks cheap rather than sharp.
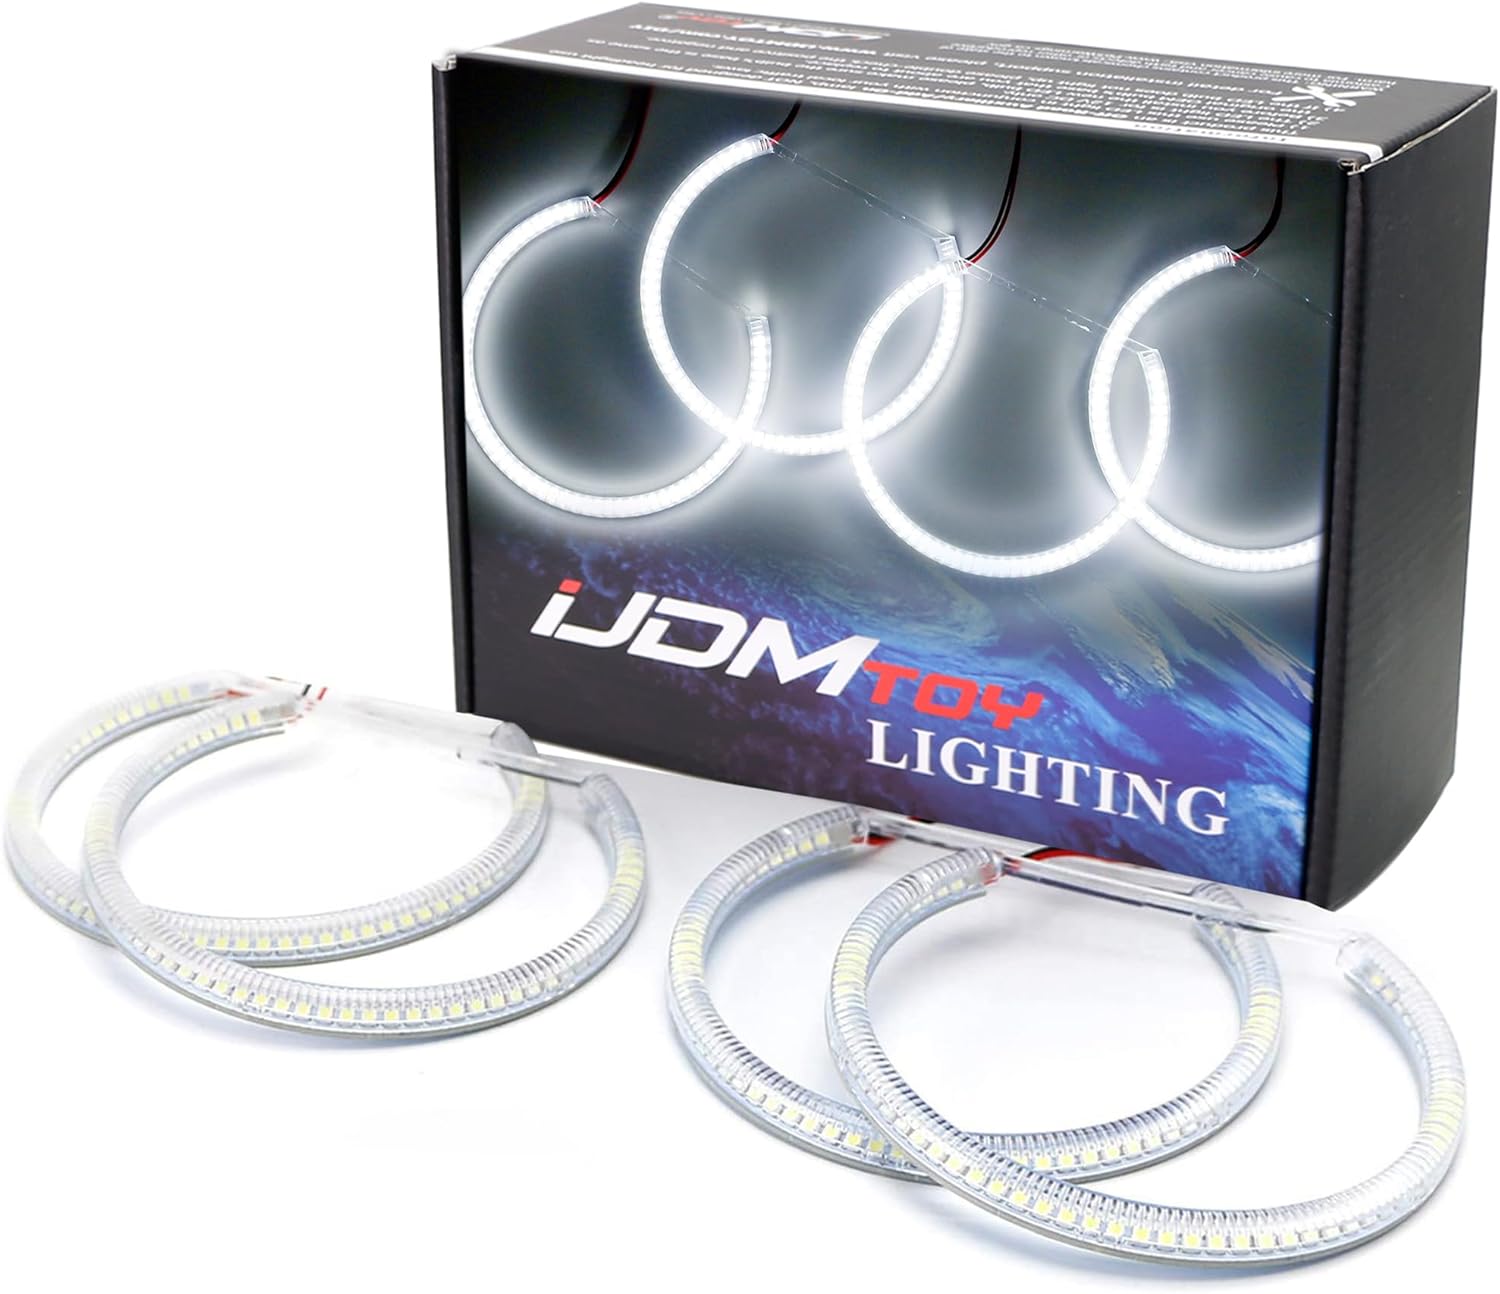
iJDMTOY 7000K LED Angel Eyes Halo Ring Kit — E36/E46/E39/E38
$45.19
This is the kit I'd recommend for an E36 driver who wants a clean LED result without overthinking it - 7000K is white enough to look modern but not so cold that it fights the rest of the headlight.
E39 5 Series (1995-2003)
The icon. If you care at all about BMW design history, you already know the E39 is where angel eyes became a cultural phenomenon, and keeping them looking right matters. There's a nuance here that a lot of guides skip: the pre-facelift E39 (1995-2000) and the post-facelift (2000-2003) use different headlight housings, and the halos don't always cross-fit cleanly. The facelift headlights have a slightly revised lens curvature and different mounting points inside the housing. Always check your build date before ordering.
There's also the halogen versus xenon distinction. Pre-facelift E39s were predominantly halogen with the option of early-gen bi-xenon on higher spec models. The post-facelift made xenon much more common, and the reflector bowl geometry is different between the two setups. If you have xenon, your inner ring is positioned slightly differently than on a halogen car, and some ring kits won't align correctly. The reputable suppliers list both fitments separately - pay attention to that and don't assume one kit covers both.
For the E39, I almost always recommend CCFL for a purist restoration. It matches the factory look so closely that most people can't tell the difference from twenty meters. If you want something brighter for a car that sees a lot of night driving, an SMD LED kit at 6000K is a meaningful step up in visibility while still looking tasteful. Whatever you do, don't go above 8000K on an E39. It doesn't suit the car's aesthetic at all and it looks like someone fitted the wrong parts.
APMAT LED Angel Eyes Halo Bulbs 6000K — E39 E53 E60 E63 E65 E83
$35.99
The APMAT 6000K kit is worth serious consideration for E39 and E53 owners - it covers both chassis in one fitment, the color temperature is flattering rather than harsh, and at $34 it won't hurt if you need to adjust sizing during fitment. Build date tip: check your production plate on the driver's door frame. Anything pre-September 2000 is pre-facelift. Anything after is post-facelift. Order accordingly.
E46 3 Series (1998-2006)
This is the car for angel eyes. I'm not being nostalgic about it - the E46's headlight housing dimensions, the shape of the reflector bowl, and the overall front-end proportion genuinely work with a halo ring better than almost any other BMW chassis. When someone shows me a properly fitted set of angel eyes on an E46 in person, it still stops me. It's one of those combinations where the mod looks like it was always meant to be there.
Before you order, figure out what headlights you actually have. The E46 came with three different headlight types over its production run - base halogen, projector halogen, and projector xenon. The projector xenon cars have a different inner reflector shape and need rings sized specifically for that housing. A lot of budget kit sellers lump all E46 fitments together, which is how you end up with a ring that doesn't sit flat or overhangs the reflector edge. Measure the ring diameter against your reflector opening before ordering if you're not buying from a source that explicitly separates the fitments.
My strong opinion on color for the E46 - stay at or below 7000K. I know 8000K and 10000K options exist. I've seen them installed. They look cheap against the E46's lines, and the blue-white tint against the older housing design is jarring rather than crisp. The E46 wants warm-white to neutral-white. 6000-7000K is the sweet spot. If you're building a show car and you want RGB for events, that's fine - but keep it on white for daily driving. The car looks right with white rings. It looks wrong with blue or purple ones.
iJDMTOY 7000K LED Angel Eyes Halo Ring Kit — E36/E46/E39/E38
$45.19
For a daily driver E46 where you want the classic look done properly, the iJDMTOY 7000K kit at $45 is the correct answer. It's been a reliable seller for good reason - the 7000K temperature is exactly right for this chassis and the kit arrives with everything you need for a full install.

If you're building something for shows or you want app-controlled color changes for events, the iJDMTOY RGB 4pc kit at $58 is the one to get for E36 and E46 cars. Just keep it on white for the road. Legal note - RGB is a modification that will flag an MOT check or roadside inspection in most European markets when running non-white output while driving, so use the static white mode for daily use and save the color modes for static display.
E60 5 Series (2003-2010)
The E60 split opinion when it launched and it still splits opinion now, but the angel eyes situation on it is actually straightforward once you understand the two distinct eras. Pre-LCI E60s (2003-2007) used xenon headlights with a more traditional reflector layout and CCFL rings on higher-spec cars. Post-LCI E60s from 2007 onward moved to a revised headlight with integrated LED marker rings that look considerably sharper and are widely sought-after as donor units for earlier cars. If you see an E60 LCI headlight assembly at a breaker, the price will reflect how desirable they are.
For aftermarket upgrades on the pre-LCI E60, the H8 bulb route applies - you can swap to a higher-output LED unit without touching the housing at all. The ring output on stock E60 CCFL can look a bit wan compared to more modern setups, and a decent LED replacement makes a real difference in presence.

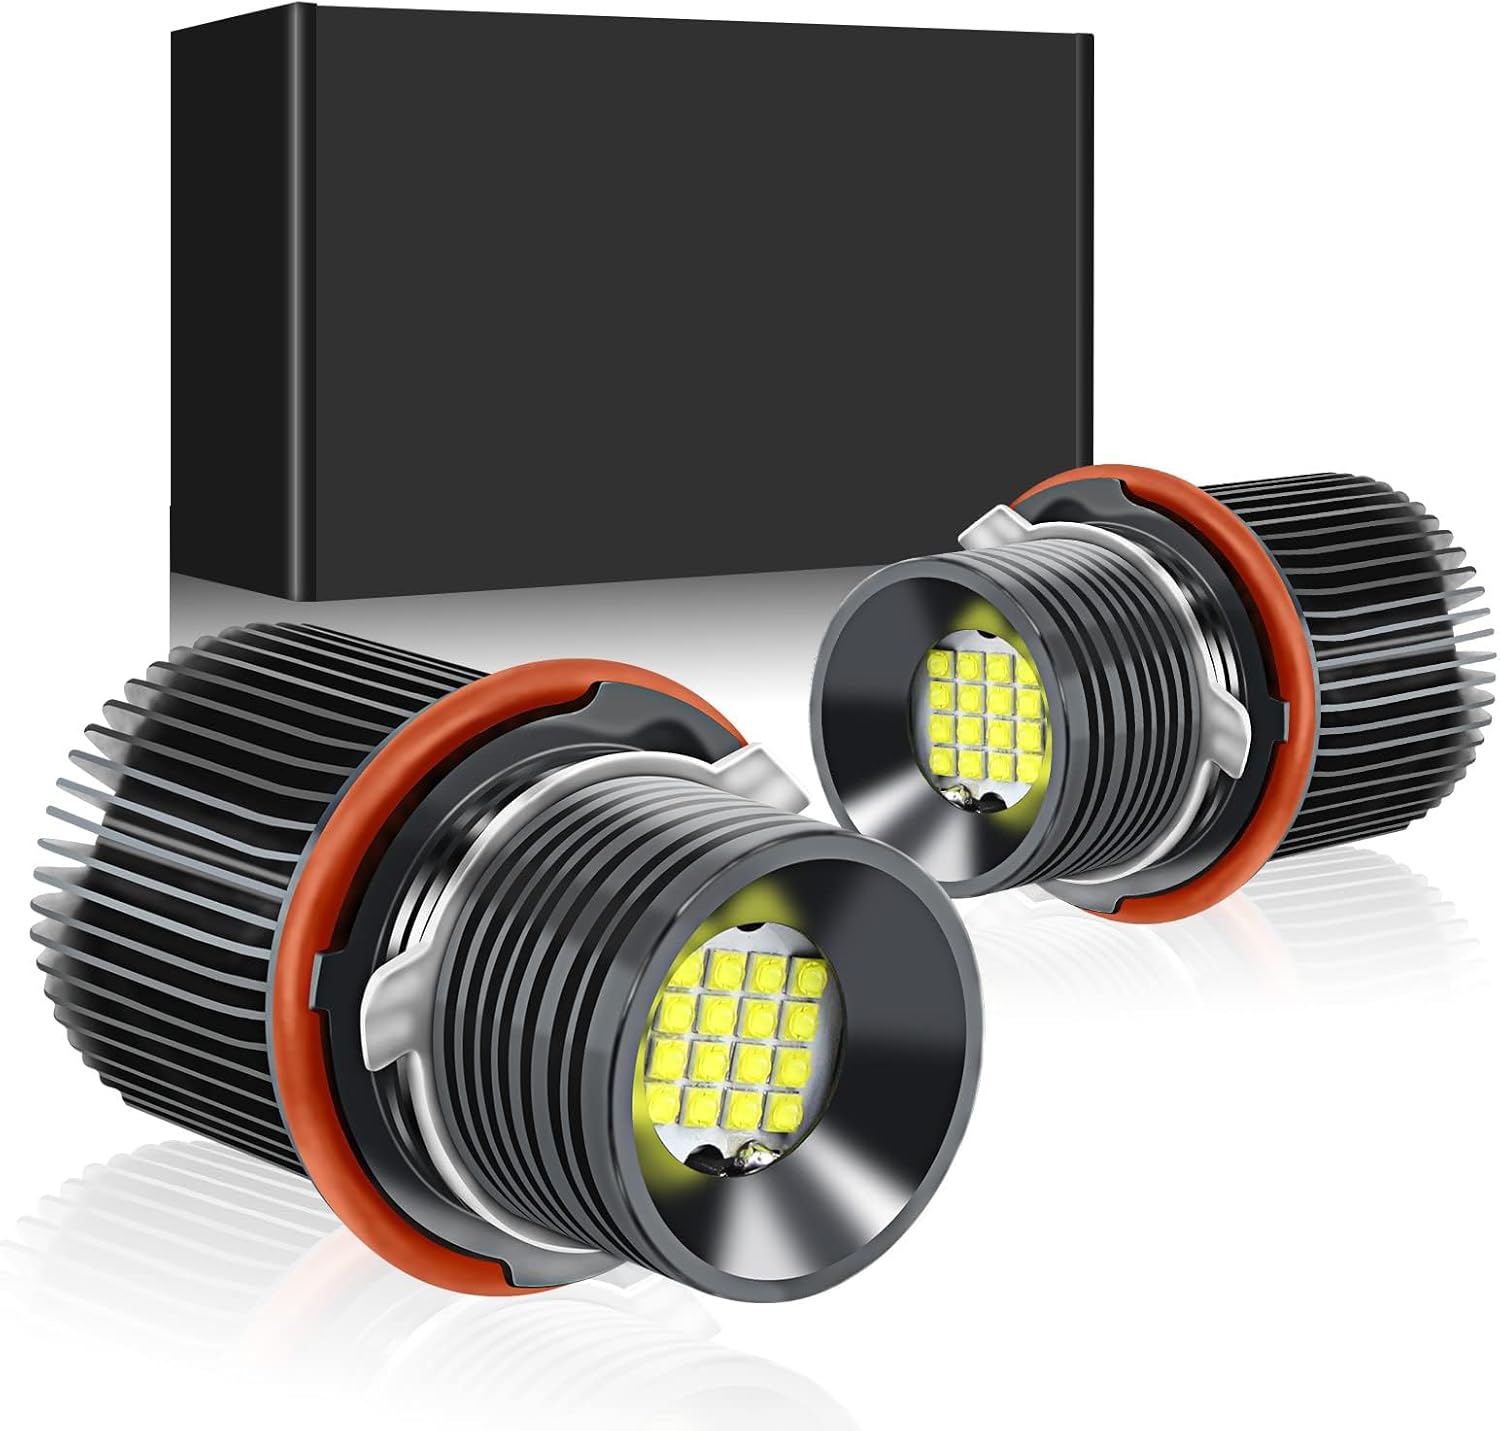
ICBEAMER LED Angel Eye Halo Bulbs 20W — E90/E92/E60/E70/E71
$31.99
The ICBEAMER 20W unit at $32 covers the E60 alongside the E90, E92, E70, and E71 - good value for an H8 upgrade that gives you a noticeably brighter, crisper ring without an afternoon of headlight baking.
E90/E92 3 Series (2005-2013)
The E90 generation was the first 3 Series to come with LED angel eyes from the factory - though only on LCI cars from 2008 onward, and only in some markets. Pre-LCI E90s and E92s came with either CCFL or halogen rings depending on spec and market, so there's variation to deal with. The unifying factor across almost all E9x cars is the H8 bulb socket that drives the angel eye marker ring. That's your upgrade path and it couldn't be simpler.
The H8 swap on an E90 or E92 takes ten minutes per side once you've done it once. No housing removal, no heat gun, no sealant. Just a bulb. The stock CCFL output on pre-LCI cars is noticeably yellow and relatively dim compared to a decent LED replacement. Making that swap is probably the best value-per-hour modification I can recommend on an E9x - the transformation in the front end appearance from a single parking lot to the next is immediate and obvious. On an E90 LCI that already has factory LED rings, the upgrade is less dramatic but you can still go significantly brighter than stock.
Where the pre-LCI halogen E90 differs is that the ring reflector inside the housing is a basic unit that doesn't show the ring as crisply as the xenon or LCI setup. If you have a pre-LCI halogen car and you want the full LCI look, the route is to either source a complete LCI donor headlight or install a full ring kit inside the housing, which does require the bake-and-pry process from Part 2 of this guide. It's more work, but the result on a halogen-headlight pre-LCI E90 with a properly fitted full ring kit looks better than a simple bulb swap.

APMAT H8 LED Angel Eyes Halo Bulbs 6000K — E90 E92 E82 E70 E71
$33.38
The APMAT H8 6000K at $35 is what I'd put in my own E90 if I had one. The 6000K color temperature reads as clean white - bright enough to be visible in daylight without going into the harsh blue territory that looks wrong against the rest of the car's LED signature.
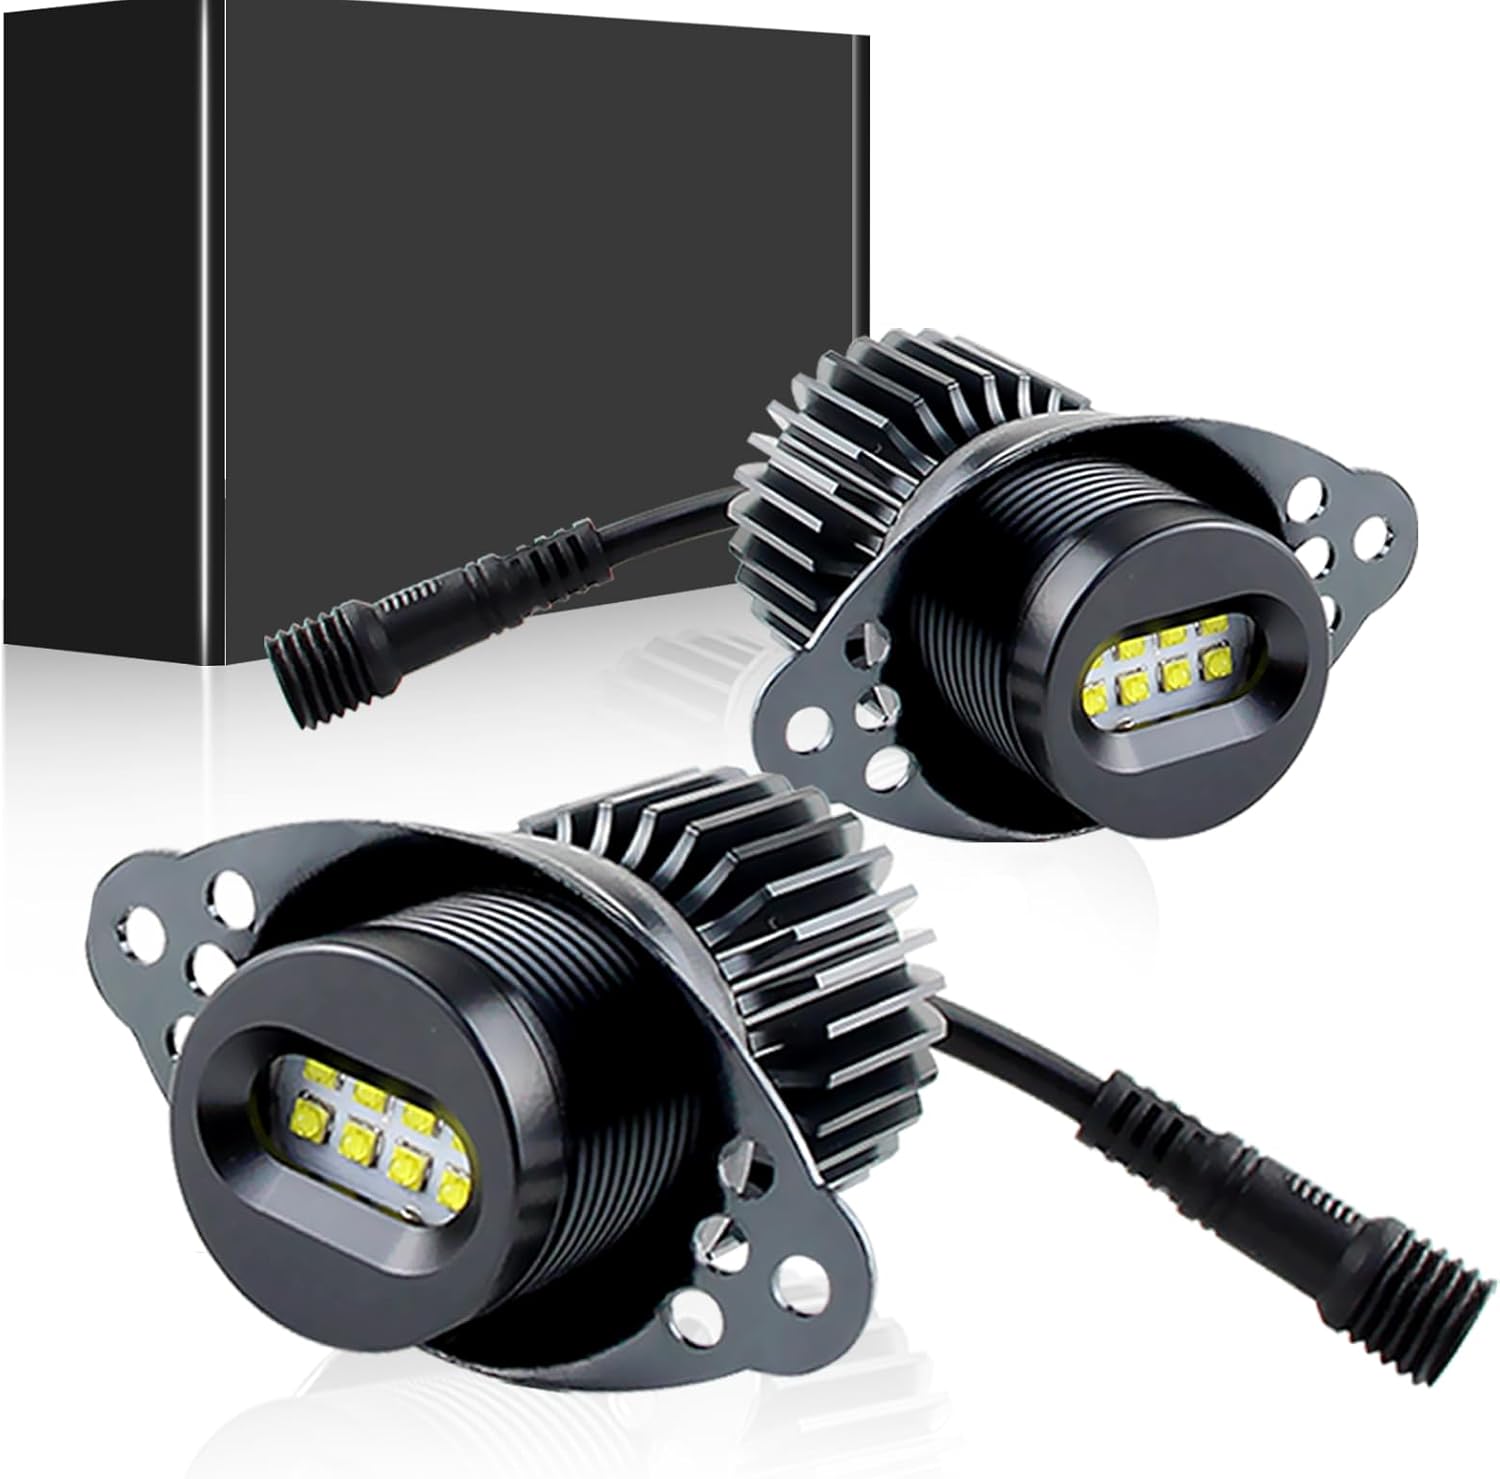
APMAT 120W LED Angel Eyes Halo Rings — E90/E91 LCI 328i/335i
$35.14
If you have an E90 or E91 LCI specifically and you want maximum punch - 120W equivalent output is a serious step up from a standard H8 replacement. The $37 APMAT 120W is the choice for people who've done the basic swap and want more presence. Worth having a resistor in the circuit if your car throws a bulb-out warning with standard LED wattage units.
E70/E71 X5/X6 (2006-2014)
Big SUV, big headlights, and the X5 in particular is an underrated canvas for this mod. I think people underestimate the E70's headlight housing because the overall size of the car tends to dominate - but that housing is actually a good shape for showing off a halo ring, and the extra surface area of the headlight means the ring has more room to breathe visually than it does on a compact car. The E70 and E71 both use H8 sockets, same as the E9x, so the process is identical - pull the access cover off the back of the housing, twist out the old unit, plug in the new one.
The X5 also tends to sit at the right height that the angel eyes are at near eye-level for oncoming drivers and pedestrians. On a car this size that matters - the rings are genuinely visible in a way that they might not be on a lower saloon in heavy traffic.

GFJMC 120W H8 LED Angel Eye Halo Bulbs 6000K — E90/E92/E70/E71
$43.99
I'd go with the GFJMC 120W H8 at $41 for the X5 and X6. Given the scale of the car, higher output makes sense - you want the rings to register from a distance, and a standard-output H8 swap can look a bit underwhelming on a vehicle this size. The 6000K temperature keeps it looking clean and modern rather than washing out into blue.
F10/F30/F31 (2011-2019)
The F-chassis cars introduced a new chapter - sharper headlight housings, more angular DRL integration, and a general move toward precision over warmth. Pre-LCI F30s and F10s retained a more conventional halo ring structure that's upgradeable via CCFL or LED replacement without housing changes on some variants. Post-LCI F-chassis cars moved to full LED housing setups where the ring element is part of a more complex module rather than a simple replaceable ring.
For the pre-LCI F10 and F30, a drop-in CCFL or LED upgrade follows the same principles as the E-chassis cars, though the housing opening and split point differs. For the most complete result - particularly if your existing rings are yellowed, cracked, or flickering - a full housing-level replacement from a quality aftermarket supplier is the cleanest solution. You get new lenses, new seals, and factory-fresh ring appearance in one go.

KACEPAR LED Angel Eyes Halo Ring Headlights for BMW F10 F30 F31
$106.88
The KACEPAR full LED housing kit at $106 covers F10, F30, and F31 - it's not cheap relative to a bulb swap, but if your existing housings are damaged, fogged, or otherwise compromised, you're replacing the whole unit with something that looks sharp and comes ready to bolt in. One buy instead of a housing repair and a ring upgrade done separately.
Common Questions from BMW Forums and My Shop
Over five years of installing and troubleshooting these, the same questions come up over and over. Here are the real answers, not the hedged forum ones.
Will angel eyes drain my battery if I leave them on?
A CCFL pair pulls around 15-20W total. An LED pair runs anywhere from 10-30W depending on output rating. Over an 8-hour park, that's roughly 2-4 amp-hours of draw. A healthy 60-70Ah battery handles that comfortably - you'll lose maybe 5-7% of capacity. An old battery that's already marginal might struggle if you're parked overnight in cold weather on top of other standby draws. If your battery is over five years old and you're planning to run angel eyes as a standalone DRL circuit that stays live when the car is parked, consider whether the battery needs replacing anyway. The angel eyes aren't the problem - the old battery is.
Can I run them while headlights are off?
Yes, and that's exactly how they're meant to work in DRL mode. The traditional wiring approach on E-chassis retrofits is to connect the angel eye supply to the parking light circuit, which activates when the car is in ignition-on mode without full lights selected. This is how factory E39 and E46 cars worked - rings on with ignition, full beams separate. If you're doing a new install, wiring to the parking light circuit is the correct approach for daytime use. Some builders wire them to ignition live for always-on use, which also works but means they're running whenever the car is on regardless of lighting conditions.
How long do halo rings last?
CCFL: rated lifespan around 50,000 hours, which sounds extraordinary and mostly is - a CCFL ring that doesn't get physically cracked will outlast most of the cars it's installed in. The failure mode is sudden rather than gradual, which can be annoying but it's not dangerous. LED: 80,000+ hours rated life, less susceptible to physical shock than CCFL, and they dim slightly before failing rather than cutting out without warning. Real-world daily driving experience suggests 5-8 years before you'd expect to see degradation on a quality kit. Cheap kits might start failing within 12-18 months - that's not the technology failing, it's the components being garbage.
Do they affect resale value?
Tasteful white CCFL or LED on a classic E-chassis - E36, E39, E46 - is neutral to slightly positive on resale in my experience. It's such a common and expected mod on those cars that a buyer who knows BMWs won't be surprised by it and might actively prefer it. RGB kits on anything intended for road use tend to be a negative signal to buyers who know the car, suggesting the modification history might include things they'd need to undo. As a rule - if it's reversible and tasteful, it won't hurt you. If it screams "modified," assume it'll put off as many buyers as it attracts.
Why are some kits $30 and others $150?
Build quality in places you can't see until something goes wrong. The $30 kits use cheap inverter chips that run hot, MOSFET drivers with no overvoltage protection, and LED die quality that produces uneven color output from the start and color shifts within a year. The $100-150 kits use better driver ICs, properly rated capacitors, and LED die with tighter binning so the rings look consistent and stay consistent over time. CAN bus compatibility is another differentiator - some BMWs will throw persistent warning codes with low-quality units that lack the right resistor configuration. You're paying for components, not just markup. I've seen far more failed cheap inverters than failed quality ones.
Can I use 10000K super blue angel eyes?
You can. It will look cheap. Don't. 10000K output has a distinctly purple-blue tint that reads as "wrong" against the headlight housing color, the wheel arches, and basically every other color on the car's exterior. It made sense as a novelty when LED automotive lighting first became mainstream in the early 2000s. It hasn't improved with age. 6000-7000K is where BMW's own engineers landed with their factory LED DRL color temperature on modern cars, and there's a reason for that. Match it or go warmer. Don't go bluer.
What if my headlights are already foggy?
Restore them first. The installation process for any ring kit that requires housing entry - CCFL or ring-style LED - involves opening the headlight anyway, which is a perfect opportunity to clean the inside of the lens, polish the reflector bowl where needed, and reseal everything with fresh butyl tape. If you skip restoration and just fit the angel eyes, you'll have glowing rings inside a foggy lens, which looks worse than either problem separately. There are good headlight restoration kits for under $20 that will deal with surface oxidation. If the fogging is internal from a previous seal failure, you're opening the housing anyway - clean it then. Don't install angel eyes in a foggy headlight. Fix the headlight first.
Do they work with adaptive headlights?
Yes, because they're on separate circuits. The adaptive system - the motor that swivels the headlight beam when you turn the steering wheel - operates entirely independently of the angel eye ring circuit. When the headlight swivels, the whole housing moves, and the ring moves with it because it's physically mounted inside the housing. There's no interaction between the adaptive motor control and the ring power supply. You don't need to disable anything or code anything out for basic angel eye installation on an adaptive headlight car. The one thing to check is that your wiring routes don't bind against the housing pivot point when the headlight moves through its full range of motion.
Will my factory Xenon DRL still work after install?
Yes. On E-chassis cars with factory CCFL angel eyes, the xenon projector and the corona ring circuits are independent - the projector handles low beam, the ring handles DRL. If you're replacing the CCFL ring with an LED ring, you're swapping one DRL source for another. The xenon projector circuit is not touched. On H8 bulb swap cars, the xenon headlight is a completely separate system from the H8 marker socket - you're literally just changing a bulb in a different socket. The projector will keep working exactly as before. Your aftermarket halos supplement the factory setup, they don't replace it.
My rings turned purple over time - is that normal?
No. That's a failure, not a feature. The two most common causes are UV degradation of the silicone or epoxy diffuser layer on cheap LED rings - the material yellows and shifts the apparent color toward orange or purple as the UV-stabilizing compounds break down - and color drift from failing LED die that shift wavelength as they age. A quality ring at 7000K stays at 7000K for years. A cheap ring at "7000K" might be 6000K on day one and 5500K with a purple cast by year two. There's no fixing it - the ring needs replacing. Use it as a lesson on kit quality and spend the extra $15 next time.
Final Verdict - Start Here
If you have an E36, E39, or E46 and you want the car to look the way it was meant to look, the iJDMTOY 7000K CCFL or LED kit under $50 is the correct starting point. It's not the flashiest option or the most technically impressive, but it's the one that will make your car look right in the same way a factory install would have looked if BMW had been fitting angel eyes to those cars from new. For E90, E92, E70, or any other H8-socket BMW, do the bulb swap first - it takes fifteen minutes and transforms the front of the car. If you want the RGB show car setup for events, the iJDMTOY 4pc kit on an E36 or E46 does that well, but keep it on white when driving. And skip anything priced under $25 per pair. I've seen the inside of too many failed cheap inverters to recommend them to anyone. The components are garbage and you'll be doing the install again in twelve months.
This mod is genuinely one of my favorites in over five years of wrenching on BMWs. It completely transforms the face of the car for anywhere between $30 and $150 and an afternoon of work. I keep saying this to customers and it keeps being true - photos don't do it justice. You can look at a hundred photos of a car with angel eyes fitted and it still won't prepare you for sitting in your driveway at night watching your own car lit up for the first time. That's the thing about this particular mod. It changes the character of the front end in a way that feels like the car has woken up. If you go ahead with the install, send me photos - I'm on Instagram and I read every email at the address in the site footer. I want to see your build.
For more BMW upgrade guides, browse our articles section or see the full angel eyes product catalog.

