BMW Cabin Air Filter - Location and Replacement by Chassis
Affiliate disclosure. BimmerTalk is a proud partner of the Amazon Associates Program and Turner Motorsport. We may earn a small commission on qualifying purchases through our links, at no extra cost to you. Read the full disclosure.

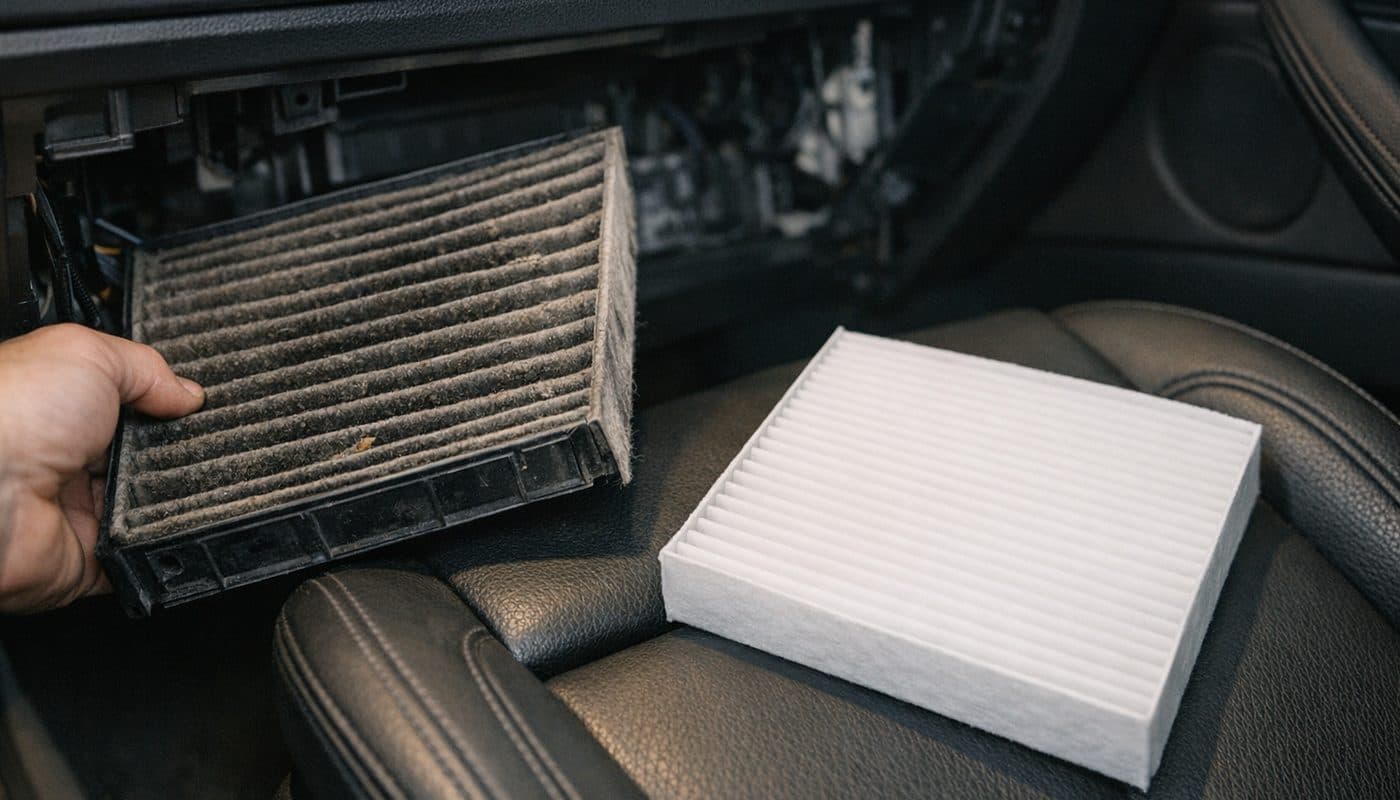
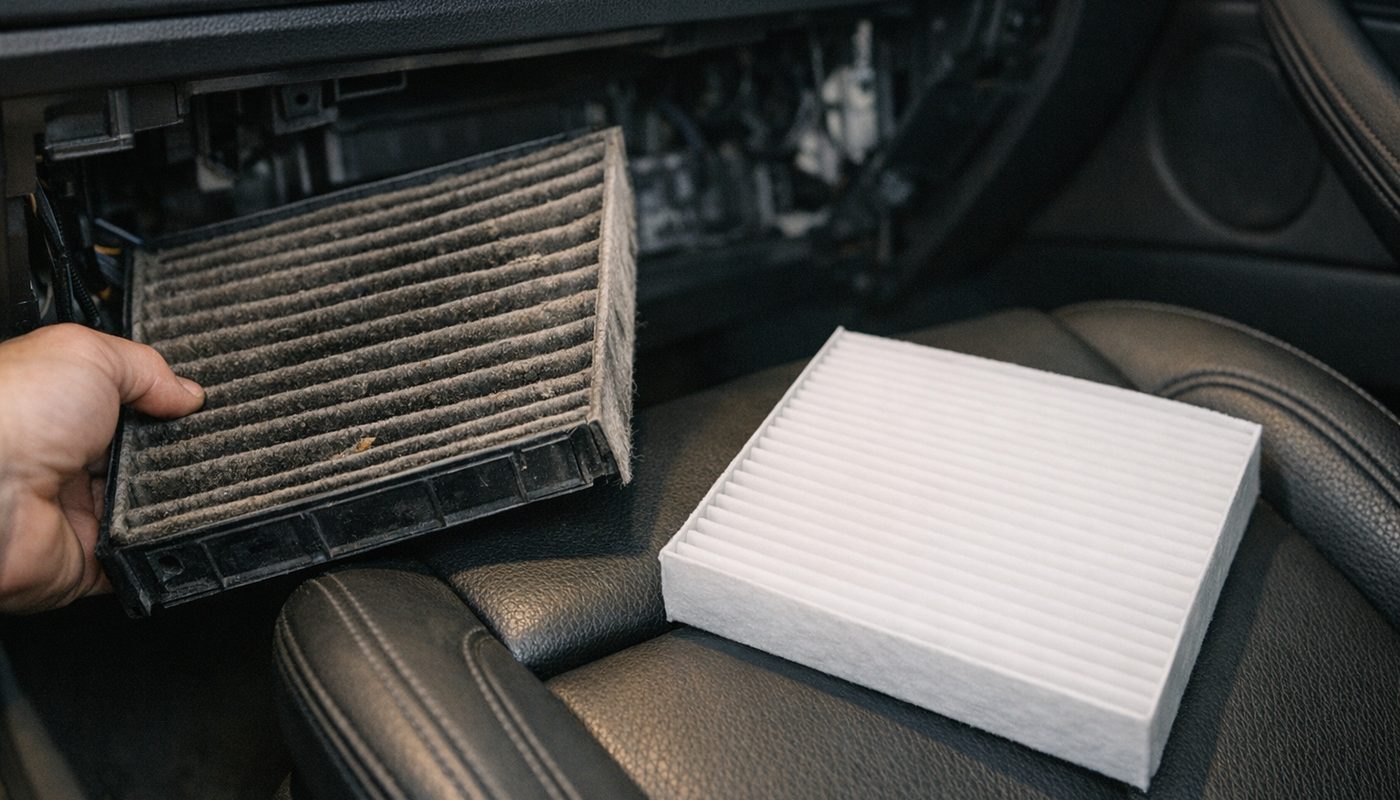
Every few months somebody messages me asking why their AC is blowing like a tired hairdryer, or why the windshield fogs up in about four seconds of a cold morning. Nine times out of ten it has nothing to do with the compressor, the blend door, or anything expensive. It's a filter smaller than a placemat that's been quietly turning into a felt mat of pollen, brake dust, and dead leaves.
I've pulled these things out of everything from a 2007 E90 328i to my own G20 330i, and the story is always the same. Nobody thinks about the cabin air filter until the car starts smelling like a gym bag or the defrost stops working. It's cheap, it's easy on most chassis, and BMW hides it in two very different spots depending on generation, which is exactly why half the forum threads out there are people arguing past each other.
So let's sort it out properly, chassis by chassis, cowl versus glovebox, and I'll show you the one trick that keeps that glovebox cover from rattling like a loose glovebox for the rest of the car's life.
15-30 min
Typical DIY time
Every 12 months / 15k miles
Recommended interval
Every 6-9 months
Dusty or pollen-heavy areas
$15-$40
Parts cost (pair)
Why This Tiny Filter Causes Big Problems
The cabin microfilter (BMW calls it a microfilter in the parts catalog, most of us just say cabin air filter or pollen filter) sits between the outside air intake and your HVAC blower. Every bit of air that comes through your vents, whether you've got recirculation on or off, has already passed through this pleated paper element at some point. When it's fresh, it strains out pollen, dust, soot, and bugs. When it's clogged, it does three things badly: it restricts airflow so your blower has to work harder for less air, it lets a musty smell bloom the second you flip the AC on, and it slows down how fast your windshield clears on a foggy morning because you're just not moving enough air across the glass.
None of that is expensive to fix. What is mildly annoying is that BMW moved the filter location around over the years, and depending which chassis you drive, you're either popping a hood-mounted cover or crawling into the passenger footwell.
| Chassis | Filter Location | Typical DIY Time |
|---|---|---|
| E90 / E92 3 Series | Under-hood cowl box, driver side | 25-35 min |
| F30 / F32 3 Series | Behind glovebox / passenger footwell | 15-20 min |
| G20 3 Series | Behind glovebox, tool-free panel on many cars | 10-15 min |
| F10 5 Series | Behind glovebox / passenger footwell | 15-25 min |
| G30 5 Series | Behind glovebox / passenger footwell | 15-20 min |
| E70 X5 | Under-hood cowl box | 30-40 min |
| F15 / G05 X5 | Behind glovebox / passenger footwell | 15-25 min |
| F25 / G01 X3 | Behind glovebox / passenger footwell | 15-20 min |
E90 / E92 3 Series
- Filter Location
- Under-hood cowl box, driver side
- Typical DIY Time
- 25-35 min
F30 / F32 3 Series
- Filter Location
- Behind glovebox / passenger footwell
- Typical DIY Time
- 15-20 min
G20 3 Series
- Filter Location
- Behind glovebox, tool-free panel on many cars
- Typical DIY Time
- 10-15 min
F10 5 Series
- Filter Location
- Behind glovebox / passenger footwell
- Typical DIY Time
- 15-25 min
G30 5 Series
- Filter Location
- Behind glovebox / passenger footwell
- Typical DIY Time
- 15-20 min
E70 X5
- Filter Location
- Under-hood cowl box
- Typical DIY Time
- 30-40 min
F15 / G05 X5
- Filter Location
- Behind glovebox / passenger footwell
- Typical DIY Time
- 15-25 min
F25 / G01 X3
- Filter Location
- Behind glovebox / passenger footwell
- Typical DIY Time
- 15-20 min
Symptoms Of A Clogged Cabin Filter
Weak airflow even on high blower speed
If you crank the fan to setting 4 or 5 and it feels like you're only getting what you used to get on setting 2, that's a filter caked with debris choking the intake. This is the single most common complaint I hear, and it's almost always solved with a ten dollar part.
Musty or sour smell when the AC kicks on
A clogged filter holds moisture, and moisture plus organic debris (pollen, leaves, bug bits) equals mildew smell. If your car smells like a wet dog for the first thirty seconds of AC every single time, don't bother with cabin fresheners or ozone treatments first, just change the filter.
Windows fogging up slower than they should to clear
Defrost relies on volume of air moving across the glass, not just heat. A starved blower moving air through a clogged filter will clear your windshield noticeably slower on a cold or humid morning. I've had customers convinced their HVAC blend door actuator was dying when it was just a filter that hadn't been touched in four years.
Chassis By Chassis Location Guide
E90 / E92 / E93 and E70 X5 - under the hood, cowl mounted
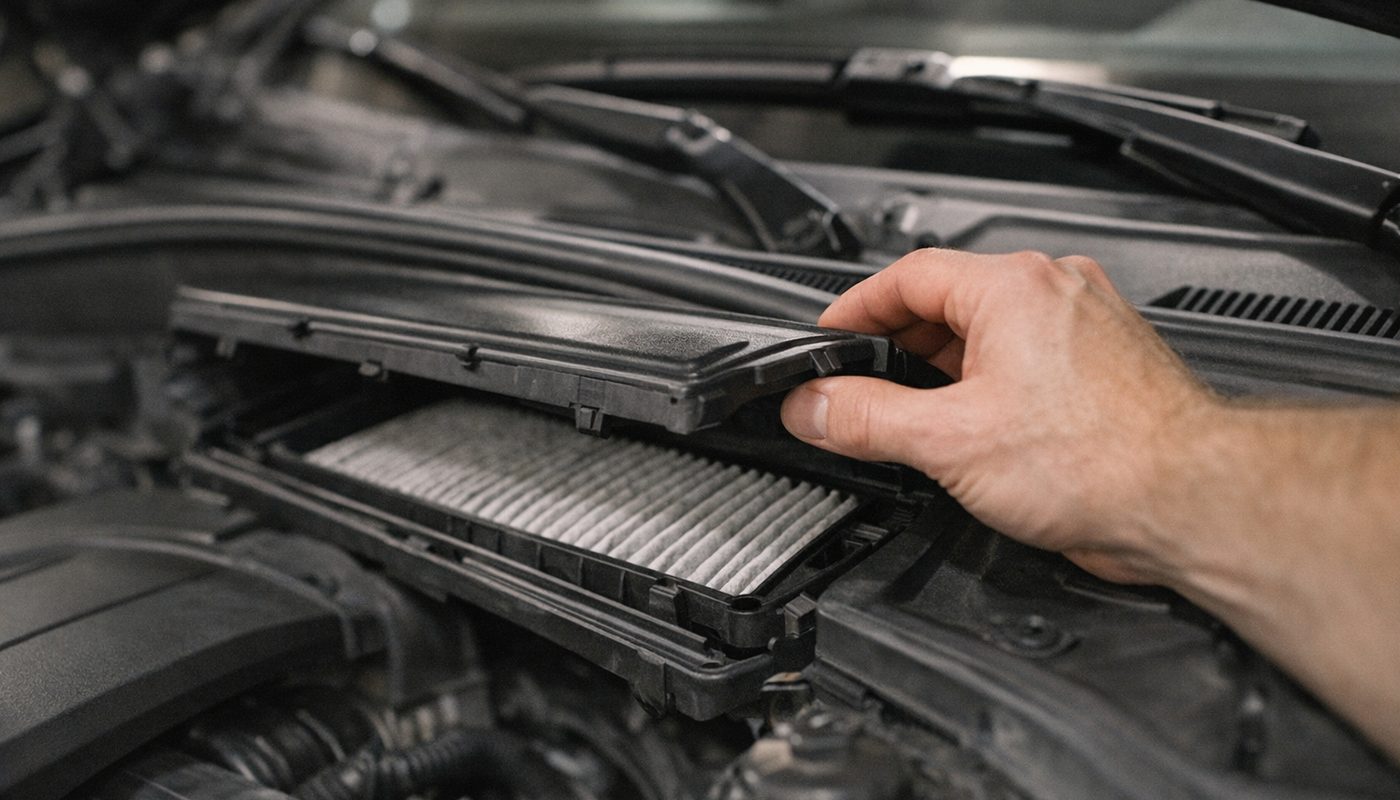
On these older chassis BMW mounted the microfilter housing in the cowl area at the base of the windshield, on the driver's side of the engine bay, under a plastic cover. You'll need to pop the hood, find the rectangular cover with a few quarter-turn fasteners or spring clips, lift it, and the filter frame lifts straight out. The catch here is the plastic cover and its retaining clips get brittle with UV exposure and heat cycling over a decade-plus of life, so go slow. I've snapped more than a few of these covers rushing a job that should've taken twenty minutes.
F30 / F32 / F10 / G30 - behind the glovebox
Starting with the F-chassis cars, BMW moved the filter housing into the passenger footwell area, tucked up behind the glovebox. You'll drop the glovebox down (usually two side stops you squeeze or pull to let it swing fully open) and there's a small access cover right behind it. Pull the old filter out, note the airflow direction arrow molded into the frame, and slide the new one in the same orientation. This job is genuinely a 15 to 20 minute driveway task with no tools on most of these.
G20 and current G-chassis cars - same idea, even easier access
My own G20 has a tool-free panel behind the glovebox that pops with a light squeeze and pull, no screws at all. This is honestly one of the few things BMW made simpler over the generations instead of more complicated. If your G20, G21, or G30 has this panel, you're looking at a ten minute job including getting the new filter out of its packaging.
Standard Versus Activated Charcoal Filters
BMW and the aftermarket both offer two flavors. A standard particulate filter is just pleated paper media designed to catch pollen, dust, and larger debris, nothing fancy. An activated charcoal (carbon) filter adds a layer of activated carbon that adsorbs gases and odors, things like exhaust fumes, diesel smell in traffic, or that stale parking garage smell.
| Filter Type | Best For | Typical Cost (pair) |
|---|---|---|
| Standard particulate | Dusty climates, allergy sufferers, basic protection | $12-$25 |
| Activated charcoal/carbon | City driving, tunnels, garage parking, exhaust smell | $20-$40 |
Standard particulate
- Best For
- Dusty climates, allergy sufferers, basic protection
- Typical Cost (pair)
- $12-$25
Activated charcoal/carbon
- Best For
- City driving, tunnels, garage parking, exhaust smell
- Typical Cost (pair)
- $20-$40
If you daily-drive in a city with a lot of stop and go traffic, sit in tunnels, or park in an underground garage regularly, spend the extra few dollars on the carbon version. If you're mostly on open highway or rural roads, a standard filter does the job fine and you're not paying for a feature you won't notice.
How Often Should You Actually Change It
BMW's official interval is roughly every 12 months or around 15,000 miles, whichever comes first, and that's a reasonable baseline for most drivers. Where I'd push that shorter is anyone in a dusty region, high pollen season areas, or cities with a lot of construction dust and diesel exhaust in the air. In those conditions I tell people to check it at 6 to 9 months and just look at it, if it's still mostly white and open, leave it, if it's grey and matted flat, swap it.
This is a much shorter interval than your engine air filter, which I cover separately in my guide on how to replace the air filter on a BMW, and it's worth not confusing the two. The engine air filter feeds your intake and affects the DME's fuel trims and airflow readings. The cabin filter only affects what you breathe inside the car. Different job, different location, different interval.
What You Need Before You Start
Tools and parts
For glovebox-style cars you genuinely need nothing but your hands most of the time, maybe a small trim tool to pop a clip if it's stubborn. For cowl-mounted cars on E90/E70, a small trim panel tool or flathead helps with the spring clips without cracking the plastic. Beyond that, just buy the right filter for your chassis, standard or carbon depending on your driving, from a reputable brand like Mann, Mahle, or Hengst, or BMW OE if you want the exact factory part.
Worth having in the garage anyway
While you've got the glovebox open and you're in DIY mode, it's a good time to check your service reminder status and reset it once you're done, especially if you're also staying on top of oil intervals I break down in my BMW oil change cost guide. A cheap OBD2 tool makes clearing that CBS (condition based service) light for the microfilter a thirty second job instead of a trip back to the dealer just to turn off a light.

Step By Step - Glovebox Style Cars (F30, G20, F10, G30 and similar)
Get the glovebox out of the way
Open the glovebox fully, then squeeze the sides or pull the stop arms depending on your model until it swings down further than normal, almost hanging free. Some cars have a small damper strut you'll feel resist, that's normal, don't force past it.
Pop the access cover and pull the old filter
Behind the glovebox you'll see a plastic cover, sometimes with a couple of tabs, sometimes tool-free like on my G20. Release it, and the filter frame slides out toward you. Take a photo of the airflow arrow direction before you pull it, it saves guessing when the new one goes in.
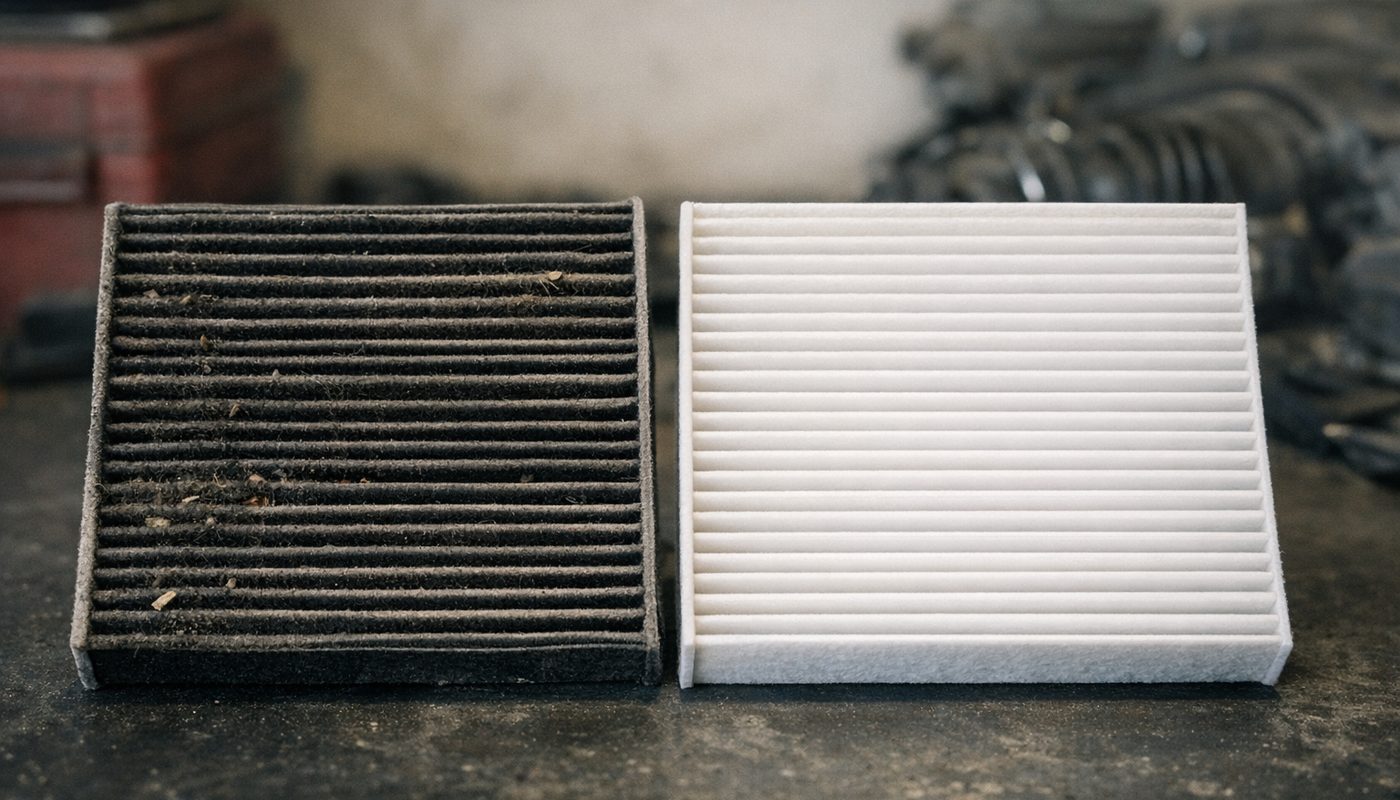
Install the new filter and reseat the cover properly
Slide the new filter in matching the same arrow direction as the old one. Now here's the trick almost nobody mentions, the access cover on these cars has small locating tabs that need to seat into their slots before you press the main clip home, if you just push the middle of the cover first, it seats crooked and either won't click shut or rattles for the next two years. Line up the tabs on one edge first, press that side in until it seats flush, then rotate the opposite edge in and press the clip. It should click once and sit dead flush with no gap.
Step By Step - Cowl Mounted Cars (E90, E92, E70)
Open the hood and find the cover
Pop the hood and locate the cover at the base of the windshield on the driver's side, it's usually held by a few quarter-turn fasteners or spring-loaded clips. Some cars have wiper arm covers or trim nearby that can make this look more complicated than it is, you generally don't need to remove the wiper arms themselves.
Lift the housing and swap the element
Once the cover is off, the filter frame usually lifts straight up and out, sometimes it's a two piece frame that folds to come out through a smaller opening. Note the orientation, wipe out any leaves or debris sitting in the housing tray (there's almost always some), and drop the new filter in the same way.
Reinstall the cover without cracking it
These covers are the age-related weak point. The plastic gets brittle from years of engine bay heat and UV, so press the clips closed evenly rather than levering one corner down hard. If a clip is already cracked, it's worth replacing the cover or clip set rather than fighting it every time, they're cheap compared to the swearing involved.
Common Mistakes That Turn A 15 Minute Job Into An Hour
Installing the filter backwards
Every filter has an airflow direction arrow molded into the frame. Install it backwards and you'll get reduced airflow and premature clogging because the pleats are designed to trap debris on one face only. Takes two seconds to check, saves you doing the job twice.
Forcing the glovebox hinges past their stop
I mentioned this above but it deserves repeating because it's the number one thing I see people break doing this job themselves. The glovebox only needs to swing down further than its normal open position, not flop completely loose. If you feel real resistance, you're at the limit.
Ignoring what's actually causing the mess
If your filter is soaked or moldy rather than just dusty, that points to a clogged AC drain letting condensation sit in the housing rather than just normal wear. Worth a look while you're in there, because a new filter dropped into a wet housing will just mold again in a couple months.
If you're also due for other basics around the same mileage, it's worth glancing at my broader BMW maintenance cost by model and year breakdown so you can batch a few small jobs into one afternoon instead of making four separate trips to the garage.
FAQ
How often should I change the cabin air filter on my BMW?
Roughly every 12 months or 15,000 miles under normal conditions. If you're in a dusty city, high pollen region, or regularly sitting in tunnels and underground parking, check it every 6 to 9 months instead and swap early if it looks grey and matted rather than waiting for the full interval.
How much does it cost to change a BMW cabin air filter?
Parts alone typically run roughly $12 to $25 for a standard filter or $20 to $40 for an activated charcoal version, often sold as a pair since some chassis use two filters side by side. Doing it yourself, that's the whole cost. Having a shop do it usually adds an hour of labor on top since they'll often bundle it with an oil change or inspection.
Where is the cabin air filter in a BMW?
It depends on the generation. Older chassis like the E90, E92, and E70 have it under the hood in a cowl box near the base of the windshield on the driver's side. Newer F-chassis and G-chassis cars, including the F30, F10, G20, and G30, moved it behind the glovebox in the passenger footwell instead.
What brand cabin air filter does BMW use?
BMW's OE supply for these filters commonly comes from Mann-Filter, and you'll also see genuine BMW-branded boxes on dealer shelves that are the same part relabeled. Mahle and Hengst make solid equivalent quality aftermarket options too, all of which are perfectly good choices, you're not losing anything going aftermarket here as long as you buy from a reputable brand rather than an unbranded bargain bin filter.
Can I just clean and reuse the old filter instead of replacing it?
Technically you can vacuum out loose debris in a pinch, but the pleated media traps fine particles down in the paper fibers that a vacuum won't fully clear, and once it's compressed or damp it won't hold its shape properly again. Given how cheap these are, I don't bother, just replace it.
Does a clogged cabin filter affect my AC's cooling performance?
Indirectly, yes. It won't stop the compressor from making cold air, but restricted airflow means less of that cold air actually reaches you, so the car feels like it's not cooling well even though the AC system itself is fine. A lot of unnecessary AC recharges get done when the real fix was a five dollar filter.
Is it worth paying a dealer or independent shop to do this instead of DIY?
On glovebox-style cars, honestly no, it's one of the easiest jobs on the entire car and doesn't justify a labor charge in most cases. On older cowl-mounted cars with brittle covers, if you're not comfortable with plastic clips that might be twenty years old, having a shop handle it once isn't unreasonable, especially if you plan to DIY it yourself in future years once you've seen it done properly.
Bottom Line
This is one of the few maintenance items on any BMW, from an E90 to a brand new G20, where there's basically no excuse to skip it. It's cheap, it's fast on most chassis, and ignoring it just means you're breathing dirtier air and running a weaker HVAC system for no reason at all. Figure out whether you're a cowl car or a glovebox car, grab a filter that matches how you actually drive, standard or charcoal, and give it fifteen minutes on a Saturday. Your nose, and your foggy windshield on cold mornings, will thank you. Drive safe out there, Kamil.