
BMW 3 E36 Interior Upgrades
Affiliate disclosure. BimmerTalk is a proud partner of the Amazon Associates Program and Turner Motorsport. We may earn a small commission on qualifying purchases through our links, at no extra cost to you. Read the full disclosure.
Popular E36 interior
Hand-picked interior parts that fit the BMW E36 - mid-tier price band, mixed across subcategories.


The BMW E36 interior is one of those things that ages in both directions at once. On one hand, it's genuinely well-designed for a mid-1990s German car - the ergonomics are solid, the driver focus is real, and the bones are good enough that people are still daily driving these things thirty years later. On the other hand, time has not been kind to the materials. The foam in every seat you've ever touched has probably crumbled. The headliner is sagging. The dash is cracked. The center console trim is either faded to gray or snapped off entirely. If you're wrenching on an E36 right now, the interior is almost certainly the most embarrassing part of the car.
I've spent a lot of time inside E36s - my own, friends', project cars at the shop, and one truly miserable M3 I helped a guy buy that looked perfect in the Craigslist photos. The bmw e36 interior is a rabbit hole that rewards patience and punishes people who just throw money at it without understanding what they're dealing with. This guide covers everything: what the OEM cabin actually gives you, where it fails, what to fix first, which brands are worth trusting, and how to spend your money depending on whether you're building a daily, a track car, or a show piece.
One honest note before we dive in: E36 pricing is genuinely weird right now. These cars have appreciated faster than almost any BMW from that era, and the aftermarket has responded with pricing that sometimes seems detached from reality. I'll give you real price ranges based on what I know from retailers like FCP Euro, ECS Tuning, Turner Motorsport, and Redline360, plus what I've seen discussed on R3VLimited and Bimmerforums. Where I'm giving you a rough range rather than a pinned current price, I'll say so.
Why the E36 Interior Deserves Real Attention
Most people treat the E36 interior as an afterthought - something you fix after you've done the suspension, the engine, and the brakes. I get it. Suspension matters for safety. Brakes matter for survival. But spend thirty minutes in a cracked, sagging, rattling E36 cabin and tell me it doesn't affect how you drive the car. It does. The interior is where you live when you're behind the wheel, and on a car that was already built to be driver-focused, a degraded interior actively works against the driving dynamic BMW engineered into this chassis.
The E36 was sold from 1992 through 1999 in various body styles - the sedan (E36/4), coupe (E36/2), convertible (E36/3), touring wagon (E36/5), and the compact hatchback (E36/5). The M3 in North America came as the coupe only. Body style matters when you're shopping for interior parts because headliner shape, rear trim pieces, and convertible-specific components like the top surround trim and wind deflector are not interchangeable across body styles. This is the first thing I see people get wrong when they're ordering parts.
The other thing that matters is model year and trim level. The earlier cars (1992-1995) have slightly different dash designs than the facelifted cars (1996-1999). The airbag steering wheel changes. The instrument cluster bezel changes subtly. If you're doing a full interior refresh, you need to know which car you have before you order anything. The BimmerTalk chassis lookup tool is genuinely useful here if you want to cross-reference your VIN against known trim configurations.
The OEM Baseline - What BMW Got Right and What It Got Wrong
Let me give credit where it's due first. The BMW E36 interior layout is actually quite good. The driver-centric cockpit design - steering wheel angled toward the driver, center console angled toward the driver, gauges easy to read - was ahead of most competitors in 1992 and still makes sense today. The driving position in a coupe with a sport seat is genuinely excellent. The three-pedal manual cars have a clutch, brake, and throttle layout that encourages heel-toe properly. BMW got the fundamentals right.
The instrument cluster is clean and readable. Analog gauges with real needles, proper warning lights, a centrally mounted tachometer - this is what instrument clusters should look like. The optional on-board computer (OBC) that displays outside temperature, range, and average consumption is a genuinely useful feature that BMW executed well before it was common.
Now for what BMW got wrong, or at least what time has exposed as weak. The foam in the seat cushions and backrests is the single biggest failure point in every E36 I've ever sat in. BMW used a foam compound that degrades into a sticky, crumbling substance usually described as "foam rot." By the time any E36 is 20-25 years old, the seat foam is almost certainly compromised. You sit down and you feel it - that slight "bottoming out" sensation even on what looks like a nice seat. Recovering a seat without replacing the foam is a waste of money.
The headliner material delaminates from the backing board because BMW used a heat-sensitive adhesive that doesn't survive decades of summer sun. The fabric sags, then droops, then either touches your head or you've already stapled it back up three times with increasingly desperate DIY fixes. Every E36 headliner you see that hasn't been replaced is either sagging or about to.
The dashboard on pre-facelift cars specifically tends to crack along the top, particularly in cars that lived in hot climates. This isn't a cheap fix - a replacement dash is expensive, and recovering the original is a skilled job. The facelift cars (1996+) seem to fare slightly better here, but it's not a solved problem.
The door cards - the interior door panels - are made of a hard plastic shell with fabric inserts that fade and wear through. The clips that hold them to the door are brittle and break during removal, which means anyone who's had their door cards off twice has probably already run out of original clips. Buy clips in bulk before you start any door card work.
The center console on the early cars is particularly prone to cracking around the gear selector opening and at the armrest hinge. The cupholder design (where it exists) is famously inadequate, though I'd argue that's a period-correct German car experience and not something you go to an E36 for anyway.
Setting Your Priorities Before You Spend a Dollar
Before I get into specific upgrades and brands, I want to make the case for actually thinking through what you want from your E36 interior before you open your wallet. I've watched people spend $2,000 on a beautiful Alcantara steering wheel and fresh seat covers while their headliner droops onto their head. That's backwards.
Here's how I'd think about interior work on an E36, in rough priority order based on impact-per-dollar:
- Structural and functional fixes first - headliner, cracked dash, broken trim clips, non-functional windows or locks. These are the things that make the car feel broken. Fix them before anything cosmetic.
- Seat foam and covering - because this directly affects how the car drives and how your back feels after an hour. This is not a cosmetic item.
- Steering wheel - you touch it constantly, it affects feedback, and a good aftermarket wheel on an E36 genuinely changes how the car communicates. High priority.
- Carpet and noise deadening - if you're building a daily, this matters a lot for comfort. Track car? Skip it entirely.
- Shift knob and other tactile components - minor but cumulative. Good shift knob, good e-brake handle - these are relatively cheap and the E36 is a manual-first car.
- Door cards and trim panels - time-consuming, but a fresh set of door cards makes the cabin feel new again.
- Gauges, electronics, and instrumentation - boost gauges, modern head units, reversing cameras. Situational depending on what you're building.
If you're building a track car, you'd flip this list: strip out weight first, put in a harness bar and harness, then worry about a wheel. The daily driver and the track car have almost opposite interior priorities, and the E36 is used for both.
The Headliner - Fix This First Every Time
If your E36 has the original headliner and the car is more than fifteen years old, assume it's delaminating or about to. The E36 headliner is a foam-backed fabric bonded to a fiberglass board. The foam degrades and the adhesive fails. You can see it starting as slight sagging at the edges near the A, B, and C pillars. It progresses until the whole center is drooping onto your head.
There are three approaches, and they're not equal:
DIY re-cover using fabric and headliner adhesive - the cheap approach, roughly $40-80 in materials. You pull the board, strip the old material, spray new adhesive, apply new fabric. Done right, it can look clean. Done wrong (and most first attempts have at least one issue), you get bubbles or wrinkles that you'll stare at every time you drive. The coupe and convertible boards are more awkward shapes than the sedan, which makes alignment harder. This is a legitimate DIY project for someone patient, but don't rush it.
Send the board to a professional upholstery shop - expect to pay $150-350 for labor depending on your area and shop, plus you pick the fabric. You get a professional result. Most upholstery shops have done dozens of these because the E36 is so common. Call ahead and ask specifically if they've done E36 headliners - if they haven't, find someone who has. The board shape is straightforward but the fabric tension at the sail panel areas (the angled sections near the C pillar on coupes) is where amateurs leave wrinkles.
OEM replacement board with material - genuine BMW replacements are expensive and often unavailable new. Used boards from salvage yards are hit or miss. Your best option is usually getting a clean used board and having it professionally covered, or doing a quality DIY cover on your original board.
Material choices: the OEM fabric is a gray or black woven headliner material. Most people match OEM. Some people doing show builds go with Alcantara, which looks incredible and costs significantly more - plan on $50-100 just for the Alcantara material for a headliner-sized application. I'd avoid the cheap foam-backed headliner material you see on Amazon for $15 - it tends to look thin and it doesn't last.
One thing people miss: the sail panels, the visors, and the grab handles all need to match whatever you do to the main headliner board. Budget for all of it, not just the main piece.
Seats and Foam - The Most Impactful Upgrade You Can Make
The seat situation on the E36 is complicated by the fact that there are multiple seat variants across the model range, and all of them have the foam rot problem to varying degrees.
The base cloth seats with manual adjustment are the most common and the least desirable. The sport seats - the ones with the side bolsters and the "kidney" shaped cushion - are better for driving and more sought after. The M-Technic and M3 seats are better still, and the rare sport seats in leather with heated function are the peak of what BMW offered in this car from the factory.
Before you decide what to do about your seats, you need to honestly assess the foam. Sit in the driver's seat and press down on the cushion with your palm. If it compresses more than about an inch with light pressure, the foam is gone. If you feel any lumps or hard spots, the foam is gone in patches. If the seat cushion has developed a permanent depression exactly where you sit, the foam is gone. Replacing the covering without replacing the foam is throwing money away.
Option 1 - Rebuild the Stock Seats
This is the right call if you have a set of sport seats or M3 seats that fit well and you want to keep the OEM look. The process is: strip the covers, replace the foam with new-cut urethane foam matched to the original profile, recover with your choice of material. A good upholstery shop charges $600-1,200 for a pair of seats depending on material and labor rates. That price range is wide because it depends enormously on whether you're using OEM-spec cloth, BMW Motorsport fabric, standard leather, or Alcantara. Get multiple quotes.
Foam replacement is the step most DIY people skip, and it's the most important. You can buy seat foam in sheets from upholstery suppliers and cut it to shape, or you can source pre-cut E36 seat foam profiles from a few specialty suppliers. The pre-cut foam costs more but saves hours of fitting work. A full front seat cushion and backrest foam set runs roughly $80-150 per seat depending on source.
Option 2 - Swap to E36 M3 Seats
The European-spec E36 M3 seats are some of the best OEM BMW seats ever made - tight side bolstering, excellent thigh support, and a driving position that keeps you planted. If you can find a clean pair, the rebuild cost is the same as any other E36 seat but the end result is significantly better. Prices for used M3 seats vary wildly - a rough pair with shot foam might be $200-400, a clean low-mileage pair in decent condition can be $600-1,200. They direct-bolt to the E36 floor rails.
Option 3 - Aftermarket Bucket Seats
For a track build or even an aggressive daily, proper aftermarket bucket seats are the answer. Sparco, Recaro, and Bride are the main players here. Recaro has the longest history with BMW and their Sportster CS and Pole Position models are popular choices - expect to pay $400-700 per seat for a Recaro Sportster CS, more for the race-focused Pole Position. Sparco Sprint seats come in cheaper, around $250-400 each, and are a solid value option for a track day car where you want to run a harness.
If you're running a harness, you need a harness bar. Stock E36 seat rails and OEM belts are not designed for a four or five point harness on a street car. Don't mix harnesses with OEM belts - it's not a safety upgrade, it's a safety downgrade. Talk to anyone at a track prep shop before you make harness decisions.
Seat rails/brackets for aftermarket seats on E36 are available from Planted Technology and a few other bracket manufacturers. Budget $80-180 per side for quality seat brackets. Don't cheap out on seat mounting - this is the one place where the wrong decision has consequences you don't want to think about.
The Steering Wheel - If You Only Do One Upgrade, Do This
I'll be direct about this. If I had to pick a single BMW E36 interior upgrade that transforms the driving feel while also being a reasonable amount of money - the steering wheel wins. Not the seat. Not the headliner. The wheel.
The OEM E36 steering wheel is 390mm in diameter. It's usable but it's not a sports car wheel by modern standards. It has airbag coverage on all but the earliest cars, and the leather on the rim wears through predictably over three decades of use. The wheel itself also absorbs road feel to some degree - not because of anything BMW did wrong, but because the thick leather cover on an older wheel is stiff and less tactile than a fresh rim.
OEM Steering Wheel Refresh
If you want to keep the OEM look (and keep the airbag, which I understand is a reasonable choice on a daily driver), you can have your existing wheel recovered. Local upholstery shops charge roughly $100-200 to wrap a wheel in fresh leather or Alcantara. The result can look factory-new. LeatherZ is a specific vendor known for quality wheel wraps on BMW interiors - they do mail-in work and the quality is well-reviewed on forums. For an E36 daily driver where you want to preserve the airbag and the clean look, a professional wheel re-wrap is excellent value.
Aftermarket Steering Wheel with Hub Adapter
The more common approach for performance builds is to remove the OEM wheel entirely, fit a Momo, Sparco, NRG, or Personal wheel via a hub adapter. The E36 hub pattern is supported by adapters from NRG, Momo, and others. Budget roughly $60-120 for a quality hub adapter and $100-400 for the wheel itself depending on brand and diameter.
Diameter matters: a 320mm to 350mm wheel is common for street use and track days. Going smaller than 320mm makes parking genuinely difficult unless you have power steering (most E36s with the M50/M52 engines have power steering, but confirm yours does before going to an extremely small diameter wheel). The Momo Prototipo at 350mm is one of the all-time great steering wheels for a car like this - leather rim, spokes that clear your fingers during lock-to-lock, and a classic look that fits the E36 era perfectly. Prices run roughly $150-250 depending on where you find it.
Note on airbags: removing the OEM airbag wheel on a street car means you have no airbag. This is a real safety consideration and not something I'll lecture you about, but be honest with yourself about what you're building. Most states don't require you to run an airbag in a car this old, but if this is also your daily commuter, know what you're trading away. You also need to deal with the airbag warning light on the dash - a resistor or a dedicated SRS bypass is the usual solution.
Quick Release Hubs
On a track car or a car with security concerns (yes, people steal E36s now that they're worth money), a quick release hub is popular. NRG makes affordable quick release units in the $60-100 range. The quality variance on cheap quick releases is real - a failed quick release at speed is catastrophic. Stick to NRG, Sparco, or OMP for this component.
Dashboard and Trim Panels - The Cosmetic Heavy Lifting
The E36 dashboard is a one-piece assembly on most variants, and replacing it is a multi-hour job involving removing the entire instrument cluster, the center console, the A-pillar trim, and a lot of fasteners. It's doable, but it's not a Saturday afternoon project unless you've done it before or you're very comfortable with interior disassembly.
Cracked Dash Solutions
If your dash is cracked - common on the top pad of the pre-facelift cars - you have three real options:
Dash pad replacement - the soft-touch pad that sits on top of the dash structure is a separate piece on most E36 variants. Replacement dash pads (OEM or OEM-equivalent) are available from BMW dealerships (priced around $200-400 new, when available) and from aftermarket suppliers. Sourcing a clean used pad from a salvage car is another option, though finding one that hasn't also cracked is getting harder as the cars age.
Dash cover - a molded plastic cover that sits over the existing cracked pad. These cost $40-80 and take about thirty minutes to install. The fitment quality varies. Honestly they look like exactly what they are - a cover over a cracked dash. Fine for a daily beater, not right for a show car or a clean build.
Dash recovery/reupholstery - a skilled upholstery shop can strip the pad, skim coat any cracks with a flexible filler, and recover the entire dash in leather, vinyl, or Alcantara. This is the premium solution and costs $300-700 depending on material and shop. A full Alcantara dash is a serious statement in an E36 and looks genuinely special.
Trim Pieces and Wood/Carbon Inserts
The E36 interior uses a series of plastic trim inserts around the center console, the gear selector surround, the dash vents, and the door cards. The OEM color is usually black or a wood grain variant (the "Holzoptik" wood trim BMW offered as an option). The wood grain trim ages poorly and is now a polarizing cosmetic choice.
Aftermarket options include:
Carbon fiber trim kits - real carbon or vinyl carbon wrap kits are available for the E36 from a few suppliers. Real carbon trim sets for an E36 interior run roughly $150-400 depending on coverage and supplier. Vinyl carbon film (DIY wrap) is $15-40 in materials and takes a steady hand. The difference in quality between real CF and good vinyl wrap is visible up close but less obvious in photos - important if this is a show car versus a track car.
Replacement OEM-spec plastic - if your trim pieces are faded or cracked, sourcing clean used pieces from a salvage E36 in good condition is often the most cost-effective path. Clean Euro-spec E36s that were parted out often had better interior trim condition than domestic cars. Check parts sites and E36 Facebook groups.
Matte black powder coat or paint - some people strip the trim inserts and paint them. Done well with proper adhesion primer and a quality flat or satin black paint, this looks intentional and clean. Done poorly, it peels within months. If you paint trim pieces, bake them (use an oven or a heat gun to cure the paint properly) and use a quality adhesion promoter.
Door Cards and Door Trim
The E36 door cards are a two-piece design on most variants: a lower hard plastic shell and an upper fabric-covered section. The fabric fades, tears, and absorbs water (particularly on convertibles that have seen rain in the cabin). The lower plastic is usually fine unless it's been damaged.
Full door card replacement is the cleanest solution. Sources for replacement E36 door cards include:
OEM BMW - available through dealer special order for some variants, expensive. Expect $150-300+ per card for new OEM.
Salvage/used - the most practical option for most people. Clean used door cards from a low-mileage E36 can be found for $50-150 per card depending on condition and trim level. Leather door cards are more desirable and more expensive than cloth.
Custom re-trim - an upholstery shop can re-trim your existing door card shells in any material you choose. Cost is heavily labor-dependent but expect $80-200 per card for basic leather re-trim. Alcantara costs more. This is the right path if you want a specific color or material that isn't available in OEM spec.
The door card pull handles and window switches are separate trim pieces that can crack independently. Individual switch surrounds and pull handle trim pieces are available from BMW or aftermarket suppliers. These are worth replacing if they're cracked - a cracked switch surround catches the eye in a way that's disproportionate to how cheap it is to fix.
Critical point on installation: before you remove door cards, buy a set of E36 door card clips. The original plastic push clips are brittle and at least half of them will break during removal. A bag of 50 replacement clips costs under $20 from any decent BMW supplier. If you remove door cards without having replacement clips ready, you will be driving with rattling door cards until you order them. Every E36 owner has done this at least once.
Carpet, Sound Deadening, and Noise Management
The E36 is not a quiet car. The chassis and firewall insulation BMW used was adequate for 1993 but by modern standards - and certainly compared to my G20 - the cabin is busy at highway speeds. If you're building a daily driver, addressing noise is genuinely worth the effort. If you're building a track car, strip everything out and don't look back.
Sound Deadening
The gold standard for DIY sound deadening in BMW applications is Dynamat Extreme - butyl rubber and aluminum foil, applied to metal panels to reduce resonance and block airborne noise. A Dynamat Xtreme 9-sheet bulk pack runs roughly $100-130 and covers the main floor and firewall areas. Full coverage of all panels requires more - budget $200-300 in Dynamat for a thorough job.
The application process: pull the carpet and any OEM insulation, clean the metal surface with isopropyl alcohol, cut Dynamat to fit each panel, apply with firm pressure using a roller to eliminate air bubbles. Focus on the floor, the transmission tunnel, the firewall, and the doors first. Those four areas give you the biggest return. The trunk, roof, and wheel arches are secondary.
Second Skin and noico are cheaper alternatives to Dynamat. The noico 80mil mat runs about $60-80 for a 36 square foot roll and performs reasonably well based on general forum consensus. Dynamat has the reputation, but for a budget build, noico is defensible.
Beyond butyl damping material, a closed-cell foam underlayer adds thermal and additional acoustic insulation. Fatmat and similar products serve this role. Apply it over the butyl layer before reinstalling carpet.
Replacement Carpet
The OEM E36 carpet is a molded one-piece set (front and rear) with a specific pile and color. German Auto Carpets and Auto Custom Carpets make replacement carpet sets specifically patterned for the E36. Prices run roughly $150-300 for a quality replacement set in stock colors. These are molded to match the OEM profile which makes installation much easier than trying to use flat carpet material.
Color choices: most people stay with the OEM black or dark gray. Some builders doing restoration work try to match the original color perfectly. And some people doing a full custom build choose a contrasting color. One thing I'd say from seeing a lot of E36 interiors: be careful with lighter carpet colors if you're actually driving the car. An E36 with cream carpet looks amazing in photos at a show and looks like a disaster six months into daily driving.
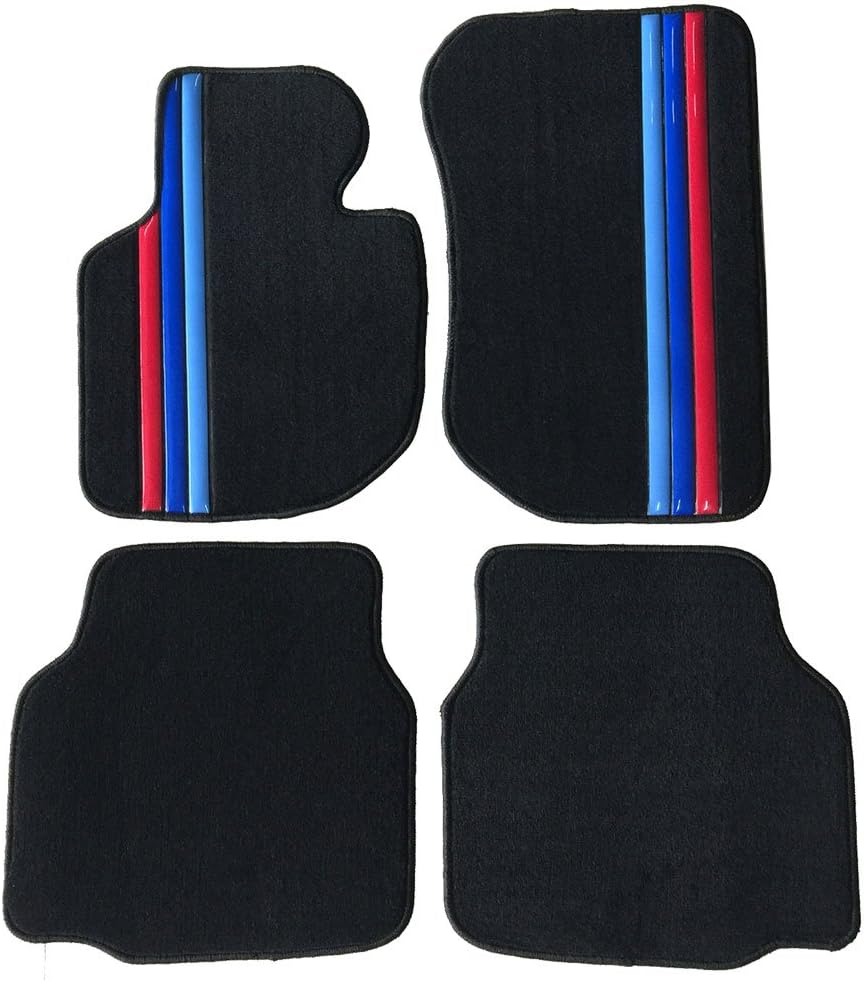
If you're tracking the car and want the simple option, a set of custom-cut floor mats on bare painted or undercoated floors is the way to go. No carpet to trap water, no carpet to absorb oil. Keep it simple.
The Shift Knob, E-Brake Handle, and Tactile Controls
The E36 is fundamentally a driver's car, and that means the bits you touch constantly matter more than on most vehicles. The shift knob and handbrake grip are cheap upgrades with outsized impact on daily feel.
Shift Knobs
The OEM E36 shift knob for the 5-speed or 6-speed manual is a simple chrome-ringed ball in leather or vinyl. It's inoffensive and functional. Aftermarket options are plentiful:
BMW OEM M sport shift knob - the M-logo black leather knob with aluminum lower collar. Fits directly on the E36 shift lever. Prices range from $60-120 new depending on source - genuine BMW part number 25-11-7-572-680 or the older version. This is the cleanest upgrade for someone who wants to keep the interior looking factory-correct.
Short shift adapter plus aftermarket knob - a short shifter kit for the E36 reduces throw significantly. Turner Motorsport and UUC Motorwerks are the well-known names here. A short shift kit runs roughly $100-200 depending on design. Combined with a short, heavy knob, the shift action on an E36 5-speed goes from vague to genuinely satisfying. If you're going to do a shift knob upgrade, strongly consider doing the short shift kit at the same time.
Weighted aluminum or titanium knobs - a heavier knob improves shift feel in most manual transmissions because the mass helps push through detents. Weighted aluminum knobs from vendors like Black Forest Industries or similar run $40-100. Thread spec for the E36 shift lever is M10x1.5 - verify before ordering any third-party knob.
Handbrake Handle
The E36 handbrake lever is long, tall, and very much a racecar-in-a-suit element of the interior design. The OEM grip is either leather or vinyl, and both wear out. Replacement OEM-spec leather grips are available used or NOS for reasonable money. Aftermarket handbrake grips from vendors like Rennline and generic BMW sport accessories vendors run $30-80. On a drift build specifically, people often replace the entire e-brake assembly with a hydraulic handbrake unit - that's a separate rabbit hole entirely, and if you're going that direction, you already know more about it than I need to explain here.
Instrumentation and Electronics
Head Unit and Audio
The OEM E36 radio is a single-DIN unit in either the standard cage or the integrated CD-player version. By current standards, the OEM audio is primitive. For most people building an E36 today, a modern head unit that adds Apple CarPlay/Android Auto is a meaningful quality-of-life upgrade without looking out of place.
Single-DIN Android and Carplay head units from brands like Pioneer, Kenwood, and Alpine fit the E36 single-DIN slot directly. A quality Pioneer DMH-WT7600NEX or similar runs $300-500. These units add navigation, streaming audio, and phone integration. The factory radio pocket on the E36 center console accepts standard single-DIN units with a basic installation kit - the wiring harness adapter for BMW E36 radios is available from any car audio supplier for under $20.
Speaker quality on an E36 is almost always the limiting factor on audio performance - the OEM speakers are decades old. A pair of quality 6x9 component speakers from Focal, JL Audio, or Hertz for the door locations runs $150-400 and transforms the audio character significantly more than a head unit swap alone.
Gauge Pods and Aftermarket Gauges
For a turbocharged or supercharged E36, a boost gauge is a reasonable addition. The OEM instrument cluster has no boost readout. Gauge pod options for the E36 include:
A-pillar pods - single or dual gauge pods that mount over the A-pillar trim. Available in 52mm gauge format from various suppliers. A quality 52mm boost gauge from Autometer or AEM runs $60-120. A-pillar pods themselves run $30-60. The installation requires routing a boost line and a power/ground to the pod location - a few hours of clean work.
Center vent gauge pods - 52mm gauge pods that replace one of the center vent openings. Cleaner looking than an A-pillar pod for street builds. Available from Modifry and similar vendors for $40-80.
Beyond boost, an oil temperature gauge is worth considering on any E36 you're tracking. The factory oil temperature gauge, where fitted, gives only a basic reading. A real-time 52mm oil temp gauge with proper 1/8 NPT sender at the block or oil filter relocation lets you know what's actually happening to the engine oil. Given what coolant system and oil cooling issues can do to an E36 motor, having this information is not paranoid - it's sensible.
Digital OBC Upgrades and Coding
The E36 OBD port allows for basic diagnostic work, and the on-board computer can be configured. For coding and diagnostic work, tools like the Peake Research R5/FCX fault code reader and INPA/DIS are the period-correct approaches. PA Soft or BMW Scanner 1.4 on a laptop via a K-line cable works for most E36 diagnostics. This isn't exactly an interior upgrade, but knowing how to read and clear fault codes (including that airbag light after a wheel swap) is directly relevant to interior work.
E36 Interior for Track Use - What to Strip and What to Keep
If your E36 is primarily a track car or you're building it toward HPDE use, the interior calculus flips completely. Instead of adding comfort and refinement, you're removing weight and clutter and building in the safety equipment that a performance track environment requires.
Weight Reduction from Interior
The E36 interior carries significant mass in carpet, foam insulation, door cards, back seats, and OEM seats. A full interior strip-out can remove 60-100 lbs depending on how aggressive you are. Common track-prep strip items:
- Rear seat delete (rear seat bench and backrest on a coupe): saves roughly 15-25 lbs
- Full carpet and insulation removal: 15-30 lbs depending on how much OEM sound deadening is present
- Door card replacement with lightweight aluminum or carbon fiber door cards: 5-10 lbs saved per door
- OEM spare tire and jack removal: 25-40 lbs
- Rear interior trim panel removal: 5-10 lbs
For a street-legal track car, keep the driver's door card (or a lightweight replacement) for the window switch and speaker mounts. Keep the headliner if you care about aesthetics at all - a bare roof in a car you also show occasionally looks worse than almost anything else you can do to a cabin.
Harness and Safety Equipment
Bucket seats on a track car need to be paired with a harness bar or cage if you're running a multi-point harness. The E36 subframe and trunk area has known mounting points for harness bars. Autopower and Saco Racing make E36-specific harness bars. Prices run roughly $200-400 for a bolt-in harness bar. A proper Schroth or Sparco four-point harness adds another $150-300.
I'll say it again because it matters: do not run a lap-and-shoulder harness without a proper seat and a harness mounting point that's been correctly installed. The geometry has to be right. Wrong harness geometry is worse than a stock belt. If you're unsure, talk to a shop that does cage and safety work, or consult the SFI/FIA harness installation guidelines directly.
Roll Bar and Cage Considerations
A full roll cage fundamentally changes the E36 interior and is outside the scope of this guide, but a bolt-in roll bar behind the front seats is a reasonable safety addition for a dedicated track car. The E36's roof is strong but not cage-strong. Autopower, OMP, and several fabrication shops offer E36-specific bolt-in bars. Budget $400-800 for a quality bolt-in bar. This affects headliner routing and rear seat use, obviously.
Build Type Recommendations - Daily, Track, and Show
Let me be direct about what I'd actually do for each type of E36 build, with honest spending priorities.
The Daily Driver E36 Interior Build
You're driving this car to work and back, taking it on weekend drives, and living in it. Comfort matters. Reliability matters. This is the build where the headliner, the seat foam, and the sound deadening take priority.
Priority spending list for a daily:
- Headliner replacement or professional re-cover: $150-350
- Seat foam replacement and re-cover on existing sport seats: $600-1,000 for the pair
- Sound deadening (Dynamat or noico on floor, firewall, doors): $150-300 in materials
- Replacement carpet: $150-250
- OEM M steering wheel or professional wheel re-wrap: $150-250
- Modern single-DIN head unit with CarPlay: $300-500
- Fresh door cards (used OEM or re-trimmed): $100-200 per card
Total realistic spend for a quality daily driver interior refresh: $1,800-3,500 depending on how much you do yourself versus paying a shop. That's a significant number, but it's appropriate for a car that's worth $8,000-20,000+ in decent condition right now. Putting $2,500 into the interior of a car worth $15,000 is sensible spending.
The Track Car E36 Interior Build
You're doing HPDE, autocross, or time attack. Weight is your friend. Comfort is optional.
Priority spending list for a track car:
- Rear seat delete: free to cheap (just remove it)
- Full carpet and insulation removal: labor only
- Recaro or Sparco bucket seats: $500-1,400 for a pair
- Seat brackets (Planted or equivalent): $160-360 for the pair
- Harness bar: $200-400
- Sparco or Schroth four-point harness: $200-400
- Aftermarket steering wheel (Momo, Sparco) with hub adapter: $200-400
- Fire extinguisher mount: $40-80
Total track-oriented interior build: $1,300-2,800 depending on seat choice and what you already have. You're spending money to go faster and be safer at the track - this is well-spent money if you're actually using the car.
The Show Car E36 Interior Build
You're building something that looks exceptional and reflects serious attention to detail. Money is more flexible than on other builds. This is where Alcantara headliners, full leather re-trims, and custom color-matched stitching come in.
Show-level interior investment for an E36 is realistically a $4,000-10,000+ project if done at a quality shop. Full leather re-trim of all surfaces, Alcantara headliner and dash, custom door cards, period-correct NOS gauges and switches, fully restored center console - each of those line items is a four-figure spend at a quality upholstery shop. I've seen show-build E36 interiors that represent more work and money than the mechanical restoration. That's legitimate if it's your thing. Just be honest about the market - a perfect interior in an E36 does not necessarily translate to sale price in proportion to what you spent.
Common Mistakes - What I See Done Wrong Most Often
After seeing a lot of E36 interior projects, there are recurring mistakes that cost people money and time. Here's what to avoid:
Mistake 1 - Recovering seats without replacing foam. I keep saying this because people keep doing it. New seat covers on crumbled foam feel like new paint on a rusted body. It looks fine briefly and then you remember the underlying problem every time you sit down.
Mistake 2 - Buying cheap headliner fabric. The thin, foam-backed headliner material available on Amazon for $15-20 is tempting because it's cheap and technically works. But it looks thin and it doesn't last. Spend the extra money on proper headliner material or just match OEM material from an upholstery supplier.
Mistake 3 - Installing aftermarket bucket seats without proper brackets. I've seen people fabricate seat brackets from angle iron or use "universal" brackets that don't properly locate the seat. On a street car, improperly mounted seats are a safety issue. On a track car, it's an immediate disqualification at any properly run event. Use purpose-made brackets for the E36.
Mistake 4 - Mixing harnesses with OEM belts and airbags incorrectly. This one has real consequences. If you add a lap belt to supplement your OEM belts, or if you run a four-point harness without proper mounting, you can create a situation where a crash is significantly worse than with stock equipment. Get safety modifications right or don't do them.
Mistake 5 - Choosing the wrong body style parts. The E36 coupe, sedan, and convertible have different door cards, headliners, rear trim, and in some cases different dash components. A convertible door card will not look right in a coupe. Always specify your chassis variant when ordering interior parts.
Mistake 6 - Forgetting the clips. Every time someone removes door cards or trim panels without fresh clips ready. Buy them first.
Mistake 7 - Doing cosmetic work before addressing leaks. The E36 convertible specifically is prone to water intrusion through the top seals and drain channels. If your car has a moisture problem, fix the leak before you spend money on new carpet or seat covers. Any E36 with a smell of mildew has water coming in somewhere. Track it down first.
Mistake 8 - Underestimating labor time. An E36 full interior refresh at a shop is a lot of hours. A good upholstery shop will be honest about this. Get a detailed quote that breaks down labor separately from materials. And if you're doing it yourself, double your time estimate. Interior work is fiddly and the E36 has a lot of screws in places you didn't expect.
Budget Tiers - What You Can Do at Each Spending Level
Let me be concrete about what's achievable at different budget levels so you can plan realistically.
Under $500 - The Triage Tier
At under $500 in parts, you're doing the functional fixes that stop the interior from actively being broken. This might mean:
- DIY headliner re-cover with proper materials: $60-100
- Fresh door card clips in bulk: $15-25
- Replacement OEM-spec floor mats: $30-70
- Shift knob replacement: $40-100
- Minor trim piece replacements from salvage: $50-150
- Sound deadening for the front floor: $60-80
At this budget, you're not transforming the interior, but you're fixing the most visually and functionally offensive things. The car stops feeling broken even if it doesn't feel exceptional.
$500-1,500 - The Serious Refresh Tier
This is where you can make a meaningful difference to the cabin. At this budget you can do:
- Professional headliner replacement: $200-350
- Quality steering wheel and hub adapter: $250-400
- Shift knob and short shifter kit: $150-250
- Modern head unit: $300-400
- DIY seat foam replacement on existing seats: $150-250
Pick two or three items from this list within your budget and do them properly. Don't spread $1,000 over five things and do all of them at a mediocre level.
$1,500-4,000 - The Full Refresh Tier
This is where you can do a comprehensive refresh that makes the interior feel new again. Seat re-foam and re-cover, headliner, carpet and sound deadening, door cards, steering wheel - the whole package. At this budget level, shop around for labor rates and do the simpler things yourself (carpet, sound deadening, shift knob) to save money for the skilled work (seat upholstery, headliner).
$4,000+ - The Show or Full Custom Tier
Full custom interior work by a quality upholstery shop. This is where you specify materials, colors, stitching patterns, and piping. Alcantara and premium leather. Custom door cards. Dash recovery. At this level, the quality of your upholstery shop is everything - find someone who has done BMWs specifically, not just "custom cars."
Frequently Asked Questions About the E36 Interior
Will E46 seats fit in an E36
Short answer: not directly. The E46 uses different seat rail dimensions and mounting points than the E36. People have made adapters to fit E46 sport seats into E36 floors, but it's not a bolt-in swap. If you want to upgrade seats in an E36, the cleaner paths are E36 M3 seats, E36 M-Technic seats, or purpose-made aftermarket buckets with proper E36 seat brackets.
What's the interior difference between the E36 pre-facelift and facelift models
The main visible differences are in the instrument cluster design (the facelift cars have slightly updated gauge faces), the OBC display design, the steering wheel airbag module shape, and some center console trim details. The seat designs remained largely consistent. If you're sourcing interior parts, always verify with the seller whether parts are from a pre-facelift (1992-1995) or facelift (1996-1999) car, because some pieces won't swap cleanly.
How hard is an E36 headliner replacement as a DIY project
Moderate difficulty. The board comes out through the door openings after you remove the A, B, and C pillar trim pieces, the visors, the map lights, and the grab handles. The main challenge is doing the re-cover with no bubbles or wrinkles, which requires patience and proper spray adhesive technique. The coupes and convertibles have more complex board shapes than the sedan, making the DIY job harder. Expect a full day for a first-timer, half a day if you've done it before.
Can I run a five-point harness on an E36 street car
Technically yes, but it requires proper mounting (harness bar or cage), proper seat position, and an honest assessment of the tradeoffs. A five-point harness on a street car without a cage means you're wearing a harness designed to work with a roll cage for rollover protection - and your street car doesn't have that. Many safety experts recommend four-point harnesses as the maximum practical configuration for a street car without a cage. This is a nuanced topic and worth researching specifically before you commit to a setup.
My E36 center console is cracked around the shifter - is there an easy fix
For minor cracks, a flexible plastic repair product (like SEM Flexible Bumper Repair used with a proper adhesion primer) can fill and stabilize the crack. It's not invisible but it stops the crack from growing. For a cracked console that's aesthetically bad, sourcing a clean used console from a low-mileage car or a Euro-spec parts car is usually the best value. Rebuilding or reskinning the original console in leather or vinyl is a more involved project but gives the best result.
What OEM interior colors were available on the E36
BMW offered the E36 with several interior color options over the production run. The most common in the US market were Black, Tan/Sand, Grey, and on some trim levels Red leather. The M3 in US spec was available with black leather sport seats as standard. European market cars had wider color availability. Trim levels (320i, 325i, 328i, M3) also affected what upholstery options were available from the factory.
What should I do about the E36 sunroof headliner
The sunroof cassette has its own headliner panel that's separate from the main board. It delaminates the same way. When you're doing a headliner job, address this panel at the same time. The cassette slides out of the roof opening after removing a few fasteners - it doesn't require removing the whole headliner board. Recover it in matching material before reinstalling the main headliner.
Are there any interior upgrades that affect resale value positively
For standard E36s, a properly done, clean-looking interior refresh that matches OEM spec or is a tasteful improvement (fresh leather on sport seats, clean carpet, no sagging headliner) definitely helps resale. Over-customized interiors - extreme color choices, non-OEM gauge clusters, heavily modified consoles - tend to reduce the buyer pool even if the work quality is high. On an M3, the calculus changes: a perfectly preserved or carefully restored OEM-correct interior is worth significant money to M3 collectors, and any deviation from factory spec has to be executed at an extremely high level to not hurt value.
Kamil Siegień
Founder of BimmerTalk. Five years wrenching on BMWs, currently dailying a G20 330i with the B48 turbo four. Spent a year doing marketing for BMW and MINI before going independent. I write everything on this site myself.
More about the site
Upgrading Your BMW's Interior - More Than Just Looks
If you've been wrenching on BMWs long enough, you already know the interior is where you spend 100% of your time behind the wheel - and factory trim, while decent, leaves a lot on the table once you start pushing the car harder or just want something that feels more dialed-in. Whether you're building a dedicated track E46 M3, refreshing an aging E90 335i, or just trying to get that OEM-plus feel in your G20 330i, the right interior upgrades genuinely change how connected you feel to the car. That's not marketing speak - it's the difference between a Sparco Evo seat that holds you through a 1.2g sweeper and sliding around in the factory sport seat that was designed for commuting, not Gingerman Raceway.
The interior category touches everything from functional safety gear to the stuff that just makes you smile every time you drop into the driver's seat. We're talking Alcantara steering wheels, weighted shift knobs that make the E46's notchy gearbox actually feel good, carbon fiber trim panels that don't look like the cheap eBay stuff, proper harness bars, Schroth harnesses rated for real use, and roll bars that won't fold under load. It's a wide net, but there's a logical order to how you should approach it depending on what you're trying to build.
What to Actually Buy First (and What to Skip Until Later)
Most people start with the cosmetic stuff - floor mats, a shift knob, maybe some carbon fiber trim for the center console. That's fine, but if you're building a car that sees any track time, prioritize the safety hardware first. A proper harness bar rated for your chassis - say an Agency Power or Cusco unit for your F8x M3 or M4 - and a set of Schroth Profi II harnesses should come before you worry about how the interior looks. The S55 in those cars puts out enough power to get you into serious trouble fast, and a lap belt isn't going to cut it if you're doing anything other than street driving.
For shift knobs, the stock unit on most E-chassis cars is undersized and light. Swapping to a weighted aluminum or leather-wrapped knob from Turner Motorsport or even a quality JDM-sourced piece genuinely improves shift feel on the ZF 6-speed. On the G-chassis cars with their electronic shifters, the options are more limited, but companies like MODE Designs and Eventuri have been expanding their interior lineup. Just make sure whatever you're buying is chassis-specific - a shift knob listed as "universal" is almost never a clean fit.
Steering wheels are another area where fitment matters enormously. If you're running an airbag delete for track days, companies like NRG and MOMO offer quality quick-release setups, but you'll need the correct hub adapter for your specific chassis. Don't assume an F30 adapter works on an F32 - verify before you buy. For street cars keeping the airbag, OEM-style recovered wheels from shops that specialize in Alcantara and leather re-wrapping are usually the better call over a full replacement.
Carbon fiber trim is an area where quality variance is massive. The cheap stuff from overseas sellers has pattern mismatch, air bubbles, and finish that doesn't survive UV exposure. Brands like Rennline and AutoTecknic use proper dry carbon or at minimum high-quality wet carbon with UV-clear coat. The price jump is real, but so is the difference when it's sitting in your N54-powered 135i.
Racing seats and brackets deserve their own conversation. A Recaro Pole Position or Sparco Rev is great, but the seat bracket is where people make expensive mistakes. You need a bracket that positions the seat correctly for your height relative to the steering wheel and pedals. Rennline makes excellent chassis-specific brackets for most BMW platforms. Also consider FIA expiration dates - harnesses and seats used in competition have a six-year window from manufacture date, not purchase date. Check the tags before you buy used.
Don't overlook gauges and gauge pods if you're running a modified powertrain. An AEM or Defi boost gauge is nearly mandatory on any turbocharged build - the factory boost readout in the iDrive is delayed and approximate. Pair it with a wideband O2 if you're doing any tuning work alongside your Chips & Software upgrades. The N54 and B58 both respond well to ethanol content monitoring, and having that data on a physical gauge in your line of sight is infinitely more useful than diving into menus while you're driving.
Tying the Interior Build Into the Bigger Picture
Interior upgrades rarely happen in isolation. If you're putting in a harness and roll bar, you're probably also looking at brake upgrades for track days - you don't want to be lapping with stock pads once you've removed the airbag system. If you're building a proper track car, the interior work goes hand-in-hand with aero and body work to reduce weight while adding downforce. Pulling the rear seats, adding a harness bar, and fitting lightweight carbon panels can shave meaningful weight on an E92 M3 - and that car already has a good power-to-weight ratio before you touch the S65.
The bottom line: buy quality, buy chassis-specific, and think about how each interior piece connects to how you actually use the car. A well-sorted interior makes every mile better - whether that's a morning commute in your daily F30 or a full day at the track in a stripped E36. Shop with intent, not impulse.