
Widebody & Body Kits for BMW 3 E92
Affiliate disclosure. BimmerTalk is a proud partner of the Amazon Associates Program and Turner Motorsport. We may earn a small commission on qualifying purchases through our links, at no extra cost to you. Read the full disclosure.
More body and aero parts for the BMW E92
If you own an E92 and you're looking at BMW E92 body kits, you already know this chassis has aged remarkably well. The E92 3 Series coupe ran from 2006 to 2013, and whether you have the base 328i, the straight-six 335i with the N54 or N55 under the hood, or the full E92 M3 with the S65 V8, the body lines on this car still look aggressive and purposeful in a way that plenty of newer BMWs don't manage. That said, most E92s on the road right now are 12 to 18 years old. Factory bumpers have road rash. Side skirts have parking lot scrapes. And if you bought a base model 328i, the front end is noticeably blander than the M Sport or M3 variants. A well-chosen body kit fixes all of that at once, and it does it without touching the drivetrain, suspension, or anything structural.
I've spent time around E92s in a real way - not just looking at them on forums. I bolted aero onto a friend's E92 335i last summer, spent two full weekends in his driveway figuring out what fit, what needed persuasion, and what the instructions failed to mention. I've also talked to enough E92 M3 owners in the BMW community to have an honest read on which brands actually deliver consistent fitment and which ones look great in product photos and then arrive with gaps you can fit a finger into. On my daily G20 330i, I've gone through a similar process with the B48, and the lessons about aero fitment translate directly - mold quality matters more than brand reputation, and a $600 kit that fits flush will always beat a $1,200 kit that needs a heat gun and prayer.
This guide covers everything you need to make a smart decision on E92 body kits - the real options, honest prices, fitment quirks specific to this chassis, what to pair with a kit, and my actual picks for different build goals. No fluff, no affiliate hype, just what I'd tell a friend standing in front of their E92 trying to figure out where to spend money.
Why E92 Owners Buy Body Kits - The Real Reasons
Before getting into specific products, it's worth being honest about why people actually do this mod. The E92 is a coupe that already has decent proportions from the factory. The M Sport package added front and rear bumpers, side skirts, and a trunk spoiler that look substantially better than the base-trim appearance. So if you have a base 328i with the standard bumpers, there's a real visual case for upgrading. If you already have M Sport, the case is more about personalization and differentiating your car from the rest of the E92 population.
A few concrete reasons I hear consistently from E92 owners:
- Replacing damaged factory bumpers. OEM E92 front and rear bumpers are expensive to replace through BMW or even through the used parts market. A quality aftermarket front lip or full bumper replacement can land cheaper than a genuine OEM replacement, and it looks better at the same time. If your bumper has been hit, this is probably your strongest financial justification.
- Upgrading from base trim to M Sport appearance. The non-M Sport E92 front bumper has a noticeably different lower air intake shape. Swapping to an M Sport-style or aftermarket front bumper with larger air intakes changes the face of the car dramatically. The M Sport look is still the benchmark that most aftermarket kits are designed around.
- Distinguishing an E92 M3 from stock. If you already have an M3, the OEM bumpers look great. But after 15 years of production, there are enough E92 M3s around that owners want to stand out. Carbon aero, widebody fenders, or a more aggressive front splitter separates your car from the next one.
- Functional aero for track use. At track days, front splitters and rear diffusers generate meaningful downforce at speed. For an E92 M3 that sees the track regularly, functional aero is a real upgrade, not just a visual one. The S65 V8 has enough top-end power that aero balance starts to matter above 100 mph.
- Refreshing a high-mileage car before a respray. If you're already paying for paint, adding aftermarket aero to the list is a natural move. The marginal cost of installing and painting new bumpers when the car is already being sprayed is much lower than doing it separately.
All of those are legitimate reasons. What isn't a good reason is buying a body kit to add perceived horsepower or because you think it will dramatically change how the car drives on the street. At legal street speeds, body kits don't move the needle on performance. The value is visual and - for track cars specifically - functional at higher speeds.
E92 Chassis Basics You Need to Know Before Buying
The E92 chassis code covers the coupe variant of the E90-generation 3 Series. The sedan is E90, the convertible is E93, and the wagon (touring) is E91. This distinction matters enormously for body kits because parts designed for the E90 sedan will not fit the E92 coupe - the bumper mounting points, side skirt profiles, and rear bumper geometry are all different. Always confirm the listing specifically says E92 before buying, and if a brand lists "E90 E92 E93" as compatible, verify by checking the product photos carefully against your specific body style.
The other critical split is between standard E92 (328i, 335i, 328xi, 335xi) and the E92 M3. The M3 uses completely different front and rear bumpers, wider front fenders, and different door sills than the standard E92. A front lip designed for the E92 M3 front bumper will not clip onto a standard 328i front bumper - the lower bumper edge profile is different. Many premium aero brands like ADRO and Vorsteiner design specifically for the E92 M3 fitment, which means their products only work properly if you either have the M3 bumper or if you replace your bumpers with M3-spec units first.
Production years also matter in a smaller way. The E92 got a LCI (Life Cycle Impulse) facelift in 2010, which updated the headlights, taillights, and made minor changes to bumper design. The pre-LCI runs from 2007 to 2010, and the LCI runs from 2010 to 2013. Most body kit brands specify which generation their products fit, so check that date range carefully against your VIN build date. If you're unsure what you have, run your VIN at our chassis decoder tool to confirm exact production date and factory option codes before buying aero.
Types of E92 Body Kits - What the Categories Actually Mean
The term "body kit" gets used loosely, and on the E92 specifically, it covers a pretty wide range of products. Understanding the categories helps you match your budget to your goal.
Lip Kits
A lip kit is the most accessible and reversible option. It typically includes a front lip spoiler that attaches to the lower edge of the existing front bumper, side skirt extensions (sometimes called side splitters), and optionally a rear diffuser or rear lip that clips onto the lower edge of the rear bumper. You're not replacing any body panels - you're adding to what's already there. Prices for a complete lip set run roughly $350 to $900 for ABS plastic options from brands like Maxton Design, and higher for carbon. Installation is bolt-on with existing mounting holes and adhesive tape in most cases.
The advantage of a lip kit is obvious - it's the cheapest way to visually lower the car, add some aggression to the front end, and do it all reversibly. The downside is that lips take a beating from road debris and parking lot curbs. On a daily driver, expect to replace a front lip at some point. Budget for it.
Full Bumper Replacement Kits
These replace your entire front and/or rear bumper rather than adding to it. The aftermarket bumper plugs into the same factory mounting locations. Aesthetically, this gives you much more flexibility - you can go more aggressive than the factory M Sport bumper, add larger air intakes, integrate a lip splitter into the bumper itself, or change the fog light surrounds. Brands like Prior Design operate primarily in this space for the E92.
The tradeoff is cost and complexity. A full bumper swap means bumper removal, potentially moving over fog lights and sensors, paint matching, and then reinstallation. If you're doing this at a shop, you're adding 4 to 8 hours of labor on top of the part cost. And if the fitment isn't perfect - which is a real risk with some aftermarket bumpers - you'll be fighting panel gaps that require bodywork to address. This is a committed upgrade. Not reversible without buying back OEM parts.
Full Body Conversion Kits
Companies like Prior Design also offer what are more accurately called conversion kits - these might include wider fenders, completely reshaped bumpers, different hood designs, and in widebody cases, fender flares that change the overall silhouette of the car. These are typically the most expensive option, running $3,000 to $8,000+ before paint and labor, and they require serious bodywork to install properly. Think of these as custom build territory. They look incredible when done right and catastrophic when done wrong.
Single Piece Aero Additions
A front splitter, a trunk lip spoiler, or a rear diffuser purchased individually. This is actually how most E92 owners end up running their car - not with a complete matching kit, but with individual pieces that work together visually. An ADRO front lip on a stock front bumper, a factory trunk spoiler if the car didn't come with one, and a clean aftermarket rear diffuser is a common and tasteful combination that doesn't require any bodywork. It's also cheaper to spread the cost over multiple purchases.
The Six Brands Worth Looking At in 2026
There are dozens of brands selling E92 body kits, and most of them aren't worth your money. The ones below have consistent forum feedback, known fitment data, and actual product lines dedicated to E92 applications rather than generic "fits all BMW 3 Series" claims.
ADRO - Best Carbon Aero for the E92 M3
ADRO is a carbon fiber aero specialist with a proper dedicated E92 M3 full kit listing that includes front lip, side skirts, and rear diffuser pieces. Their carbon work is high quality - proper dry carbon or prepreg construction on their premium pieces rather than wet-laid carbon that's heavier and less visually consistent. Prices for ADRO on the E92 start around $600 to $1,200 for lip-style aero pieces. Full aero sets run higher, particularly if you're pricing a complete front-rear-sides package in carbon.
The key thing to understand about ADRO is that their E92 fitment is specifically designed around the E92 M3 front bumper. If you have a standard E92 328i or 335i with the stock bumpers, ADRO's front lip won't fit properly without also running M3 front bumpers. This is the single most common mistake I see when people buy ADRO on the forum - they see the product title says "E92" and assume it covers all trim levels. Read the fitment notes.
Forum feedback on ADRO is generally positive on the quality of the carbon itself but consistently mentions a few issues - shipping damage is a real risk on carbon pieces (always inspect the package before signing), panel alignment can require careful test-fitting before any paint or clear coat work, and the installation instructions range from adequate to "figure it out yourself." If you're confident working on your car and you've done aero before, ADRO is a top-tier choice for the M3. If this is your first carbon aero purchase and you're sending it straight to a shop without checking fitment first, you may end up with a headache.
My honest take - for an E92 M3 build where the goal is premium carbon aero with real visual presence and good material quality, ADRO is one of the two or three brands I'd actually spend money on. The fitment requirement of the M3 bumper is a real constraint but not a dealbreaker.
Maxton Design - Best Value OEM-Plus Option
Maxton Design is a Polish brand with very wide BMW fitment coverage. They make ABS plastic aero pieces - front lips, side skirts, rear diffusers, and spoiler extensions - across essentially the entire modern BMW lineup including the E92. Complete sets (front lip, skirts, rear diffuser) run roughly $350 to $900 in gloss black ABS. Once you add installation and paint if you want color-matched pieces, you're looking at $600 to $1,200 all-in depending on your area's labor rates.
Maxton's aesthetic is what the BMW community calls "OEM-plus" - the styling stays close to factory proportions without going wide or aggressive. The front lip has a subtle forward extension that visually lowers the front end without looking like you're driving a race car on the street. For someone who wants their E92 to look intentionally modified but not extreme, Maxton is the most accessible starting point. The case for this approach to affordable aero is well documented - you get most of the visual return for a fraction of the cost of carbon.
The honest limitations of Maxton are few but real. ABS plastic in gloss black scuffs easily. If you're running gloss black pieces on a car that sees winter roads or regular highway miles, expect surface scratches within a year. Heat adjustment is sometimes needed for perfect edge seating - a heat gun and some patience usually solves it, but it's an extra step that premium carbon pieces don't require. The material is also less forgiving of minor impacts than urethane - it will crack rather than flex. But at these prices, replacing a cracked front lip isn't financially painful the way a cracked ADRO carbon piece would be.
Forum users on E92-specific threads generally have positive feedback on Maxton's fitment consistency, which is the most important thing for ABS aero. The molds are tight enough that the pieces seat properly without major alignment fights. If you only do one visual upgrade on a daily driver E92 that sees real-world conditions, a Maxton front lip and side skirt set is probably the most sensible use of $400 to $600.
3D Design - Best High-End OEM Refinement
3D Design is a Japanese aftermarket company with a long history of BMW-specific products. Their E92 lineup includes lip spoilers, trunk spoilers, and diffuser-style rear pieces. Pricing sits in the $700 to $1,800 range depending on the piece and finish. This is more expensive than Maxton but below Vorsteiner on the pricing ladder.
What separates 3D Design is the design philosophy. They're not trying to make your E92 look like a race car or a tuner special. They're designing pieces that look like they could have come from BMW's M Performance catalog - clean lines, proper proportions, no unnecessary aggression. For E92 M3 applications specifically, 3D Design aero is a popular choice among owners who want the car to look polished and cohesive rather than modified. The trunk spoiler in particular is well regarded as a clean alternative to the factory optional spoiler.
The common complaints with 3D Design are cost relative to visual impact (because the styling is subtle by design), long lead times (they're a Japanese brand and stock in the US is limited), and occasional fitment adjustments around OEM sensor cutouts and bumper contours. These aren't quality problems exactly - they're the kind of minor fit tweaks you get with any precision aero piece when it meets real-world bumper tolerances. A shop familiar with the brand knows how to handle it.
Vorsteiner - Best Show Quality Carbon
Vorsteiner needs no introduction in the BMW world. They've been producing carbon fiber aero for BMWs for over a decade and the E92 M3 has always been one of their core platforms. Their E92 lineup includes carbon front lips, splitters, rear diffusers, and trunk spoilers. Pricing is $900 to $2,500+ per piece set, which makes a complete front-rear-sides package a four to five figure investment.
The reason to choose Vorsteiner over ADRO or other carbon suppliers is show-quality finish consistency and brand recognition in the BMW community. If you're building an E92 M3 for shows or you want the car to be a conversation piece, Vorsteiner carbon has the visual presence and reputation that other brands are still working toward. The weave pattern is consistent, the clear coat is well applied, and pieces arrive looking finished rather than needing additional prep work.
The tradeoffs are also real. Carbon fiber aero at this price point carries a serious replacement cost if damaged. A Vorsteiner front splitter that gets curbed costs several hundred dollars to replace. For a show car that gets trailered to events and lives in a garage, this is manageable. For a daily driver E92 in a northern state with rough roads and winter potholes, the economics don't work as well. Forum feedback consistently mentions the need for extra mounting hardware on some pieces and the importance of careful clear coat maintenance to prevent UV yellowing over time.
Vorsteiner is the right choice for a specific type of E92 build. Know what kind of build that is before committing the money.
Prior Design - Best Full Transformation
Prior Design is a German company that specializes in full body kit conversions - not bolt-on lip sets but complete bumper replacements and, for some models, widebody fender conversions. Their E92 kits sit in the $3,000 to $8,000+ range before paint and labor. When you add professional installation and a quality paint job, you're looking at a total investment that can approach or exceed $15,000 to $20,000 on a well-executed build.
That sounds like a lot, and it is, but it also completely transforms the visual identity of the car in a way that lip kits simply can't. A Prior Design E92 doesn't look like a modified stock car. It looks like something custom built. The bumper design is more aggressive, the lines are more dramatic, and the overall impression is of a car that was designed to stand out. If that's your goal and you have the budget and access to a body shop that knows what they're doing, Prior Design delivers on the promise.
The honest warnings are significant though. Full bumper conversions are not beginner projects. Bodywork-heavy installation means panel blending, careful paint matching, and potentially significant labor if the fitment isn't perfect from the box. Prior Design kits require real shop time - this is not a weekend driveway project. Forum feedback is littered with stories of people underestimating the labor cost and ending up with a half-finished car sitting at a shop waiting for funding. Budget the full amount before you start, not partway through.
KBD Urethane - Best Daily Driver Durability
KBD Urethane makes fiberglass and urethane body kit pieces across a range of BMW applications. Pricing runs $500 to $1,500 depending on the piece. The material story here is the main selling point - urethane flexes on impact rather than cracking or shattering. For a car that lives in a city, sees parking garages, drives over rough roads, and maybe encounters the occasional pothole, urethane aero is genuinely more practical than ABS or carbon.
KBD isn't as commonly discussed in E92 circles as some other brands, and that's partly because the BMW enthusiast community tends toward premium carbon or OEM-plus ABS rather than urethane. But for someone who wants the visual upgrade without worrying about cracking a $800 carbon lip on a Tuesday morning parking lot, KBD is worth the conversation. The forum feedback on urethane aero consistently mentions extra prep work before paint, careful alignment to avoid waviness, and the need for a good primer coat to get proper adhesion. These aren't dealbreakers but they're real labor considerations.
Price Comparison by Brand and Configuration
| Brand | Product Type | Typical U.S. Price 2026 | Material | E92 Variant Fit |
|---|---|---|---|---|
| ADRO | Front lip / full aero set | $600-$1,200 (lip); higher for full sets | Carbon fiber | E92 M3 specific |
| Maxton Design | Lip / skirts / diffuser set | $350-$900 parts; $600-$1,200 installed/painted | ABS plastic | Standard E92 and M3 |
| 3D Design | Lip spoiler / trunk spoiler / diffuser | $700-$1,800 per piece | Carbon / FRP | E92 M3 preferred |
| Vorsteiner | Carbon front lip / diffuser / spoiler | $900-$2,500+ per piece set | Carbon fiber | E92 M3 specific |
| Prior Design | Full bumper / body conversion | $3,000-$8,000+ before paint/labor | Polyurethane / FRP | Full E92 range |
| KBD Urethane | Bumper / lip pieces | $500-$1,500 | Urethane | Standard E92 applications |
E92-Specific Fitment Notes You Won't Find in the Product Listings
This is the section that actually saves you money and frustration. Product listings tell you "fits E92" and that's often where the information ends. Here's what the listings don't tell you.
Standard E92 vs M3 Bumper Profiles
The E92 M3 has fundamentally different front bumper geometry than the standard E92. The lower air intake opening on the M3 front bumper is wider and shaped differently. Any front lip designed for the M3 bumper will not sit flush on a standard E92 bumper - the leading edge profile doesn't match. This sounds obvious when stated clearly but it causes a significant number of returns and disappointed forum posts from people who didn't read carefully. If you have a 328i or 335i and want to run ADRO or Vorsteiner front aero, your options are: 1) find a piece specifically designed for the standard E92 bumper, 2) swap to M3 bumpers first, or 3) look at brands like Maxton that offer distinct fitment versions for non-M3 applications.
The M Sport vs Non-M Sport Split for Standard E92
Even within the non-M3 E92 range, there's a meaningful difference between M Sport package cars and base-trim cars. The M Sport package included modified front and rear bumpers and body-color side skirts. Some aftermarket lip kits are designed around the M Sport bumper profile. If you have a base 328i without M Sport, verify whether a given product expects the M Sport bumper before buying. The lower contour of the non-M Sport front bumper is different enough that lip fitment can be poor if the mold was designed around the M Sport piece.
Pre-LCI vs LCI Bumper Differences
The LCI facelift in 2010 changed the front and rear bumper design in ways that are subtle to the eye but meaningful for aero fitment. The front bumper opening shape and the lower trim line changed slightly. Most brands that support E92 aero will specify "pre-LCI" and "LCI" versions separately. If a product just says "fits E92 2007-2013" without specifying, ask before buying. Running pre-LCI front aero on an LCI car usually means visible gaps at the bumper edge where the lip doesn't follow the contour properly.
PDC (Park Distance Control) Sensor Compatibility
Many E92s came with front PDC sensors from the factory. Full bumper replacement kits and some aggressive front lip designs need to accommodate PDC sensor mounting holes or cutouts. Check this specifically before buying a full front bumper conversion. ADRO-style front lips that bolt onto existing bumpers generally don't interfere with PDC sensors since they attach below the sensor locations. Full bumper replacements from Prior Design and similar brands should include PDC cutouts, but confirm in the product description.
Side Skirt Interface with Rocker Panel and Door Sills
E92 side skirt fitment is one area where cheap kits fail visually even when they technically attach. The transition between the aftermarket side skirt and the factory door sill trim and rocker panel edge needs to be clean or the car looks slapped together. Premium brands like Vorsteiner and 3D Design design their side pieces to integrate with the factory trim lines. Cheaper kits often leave a visible step or gap at the front or rear edge of the skirt. This isn't structural but it looks bad and defeats the purpose of the upgrade.
Trunk Lid and Quarter Panel Body Lines
The E92 coupe has a pronounced character line running along the rear quarter panels that affects how trunk spoilers and rear diffusers integrate visually. A trunk lip spoiler needs to follow the trunk lid contour properly or it looks like an afterthought. For the diffuser, the geometry at the rear bumper lower edge matters - the E92 has a particular curve at the lower rear corners that cheap diffusers don't always accommodate cleanly. Brands like 3D Design put visible engineering effort into this transition. Generic "fits all 3 Series" diffusers often don't.
Supporting Modifications That Actually Make Body Kits Look Better
A body kit on stock-height E92 with the factory wheel gap looks awkward. The visual impact of any aero modification is substantially improved by getting the ride height right first. If you're serious about the visual result, here's what I'd address alongside the body kit.
Lowering - The Single Most Important Complementary Mod
An E92 at factory ride height sits high enough that a front lip looks like it's floating under the car rather than part of the bodywork. Lowering the car 20 to 30mm on quality lowering springs or 20 to 40mm on adjustable coilovers transforms how body aero integrates visually. The wheel gap closes, the side skirts sit closer to the rocker line, and the front lip actually looks like it belongs on the car rather than an add-on. For a complete look-modification build, I'd actually do the suspension before the body kit - lower it first, then measure and decide which front lip height works best.
On the E92 specifically, coilover options for this chassis are extensive. KW, Bilstein, H&R, and BC Racing all have well-tested setups. If you want a more aggressive lowered look without the stiffness penalty of coilovers, H&R or Eibach sport springs work well for daily drivers. Just factor in that very low ride height increases the risk of grounding your front lip on driveways and speed bumps.
Wheels - Make the Aero Look Intentional
Aftermarket body aero on a car still running stock wheels often looks like half a build. The proportions work better when the wheel design complements the aero. For E92 applications, 18 or 19 inch aftermarket wheels in a fitment that fills the wheel arch properly are the standard reference point for builds that photograph well and look cohesive in person. The E92 M3 already runs staggered fitment (front 245, rear 265 in OEM spec), and aftermarket wheel choices should maintain or improve that stagger for proper visual balance.
Paint Correction and Protection
If you're adding a painted body kit to an E92 that's 10-15 years old with original paint, the paint quality will show. A body kit on a car with oxidized or scratched paint draws attention to the poor paint condition rather than improving the overall appearance. If the budget allows, a paint correction before adding aero pieces is money well spent. If not, at minimum protect the freshly painted aero with quality ceramic coating or paint protection film on the forward-facing surfaces that take stone chips.
Exhaust Visibility and Rear Diffuser Clearance
For E92 owners running an aftermarket exhaust - which is a very common mod on the 335i with the N54 or N55 - rear diffuser selection needs to account for exhaust tip position and pipe routing. Some aggressive diffuser designs have cutouts for specific exhaust configurations. If you have an aftermarket single or dual exit exhaust that exits in a non-factory position, verify the diffuser you're buying has the right cutouts or can be trimmed to fit. This is a forum-reported issue that comes up regularly with full rear bumper replacement kits where the exhaust exit doesn't line up with the bumper's planned cutouts.
Installation Overview - What's Realistic for Different Kit Types
I want to be straightforward here because I see people regularly underestimate body kit installation complexity.
Lip Kit Installation - DIY Friendly
A standard lip kit (front lip, side skirts, rear diffuser) is genuinely DIY accessible if you have basic tools and a few hours. The process is typically: remove any clips or fasteners holding the lower edge of the existing bumper trim in place, clean the attachment surface, apply double-sided automotive tape (usually 3M VHB or equivalent), position the lip, and add supplied push clips or bolts. For Maxton Design and similar ABS pieces, a heat gun helps conform the piece to the bumper edge for a clean seal.
Realistic time estimate: 2 to 4 hours for a front lip and side skirt set if it's your first time. Faster with a second person. The actual technical difficulty is low - the main challenge is patience to get the alignment right before committing to the tape. If you rush it and the piece isn't centered, you'll notice every time you look at the car.
For color-matched installation, you either need to spray the pieces before installing (easier to paint separately) or mask them and respray after installation. Most people get pieces sprayed at a body shop before installation. Budget $150 to $400 for painting a lip kit depending on your region, the number of pieces, and whether blending into the bumper edge is required.
Carbon Aero Installation - Intermediate DIY
Carbon pieces from ADRO, Vorsteiner, or 3D Design are more involved because the stakes are higher. A $1,000 carbon front lip that doesn't fit flush is a much bigger problem than a $200 ABS lip that needs adjustment. The standard advice - which I follow and which forums consistently repeat - is to dry fit everything completely before any fasteners go in and before any additional clear coat or protection is applied. Test fit, check gaps around the entire perimeter, confirm sensor cutouts align, confirm mounting tabs aren't under stress, and then install permanently.
Carbon pieces typically mount with a combination of existing OEM bumper holes, added M6 or M8 hardware through new holes, and sometimes 3M tape at contact edges. The specific hardware included varies by brand and product. ADRO includes hardware in the kit - use it rather than substituting generic bolts, which may not have the right thread pitch or standoff height. Vorsteiner pieces sometimes need additional mounting hardware that isn't included. Read the instructions before you open the box so you know what you're getting into.
Full Bumper Replacement - Professional Recommended
If you're swapping to a full aftermarket front or rear bumper, I strongly recommend professional installation unless you have bumper swap experience. The process involves removing the entire factory bumper (front bumper specifically requires disconnecting fog lights, PDC sensors, ambient temp sensors on some cars, and potentially the bump strip and tow hook cover), test fitting the aftermarket piece, modifying mounting points or brackets if needed, and then reinstalling with all electricals reconnected. On a well-prepared shop, this takes 3 to 5 hours per bumper.
The DIY risk with full bumper replacements is that you discover a fitment issue when the car is already disassembled, the part may need modification that requires specific tools, and getting the paint match right requires professional equipment. This is the category where the "save money doing it myself" calculation often doesn't work out in your favor.
Full Conversion Kits - Professional Only
Prior Design-style full conversions with wide fenders, completely redesigned bumpers, and significant bodywork are professional work only. Full stop. These kits require panel alignment, filler work in some cases, and a paint job that covers everything uniformly. Budget 20 to 40+ hours of shop labor depending on complexity. This is a build project, not a weekend mod. If you're going this route, find a shop with photos of similar past work before handing over the parts.
Common Mistakes E92 Owners Make with Body Kits
After talking to enough people who've gone through this process, the same mistakes come up repeatedly. Here's how to avoid them.
Buying Without Confirming Trim Level Fitment
Already covered this but it bears repeating because it's the most expensive mistake. M3 front lip + standard 328i bumper = poor fit. Every time. Confirm the specific application - M3 or standard, M Sport or base, pre-LCI or LCI. Run your VIN, check your build sheet, and match it to the product's specific fitment table. If the product page doesn't have a specific fitment table, ask the seller before buying. A seller who can't answer that question with specifics is a seller to avoid.
Skipping the Test Fit
The number of forum posts I've seen where someone bolted carbon aero permanently and then discovered a gap or misalignment is depressing. Test fit everything dry, with no tape and no paint, before committing. Carbon aero especially - any panel that arrives with a cosmetic finish needs to be test-fit before adding any additional coating. Discovering a fit issue after you've ceramic coated the piece is an expensive problem.
Underestimating the True All-In Cost
Seeing a Maxton front lip listed at $150 and not accounting for paint, installation hardware, and labor is how people end up surprised by a $600 invoice for what they thought was a $150 mod. Build the full cost before buying. Part price plus shipping plus paint plus installation labor is the real number. For premium carbon from Vorsteiner or ADRO, add the cost of professional installation if you're not doing it yourself, and factor in ongoing maintenance (clear coat protection, careful washing to avoid scratching the weave).
Buying a Full Kit When Individual Pieces Would Work Better
Some brands sell kits as a package deal, and the visual result of their rear diffuser might be great while their front lip is mediocre for your specific application. Mixing brands for individual pieces often produces a better final result than forcing a matched set from one brand. ADRO front, 3D Design trunk spoiler, and a factory-matched rear diffuser is a legitimate combination that many E92 M3 owners run. You don't have to pick one brand and stick with it.
Not Addressing Ride Height First
Installing a front lip on a car at stock ride height and then lowering it afterward is a recipe for a ground clearance problem. A front lip at stock height has a certain distance from the ground. Lower the car 30mm and that same lip might be 25mm off the pavement - which is barely enough clearance on a flat road and not enough on any significant driveway incline. Get the ride height sorted first, then pick the lip height that works at that ride height. Many lip kits offer multiple height options - some lips have removable lower sections or different mounting positions for this exact reason.
Neglecting Wheel Arch and Splash Guard Fitment
On E92 coupes, side skirts that run close to the rocker panel can interfere with the wheel arch liner and splash guard at the front and rear corners of the door sill area. Check for rubbing during installation by turning the steering wheel lock to lock and cycling the suspension through compression. A zip tie that catches a rotating tire or a skirt piece that contacts the front arch liner at full lock is a safety issue, not just an annoyance.
Editor's Picks by Use Case
If I had to give one recommendation for each type of E92 owner, here's where I land. These are honest opinions based on what I've seen work, not based on which brand has the best margins.
Best Value Pick - Maxton Design Front Lip and Side Skirt Set
For a daily driver E92 or a weekend car that sees actual roads, the Maxton Design lip and skirt set at $350 to $600 for parts is the best return on investment available. The OEM-plus styling is tasteful, the ABS construction is adequate for street use, and the fitment is consistent enough that you're not fighting the installation. Get it painted before you install it, use 3M VHB tape and the supplied clips, and spend the money you saved over carbon alternatives on proper lowering springs or other mods that affect how the car drives.
Best Carbon Pick for E92 M3 - ADRO Front Lip with Vorsteiner Diffuser
For an E92 M3 where the goal is premium carbon aero that looks properly finished, I'd mix brands. The ADRO E92 M3 front aero has the quality and clean design language that works well at the front of the car. At the rear, Vorsteiner's diffuser pieces have arguably better weave consistency and visual finishing. Mixing these two brands across front and rear is a combination I've seen look very good on M3 builds that have actual street presence rather than just internet presence.
Combined budget for this combination including both brands and a single piece each: roughly $1,500 to $2,500 for parts. Add professional installation and you're looking at the high end of a $3,000 project but the result is a properly finished carbon aero package on one of the best coupes BMW has ever made.
Best Track Build Pick - ADRO Full Kit or Vorsteiner Splitter Set
For an E92 M3 that sees regular track days, functional aero matters. ADRO's full kit includes front splitter geometry that actually generates meaningful front downforce at track speeds. Vorsteiner's rear diffuser works with the flow management under the rear of the car. At sustained speeds above 80-100 mph on track, this combination improves aero balance in a way you can feel. Pair this with properly set up coilovers - check the BMW coilover buyer's guide for track-focused options - and the car is more planted at speed.
Best Full Transformation Pick - Prior Design
If budget isn't the constraint and you want an E92 that turns heads for reasons beyond "nice stock car," Prior Design's full kit is the route. Accept the cost, hire a competent body shop, plan the project properly from start to finish including the paint budget, and the result is a car that genuinely looks custom built. Just don't try to do this piecemeal or on a shoestring. The Prior Design approach only works when it's executed completely. Half-done Prior Design looks worse than stock. Fully executed, it's hard to beat for drama.
Best Daily Driver Pick - KBD Urethane with Paint Match
For someone in a northern state, driving year-round on roads that eat cars, who wants the visual upgrade without crying when they scrape a parking lot curb - KBD Urethane is the practical choice. The flex-on-impact property of urethane is genuinely valuable on real roads. Get it prepped properly before paint (urethane needs good primer adhesion to hold color), have it installed by a shop familiar with the material, and you have aero that survives daily driving better than any carbon piece will.
Frequently Asked Questions About E92 Body Kits
Do E92 M3 body kit pieces fit a standard E92 328i or 335i?
In general, no. The E92 M3 uses completely different front and rear bumpers with different profiles than the standard E92. Front lip pieces designed for the M3 bumper won't fit flush on a non-M3 front bumper because the lower bumper edge geometry is different. If you want M3-style aero on a 328i or 335i, your options are to find aero designed specifically for the standard E92, or to replace your bumpers with genuine or compatible M3-spec bumpers first and then run M3 aero on top. The second approach is more expensive and more involved but gives you full access to the M3 aero catalog.
How do I know if my E92 is pre-LCI or LCI?
The LCI facelift happened around mid-2010 production. The easiest visual tells are the headlight design (LCI headlights have a distinctive LED strip running along the lower edge of the headlight housing) and the taillight internals. You can also run your VIN through the chassis decoder to get your exact production date. Anything built before approximately mid-2010 is pre-LCI. Always confirm before buying aero pieces.
Can I install a Maxton Design lip kit myself without professional help?
Yes, this is a realistic DIY install. You need a heat gun, 3M VHB tape, the supplied clips, and patience for the alignment step. The technical difficulty is low. The most common DIY issue is rushing the alignment before committing to the tape - measure twice, install once. If the pieces arrive with pre-applied tape and you're in a warm garage, the whole install for front lip plus side skirts is a Saturday morning project. For carbon aero at higher price points, I'd lean toward professional installation simply because the stakes are higher if something goes wrong.
Will a front lip affect my front PDC sensors?
Lip kits that attach to the lower edge of the existing bumper generally don't affect PDC sensors because the sensors sit in the bumper body above where the lip attaches. Full bumper replacement kits must have PDC cutouts for the sensor locations or you need to relocate sensors into the new bumper, which requires drilling and careful positioning to preserve the sensor aim geometry. Check specifically for PDC compatibility on any full bumper kit before buying.
What's the right tire and wheel setup to complement E92 body aero?
The E92 coupe has a relatively wide track compared to the sedan. For standard E92, factory wheel options top out at 18 inches. Most aftermarket builds run 18 or 19 inch wheels for visual proportion. For E92 M3, 19 inch staggered fitment is standard. Lowering the car 20-30mm and running a wheel with appropriate offset to bring the tire close to the fender edge gives the best visual integration with body aero. If you're running very aggressive aero like wide bodywork from Prior Design, you typically need wider wheels and fatter tires to fill the arches properly. Check our aftermarket wheel fitment guide for specific offset and width recommendations by model.
How long does a painted ABS body kit last before showing wear?
Honest answer - it depends enormously on how and where you drive. A color-matched ABS lip on a southern California weekend car might look pristine for five years. The same piece on a Michigan daily driver that sees winter salt and rough roads might show rock chips, scuffs, and paint wear in twelve to eighteen months. ABS doesn't absorb impact as well as urethane, so any direct contact - curbs, speed bumps, parking lot debris - will crack rather than flex. Budget for eventual replacement, especially on the front lip which takes the most abuse.
Is carbon fiber aero actually lighter than ABS, and does it matter?
Yes, properly made carbon fiber (prepreg or dry carbon) is meaningfully lighter than ABS or fiberglass for equivalent pieces. A carbon front lip and splitter combination might save 3 to 6 pounds compared to ABS equivalents. At the front of the car and below the center of gravity, that weight reduction has some theoretical benefit for front-to-rear balance and unsprung weight (though bumper pieces are technically sprung). Practically speaking, on a street car, the weight difference doesn't change how the car drives in any noticeable way. The reason to buy carbon is the look and the premium material quality, not the weight saving. Track builds that count every gram will appreciate it. Street drivers won't feel it.
Do I need to remap or re-tune my E92 after adding a body kit?
No. Body aero has no effect on engine management, fueling, or boost pressure. No ECU tune or coding changes are needed for any body modification. The only modifications that require engine management changes are those that alter the air intake path or charge pressure - things like cold air intakes combined with significant boost increases, intercooler upgrades, or camshaft changes. Body kits are purely cosmetic or aerodynamic and don't affect the powertrain control system at all.
What's the best way to protect carbon fiber aero on a car that sees daily use?
Ceramic coating is the standard protection for carbon aero - it protects the clear coat from UV yellowing, makes cleaning easier, and reduces the impact of light abrasion from washing. Apply ceramic coating before the first road use. For high-impact areas like the leading edge of a front splitter, a strip of clear paint protection film (PPF) along the forward-facing edge reduces rock chip damage. Rewash carbon pieces by hand when possible - automated car washes with brushes will scratch the clear coat over time. Keep the pieces clean of road salt in winter - prolonged salt exposure attacks clear coat edges and can cause delamination on lower-quality carbon over years of use.
Can a body kit pass emissions or inspection?
Body kits don't affect emissions equipment at all - the catalytic converter, oxygen sensors, and emissions controls are completely unaffected by body aero. Visual inspections vary by state. Most state vehicle inspections focus on lighting, tire condition, brake condition, and structural items. A clean, professionally installed body kit that doesn't obstruct headlights, turn signals, or safety features will generally pass inspection without issue. Extremely aggressive front splitters that obstruct the front fog lights or very low rear diffusers that are near exhaust components could potentially flag a visual inspection - use common sense and make sure all lighting is visible and functional.
What's the minimum budget to get a good result on an E92 body kit?
For a good result that looks intentional and professional, I'd say the realistic minimum all-in budget is $800 to $1,200 for an OEM-plus approach - a Maxton or equivalent front lip and side skirt set for parts, plus paint, plus proper installation. Going below this usually means cutting corners on either part quality, paint quality, or installation quality, and the result shows. For carbon aero from ADRO, Vorsteiner, or 3D Design on an E92 M3, the minimum for a proper front-and-rear aero setup is closer to $2,500 to $4,000 all-in including installation. The idea that you can get a great looking carbon kit on an E92 for under $1,000 total is generally not realistic - either the parts are low quality, the installation is DIY without the right tools, or corners were cut somewhere that will be visible.
Should I prioritize the front or rear when building out an E92 body kit?
Start with the front. The front bumper and lip is what most people see first, it defines the car's visual identity most directly, and it has the most functional benefit in terms of aero if you're doing any performance driving. A clean front lip on a stock rear looks intentional. A rear diffuser on a stock front bumper looks like an afterthought. Build front to rear if you're spreading the project over time and budget. The exception is if your rear bumper is specifically damaged and needs replacing - in that case fix the damage first with whatever you want to run at the rear, then build the front to match later.
Putting the E92 Build Together - My Honest Final Take
The E92 is worth spending money on. It's a chassis that still looks and drives well, parts availability is good (especially for M3 applications), and the aftermarket support for body aero is strong enough that you have real choices across every budget level. Unlike some older BMW chassis where the body kit market has dried up to a handful of sketchy overseas suppliers, the E92 has legitimate brand support from ADRO, Maxton, Vorsteiner, 3D Design, and Prior Design - all of which are still actively selling E92 products in 2026.
If I were building an E92 335i right now with a moderate budget for aesthetics, I'd go Maxton front lip and skirts, get them painted body color at a shop I trust, and combine that with proper lowering on H&R or Eibach sport springs. Total all-in cost around $1,200 to $1,600. The car looks genuinely different without looking like it's trying too hard, and the remaining budget can go toward a brake pad upgrade or other mods that improve the actual driving experience.
If I were building an E92 M3 as a show car or a nicely specced weekend driver, I'd go ADRO front lip and skirts with a Vorsteiner rear diffuser, all in carbon, and combine that with a quality coilover setup and 19 inch staggered wheels. That's a $3,000 to $5,000 aero spend and probably another $3,000 to $5,000 in wheels and suspension, but the result is a properly sorted M3 that looks the way the car was always supposed to look when it was new. The S65 V8 deserves to be in a car that looks as good as it sounds.
For the track-focused E92 M3 owner, ADRO's full kit with real front downforce geometry is the functional choice. Pair it with coilovers properly set up for track use - read through the technical articles section on suspension setup for track day prep - and you have a car that both looks purposeful and behaves that way when the speeds go up.
The main thing I'd tell anyone starting this process is to be realistic about three things: your actual budget including all the peripheral costs (paint, installation, eventual replacement), your actual usage (daily driver vs weekend car vs track car changes every decision), and your tolerance for fitment complexity (some of the best-looking kits require the most work to install properly). Match those factors honestly to the brand and product choice, and you'll end up with a result you're happy with rather than a project that stalls halfway through because the money or the patience ran out.
The E92 is one of the last BMWs with completely analog driver engagement and a naturally aspirated M variant at the top of the range. It's worth building properly.
Kamil Siegień
Founder of BimmerTalk. Five years wrenching on BMWs, currently dailying a G20 330i with the B48 turbo four. Spent a year doing marketing for BMW and MINI before going independent. I write everything on this site myself.
More about the site
If you've landed on this page looking for BMW body kits, you already know the basic pitch - widen the arches, sharpen the lips, add a rear diffuser, turn your daily driver into something that stops people mid-stride in a parking lot. What you probably don't know yet is how badly the aftermarket can burn you if you walk in without a plan. I've seen guys spend four grand on a kit that didn't fit their specific build date, watched fiberglass lips crack inside a single Michigan winter, and talked to more than one owner who had to go back to stock because their kit voided a lease inspection. This guide is the one I wish existed when I started going deep on aero mods. I'm going to walk through every real decision point - materials, brands, fitment by chassis code, supporting mods, install realities, and where the money actually goes.
What a Body Kit Actually Is - and What It Isn't
A body kit is any combination of exterior trim pieces that change the visual silhouette or aerodynamic profile of a car. On a BMW that typically means some combination of a front lip or full front bumper replacement, side skirts, a rear diffuser, rear spoiler or trunk lip, and sometimes fender flares or wide-body arch extensions. "Kit" implies these pieces come matched as a set from a single designer, but in practice most owners mix and match individual pieces from different brands and call the result a kit. That's fine - just know that "kit" means different things depending on who's selling it.
What a body kit is not is a performance upgrade by itself. I want to be honest about this upfront because marketing from certain brands implies dramatic aerodynamic benefit from bolt-on lips and skirts. At street speeds - even spirited street speeds - a front lip lowers drag marginally and can reduce front-end lift if designed well, but you are not going to feel it in straight-line speed. The aero benefit at legal road speeds is real but small. The bigger payoff is visual, and that's a completely legitimate reason to run a kit. Just go in with clear eyes about what you're buying.
Track aero is a separate conversation. If you're running time attack events or autox, a properly designed splitter with canards, a functional wing, and a rear diffuser that actually works with your undertray can make a measurable difference. That's a different product category and a different budget than what most people shopping this page are looking for. I'll cover both, but I want you to know which lane you're in.
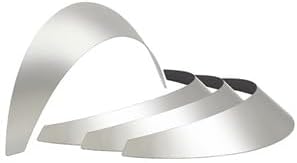
The Material Spectrum - Fiberglass, Polyurethane, Carbon Fiber, and ABS
Nothing in body kit shopping matters more than material. It determines price, longevity, fitment flexibility, repairability, and how the piece behaves in the real world. Here's how the four main materials actually stack up for a BMW owner who drives the car.
Fiberglass
Fiberglass is the oldest kit material and still the most common at the budget end. It's cheap to mold, easy to find, and takes paint well after proper prep. The problems are well known among anyone who's spent time around track cars and builds - it's brittle, it cracks on impact rather than flexing, and fit quality varies enormously because fiberglass molds degrade over time. A kit pulled from a fresh mold can have panel gaps of a quarter inch; one pulled from a third-generation mold of a pirated design can be half an inch off on every edge.
In cold climates, fiberglass becomes even more brittle. I've seen a front lip on a friend's E92 M3 crack clean through after a minor parking lot tap in January that would have just scuffed a polyurethane piece. Fiberglass is not a material I'd put on a daily driver in a state with actual winters. On a dedicated show car that lives in a garage, it's fine. On anything that sees road use, I'd spend the premium for urethane or carbon.
Polyurethane
Polyurethane (PU or urethane) is the daily-driver sweet spot. It flexes on impact, returns to shape after minor contact, bonds well with OEM bumpers, and survives temperature swings. High-quality urethane pieces from reputable brands fit noticeably better than budget fiberglass equivalents because better-sourced urethane doesn't warp in storage the way cheap glass does. The tradeoff is weight - urethane runs heavier than fiberglass and significantly heavier than carbon - and it's harder to get a perfect paint match because the surface has a slightly different texture.
For a car like my G20 330i that I drive every single day, urethane front lip and side skirts are the sensible choice. If I kiss a parking curb, I'm not looking at a shattered part. That matters more to me than saving two pounds.
Carbon Fiber
Carbon fiber (CF) is where the money goes. Genuine dry carbon, autoclave-cured, is genuinely light, genuinely stiff, and looks stunning when left in raw finish. Brands like Vorsteiner, 3D Design, and Carbon KG produce pieces in this category and price accordingly - a Vorsteiner carbon front lip for an F80 M3 or F82 M4 runs around $600-900 just for the lip. A full carbon front bumper replacement from a premium builder can hit $2,000-3,500.
The catch is that genuine dry carbon is brittle in its own way - it doesn't crack like fiberglass on a hard impact, but it does delaminate and it does not flex the way urethane does. Rocks chip it. Street use is hard on raw carbon because you're also dealing with UV degradation if you don't seal it with a quality clear coat or PPF. Wet carbon and carbon-look urethane exist as cheaper alternatives but they weigh more and the weave pattern looks obviously fake up close.
For street use I think carbon makes the most sense on high, protected areas - roof spoilers, trunk lips, mirror caps - where impact risk is lower and visual payoff is high. For front lips that are literally an inch off the asphalt, I'd rather have urethane unless the car is a weekend-only show piece.
ABS Plastic
ABS plastic is what BMW uses for OEM bumper fascias and trim, and some premium aftermarket pieces are made in ABS because it takes paint identically to factory panels and fits very precisely. The downside is that ABS is more rigid than urethane but more prone to cracking than urethane on hard impacts. Mid-tier brands often use ABS for pieces that need to match factory styling closely - it's a legitimate material, just not the best choice for low-hanging front lips on cars that see daily use.
When to Buy a Body Kit - and When to Wait
Before you spend money on aero, your car needs to be sorted in two other areas first. I say this not to be preachy but because I've seen builds where someone dropped $3,000 on a wide-body kit on a car with worn suspension, mismatched wheels, and stock ride height. It looked exactly as bad as you'd imagine - a show car on top, a neglected BMW underneath.
First, get your ride height dialed in. Body kits are designed to be seen at a specific ride height. A front lip on a stock-height BMW often looks like an afterthought - the car's too tall for the lip to read as intentional. A proper set of coilovers or even quality lowering springs drops the visual center of gravity and makes aero pieces read correctly. Without that drop, you're wasting the kit's visual impact. The suspension has to come first.
Second, sort your wheels. A wide-body kit on stock wheels looks actively wrong - the kit is supposed to cover a wider track, and if the wheels aren't filling that track, the proportions are broken. Aftermarket wheels - properly sized and offset - are the complement to a widebody or even a mild lip kit. They don't have to be expensive, but they need to be right for the build.
Once those two boxes are checked, body kit shopping makes sense. The sequence matters: suspension first, wheels second, aero third.
Body Kit Brand Tiers - How the Market Breaks Down
The BMW aftermarket for body aero is big enough that you'll find product at every price point, from $80 Alibaba front lips to $15,000 Liberty Walk wide-body conversions. I'm going to break this down into three tiers the way I actually think about it when advising other owners.
Tier 1 - Premium Brands Worth the Premium
Vorsteiner builds some of the cleanest BMW-specific aero on the market. Their GTRS series for the F-chassis M cars - particularly the F80/F82/F83 - uses properly engineered carbon construction and their fitment is as close to OEM+ as aftermarket gets. Prices are steep: front lip splitters in the $500-850 range, full aero packages for F82 M4 running $3,500-6,000 depending on configuration. They also do comprehensive kits for G-chassis cars including the G80 M3 and G82 M4. The quality justifies the cost if you're building a car you intend to keep and show.
3D Design is a Japanese brand with a strong following among BMW purists because their design philosophy is subtle and OEM-coherent. They don't do wild wide-body - they do tight, well-fitted lips, skirts, and diffusers that look like they could have come from BMW M's own accessories catalog. Their pieces are manufactured in Japan to tight tolerances and the fitment reflects that. Pricing is similar to Vorsteiner - expect $400-700 for individual pieces, $2,000-4,000 for comprehensive sets.
Adro has built serious credibility in the F and G chassis space, particularly on G20 and G30 platforms. Their designs are aggressive without being cartoonish. The carbon fiber quality is legitimate and their production tolerances are tighter than most. For my G20 I've been seriously looking at their front lip and rear diffuser combo - the G20 lines work well with their design language. Individual pieces run $350-700 in carbon, with full kits closer to $2,000-2,800.
Carbon KG focuses almost entirely on carbon aero and has strong fitment on F-chassis cars especially. They're slightly more affordable than Vorsteiner while still using genuine dry carbon construction. Good option if you want real carbon at a price that doesn't require a financing conversation.
Liberty Walk is the name everyone knows in widebody. Their BMW kits are proper body panel modifications - fender flares, extended arches, complete visual transformations. A Liberty Walk kit is not a parts purchase, it's a build decision. You're looking at the kit itself plus professional installation, paint, alignment, wheel and tire package, all-in costs that start around $8,000-10,000 and go up fast. This is a legitimate product for the right build. It's also completely wrong for 95% of people reading this page.
Tier 2 - Solid Mid-Tier Options
RW Carbon is probably the most well-known mid-tier carbon brand in the US BMW market. They source carbon pieces - some made in-house, some sourced from Asia with RW branding - and sell them at prices that undercut Vorsteiner significantly. A front lip from RW for an F30 or F80 might be $200-350 versus $600+ for Vorsteiner. The carbon quality is real but variable, and fitment on some pieces requires more trimming than you'd need with Tier 1 brands. For a car that isn't a full show build but needs quality aero, RW hits a reasonable price/quality point. Just do your homework on specific part numbers via forum feedback before buying.
AutoTecknic runs a similar mid-tier position - they produce carbon pieces primarily, with solid fitment on popular F-chassis models. Strong on M-Sport trim specific fitment where some brands miss details. Their diffusers and trunk spoilers have a good reputation in BMW forums. Pricing is in the $150-450 range for individual pieces.
Seibon Carbon is a long-running brand with coverage across many platforms including older E-chassis cars like the E46, E36, and E92. They have a wide catalog, consistent quality for the price, and decent forum reputation. For older cars where Tier 1 brands don't offer coverage, Seibon is often the best quality option. Their hoods and trunk lids have particularly strong reviews.
IND Distribution doesn't make kits themselves but they curate and retail several premium brands and their own IND-exclusive pieces. Worth checking because their customer service is strong and they do thorough model-year fitment verification before you buy.
Tier 3 - Budget Options and the Reality of Cheap Kits
This is where I have to be direct. There is a large market of low-cost body kits from Alibaba-sourced manufacturers that offer fiberglass and ABS kits for BMW chassis codes at prices that seem too good to be true - and largely are. A BMW wide-body kit on Alibaba for an E46 or E36 chassis will run you $300-600 shipped. What you're getting is a fiberglass kit pulled from a mold that was reverse-engineered from either an OEM bumper or a higher-end brand's design, with fit tolerances that will require significant bodywork to make presentable.
I'm not saying never buy a budget kit. For a dedicated track car that gets repainted constantly anyway, a cheap fiberglass wide-body isn't crazy. For a show car where a skilled body shop is going to do extensive prep work, budget fiberglass can work. For a daily driver, it's a bad investment because you'll spend the savings on paint, fitment work, and eventual replacement when it cracks.
The other budget category is replica kits - copies of M-Performance, M Sport, or M division bumpers and trim sold as "M Sport Style" pieces. These exist for almost every popular chassis. Quality varies massively. For some chassis codes with limited OEM availability - like genuine M-Performance parts for older E90/E91/E92 cars - a quality replica from a reputable mid-tier source might actually make sense. Just know what you're buying.
Fitment by BMW Generation - Where the Real Differences Live
BMW body kit shopping is unavoidably chassis-specific. A kit listed for "3 Series" might fit an F30 but not an F31 wagon, might work on 2012-2015 build dates but need modification for 2016-2018 LCI (Life Cycle Impulse) cars. Getting this wrong means you're shipping back a 30-pound box of fiberglass or living with a gap you can fit your finger through. Here's how I think about fitment by generation.
E-Chassis Cars - E36, E46, E90/E92/E93, E60
E36 (1992-1999) is old enough that most premium brands don't offer fresh production kits, but it has a dedicated aftermarket that's been serving the drift and track community for decades. Fitment information is well-established. Budget fiberglass wide-body kits are everywhere for the E36 and the platform's motorsport heritage means some surprisingly high-quality track-focused aero exists from smaller specialty builders. The OEM bumper mounts and trim clips on 25-30 year old cars are often brittle, which means kit installation on an E36 usually involves replacing fasteners and clips at the same time.
E46 (1998-2006) is one of the most kitted BMW platforms in history because of its combination of age, popularity, and near-perfect proportions. The M3 variant especially has an enormous aftermarket. Quality ranges from the ultra-budget to genuine collector-grade carbon from Seibon and other established brands. E46 M3 owners are particularly well-served - there are more aero options for this car than almost any non-current BMW platform. Key fitment note: pre-facelift and facelift E46 front bumper clips are different, and many kits specify which generation they fit.
E90/E91/E92/E93 (2006-2013) is the sweet spot for buyers right now - old enough to be affordable, popular enough to have extensive aftermarket support, and with a loyal enough fan base that quality brands still produce new pieces. The E92 coupe in particular gets strong coverage from Seibon, Vorsteiner (for M3 trim), and several mid-tier brands. The sedan E90 has a slightly smaller aftermarket than the coupe. Important note: pre-LCI (through ~2008) and LCI (2009+) front bumpers are different, and most quality kits will specify which generation. M3 versus non-M Sport trim levels also require different pieces because the bumpers are different from the factory.
E60/E61 (2004-2010) 5 Series is less well-served in the body kit market than the 3 Series chassis. M-Sport bumpers are available as replicas, and a few carbon brands do diffusers and trunk spoilers, but comprehensive kits for the E60 are harder to find. The M5 variant has better coverage, though genuine M5 aero on an E60 is technically not a "kit" - it's using factory M5 pieces.
F-Chassis Cars - F30/F31, F80 M3, F82/F83 M4, F10, F87 M2
The F-chassis generation is where the current aftermarket is richest. These cars are new enough that premium brands have invested in proper molds and design, old enough that production costs have come down, and popular enough that there's real competition keeping prices reasonable.
F30/F31 (2012-2019) - the non-M 3 Series - has solid aftermarket coverage especially for M-Sport front bumper owners. An important fitment split: cars with the base non-M Sport bumper and cars with the M-Sport package bumper use different lip/skirt designs. Most quality brands produce for M-Sport trim only. If you have a base-bumper F30, you either need a kit designed for that bumper or you upgrade to a genuine or replica M-Sport front bumper first. Also note the LCI refresh in 2016 changed front bumper details - verify before ordering.
F80 M3 / F82 M4 (2015-2020) is probably the best-served BMW platform for aero right now. Every premium brand makes something for it. Vorsteiner, 3D Design, Adro, Carbon KG, AutoTecknic, RW Carbon - all of them have dedicated F8x product lines. The CS (Competition Sport) variant added factory aero pieces, so some aftermarket brands offer CS-style lips and wings for base M3/M4 owners who want that look without the full CS purchase. Fitment is generally excellent on quality brands because the platform's popularity justified investment in proper tooling.
F87 M2 / M2 Competition (2016-2021) has a particularly strong aero aftermarket despite being a lower-volume car. The platform's track credentials attract buyers who actually use their cars, and several brands have developed genuine functional aero for it. The M2 Competition front bumper differs from the base M2, which creates the usual LCI-style fitment split. Carbon KG and Adro both have strong reputations for F87 aero.
F10/F11 (2011-2017) 5 Series - decent mid-tier coverage, weaker on genuine premium carbon brands. The F10 M5 is better served than the regular F10. If you're modding a non-M F10, your best bets are M Performance replica pieces and select mid-tier carbon brands.
G-Chassis Cars - G20, G80 M3, G82 M4, G30, G87 M2
The G-chassis is the current generation and the aftermarket is still developing. Brand investment is happening fast because G-chassis cars are selling well and the platform will be relevant for years to come.
G20/G21 (2019-present) 3 Series - This is my car, the daily driver I keep referencing. The aero aftermarket for the G20 has developed significantly since launch. Adro, 3D Design, and a few other quality brands have pieces in production. Fitment splits between base, M-Sport, and M340i trim are meaningful - the M-Sport bumper is what most serious aero buyers are working with. I've been running an Adro front lip on my G20 330i for about eight months. Installation was straightforward, fitment was excellent out of the box, and it survived a scrape with a steep parking garage exit without cracking - that's the urethane doing its job.
G80 M3 / G82 M4 (2021-present) is getting serious premium attention. The controversially large kidney grille on these cars has made them polarizing visually, which has actually driven aftermarket development as owners look for pieces that either soften or emphasize the front end styling. Vorsteiner has a full GTRS package for the G82. Adro has G80/G82 specific pieces. 3D Design offers clean OEM-coherent options. Note that Competition Package and base cars have different bumper configurations - always verify.
G87 M2 (2023-present) - Youngest platform on this list, aftermarket is just getting started. A few carbon lip options exist, mostly from smaller dedicated carbon builders. Give it another 12-18 months and coverage will look similar to G80.
Supporting Mods - What Else Changes When You Run a Body Kit
A body kit is rarely a standalone modification. The surrounding car needs to be prepared, and the kit itself often creates follow-on needs. Here's what I'd plan for when budgeting a kit purchase.
Ride Height
I mentioned this already but I want to be specific. Most front lips and full bumper replacements are designed to look correct at 20-30mm lower than stock ride height for most BMW chassis. Running a front lip at factory height often means it sits too high off the ground and looks awkward, plus it creates uneven ground clearance that increases scraping risk. Get proper coilovers dialed in before the kit goes on, or at minimum a reliable set of lowering springs that give you predictable drop.
Paint
Every aftermarket body panel needs to be painted to match your car, unless you're running raw carbon and intentionally contrasting with your car's color. Budget for $150-300 per panel for a quality respray depending on your local shop rates. A full kit can add $800-1,500 in paint costs alone. Primer, base coat, clear coat, blending - it adds up. This is money you absolutely need in the budget, not an afterthought.
Wheel Fitment
A wide-body kit that extends the fenders by 25-50mm per side needs wider wheels and tires to fill the new arches. Running a wide-body kit with narrow stock wheels looks worse than running no kit at all. Check with your kit manufacturer for their recommended wheel width, offset, and tire sizing. For most BMW wide-body conversions you're looking at front wheels 20-30mm wider than stock and rear wheels 30-50mm wider. That means new aftermarket wheels are essentially mandatory.
Alignment
After any front bumper replacement or side skirt installation, get a fresh alignment. Installing front aero pieces sometimes involves adjusting front bumper fitment that can affect how the bumper sits relative to the lower control arm geometry. More importantly, if you've changed ride height for the kit, your alignment is already off from factory spec. A proper four-wheel alignment after a body kit install is not optional - it's $80-150 well spent.
Fasteners and Mounting Hardware
Most quality kits include their own hardware. Budget kits often don't, or include cheap fasteners that strip on first install. Have a selection of M6 bolts, push-clip retainers in your car's factory size, and 3M double-sided automotive tape (specifically the thick foam-core version) on hand. For every kit I've helped install, we've used at least some aftermarket fasteners to supplement or replace what came in the box.
Common DIY Install Mistakes and How to Avoid Them
I've helped with enough body kit installs to have a solid list of what goes wrong and why. These are the mistakes I see repeatedly.
Not Test Fitting Before Painting
This is the big one. You get your kit delivered, it looks great, you immediately take it to the body shop for paint, then it comes back and doesn't fit your specific car's mounting points or requires significant trimming. Now you're trimming painted pieces and trying to blend touch-up paint. Always dry-fit every piece before any painting happens. Check every mounting point, every clip location, every area where the new piece meets factory bodywork. Make notes. Communicate needed adjustments to your body shop before they shoot a single coat of primer.
Skipping Adhesion Prep on Urethane
Polyurethane pieces need proper adhesion promoter before painting. Standard automotive primer doesn't bond to urethane the same way it bonds to metal or fiberglass. Paint adhesion failures on urethane kits are almost always caused by skipping this step. Use a purpose-made urethane adhesion promoter and follow the flash times.
Over-Torquing Plastic Fasteners
Body panel clips and screws are designed for specific torque values and strip easily when you muscle them. Use a proper tool set with the right JIS or Torx bits for BMW fasteners and hand-tighten plastic clips rather than driving them with an impact. Stripped mounting points are a nightmare to repair cleanly on exterior pieces.
Ignoring Factory Clip Condition on Older Cars
On E46, E36, and older E90 cars, the factory bumper clips and mounting tabs are often 15-25 years old and brittle. When you remove the old bumper to install a new lip or replace the front fascia, those clips crumble. Source replacement clips before starting the job - BMW parts fiche, or an inexpensive set from an online parts supplier. Going into a body kit install on an older car without a bag of fresh clips is asking to be stuck with a bumper that won't seat properly.
Using Cheap Double-Sided Tape for Side Skirts
Side skirts are often a combination of mechanical fasteners and adhesive, with the adhesive doing a lot of the work along the lower rocker. Cheap double-sided tape from a hardware store will fail within months of weather exposure, leaving your skirts pulling away from the body. Use 3M VHB tape (the thick foam-core automotive grade) or the equivalent. It's worth the extra cost.
Not Addressing Fit Gaps Before Painting
Most aftermarket body pieces will have some gaps where they meet factory bodywork. These need to be filled and finished before paint, not after. A good body shop will handle this with flexible filler on urethane pieces and standard filler on fiberglass. If you're painting the car yourself and skip this step, those gaps will read through the paint and look worse than they did unpainted.
Install Procedure Overview - How a Typical Front Lip Goes On
I'm going to walk through a front lip install because it's the most common first-step body kit mod and gives you a sense of what's involved for more complex pieces.
- Remove the existing lower front bumper trim or undertray clips. On most G and F chassis BMWs this means a combination of T20/T25 Torx screws and push-clip fasteners along the bottom edge of the front bumper. Pop the hood and check for any additional fasteners from above. Most factory lower front lip trims are held by 8-15 fasteners total.
- Test fit the new lip. Before any adhesive or paint, position the new lip and check fit at every point of contact with the factory bumper. Note any areas that need trimming. Mark trim points with a paint marker if needed.
- Make any required modifications. Trim carefully with a Dremel or sharp utility knife, test fit again. On high-quality pieces you usually need minimal trimming. On budget pieces you might need to remove significant material.
- Prep for paint. Scuff the surface with appropriate sandpaper (220-320 grit for urethane primer), clean with wax and grease remover, apply adhesion promoter on urethane pieces, let flash. Take to your body shop or paint booth.
- After paint cure, install hardware. Most lips use a combination of the factory lower bumper bolts plus supplemental mounting hardware. Some use 3M VHB tape along flat mating surfaces. Follow the kit's instructions precisely for mounting sequence - get the positioning right before tightening anything.
- Final torque and inspection. Check that every fastener is seated, that the piece is symmetrical side to side (measure from reference points on the car), and that there are no stress points where the lip might crack at a mount under flex.
Total time for a front lip install by a competent DIYer with the right tools is usually 2-4 hours excluding paint time. A full bumper replacement or side skirt install adds complexity and time. A wide-body conversion should be done professionally unless you have serious bodywork experience - there's paint blending, possibly cutting factory panels, and alignment work involved that's beyond standard DIY scope.
When to Skip a Body Kit Entirely
Honest section, because this comes up. There are situations where I'd tell a BMW owner to put the body kit money elsewhere.
If your car has deferred maintenance. A BMW with a check engine light, worn control arm bushings, leaking coolant, or tired brakes doesn't need a body kit. It needs the money spent on the systems that keep it reliable and safe. I know which parts I'd buy first and last on a budget build, and aero comes last. Check your brake pads before you check Vorsteiner's website.
If you're leasing. Body kits on a leased BMW are a return-inspection nightmare. Any visual modification that can't be perfectly reversed will come back as a charge. Even a "reversible" front lip install leaves mounting holes or tape residue that a diligent inspector will find. If you're within 18 months of lease return, skip it.
If the car has existing body damage. Installing a fresh kit on a car with a cracked bumper, misaligned panels, or rust showing through paint just draws attention to the problems. Fix the car first.
If you're using it to hide body damage. Wide-body kits covering rust, or front lips trying to hide a cracked bumper - this never works as well as you think, and it traps moisture against the damaged areas, making them worse. Fix the damage properly.
If your budget is under $500 total. A $500 body kit budget including paint and installation doesn't exist at quality levels I'd be comfortable recommending. A front lip only - single piece, good urethane, proper paint - is achievable in that range if you're doing the work yourself and have a good connection for paint. A full kit is not. Save longer or scale down to a single piece done right.
My Picks by Use Case
This is the section where I give you concrete recommendations by how you use the car. I'm not trying to be comprehensive - I'm telling you what I'd actually buy or have seen work well in real use.
Daily Driver - Keep It Subtle, Keep It Survivable
For a daily driver on current-gen cars, I'd go Adro or 3D Design front lip in polyurethane, matched side skirts, and a carbon trunk spoiler. The urethane front and sides survive real-world contact. The carbon trunk spoiler is protected up high and adds visual weight to the rear. Total investment around $1,200-1,800 in parts plus paint. This is the setup I'd build on my G20 if I wasn't constantly changing my mind about what direction I want the car to go.
For an older F30 or E92 daily, same logic applies - RW Carbon or AutoTecknic for the carbon pieces, and look at a quality urethane front lip from a brand with verified fitment reviews for your specific build date. Budget around $800-1,400 in parts plus paint.
Weekend/Show Car - Carbon, Fitment, and Nothing Cheap
If the car lives in a garage during the week and comes out for shows and cruises, this is where Vorsteiner's GTRS kit or a 3D Design comprehensive package makes sense. Go full carbon, go raw weave on pieces where it reads well, and budget for a professional installation and paint on the pieces that need it. You're looking at $3,500-6,000 in parts for an F82 M4 or G82 M4 fully kitted. That's a significant number, but these are pieces that will look correct, last, and add real collector appeal to an already desirable car.
Track/Time Attack Car
For actual track use, the priorities shift. You want functional aero over visual aero. A properly spec'd front splitter with end plates, a functional rear wing (not a trunk spoiler), and a rear diffuser designed to actually interact with airflow under the car. Companies like APR Performance and Seibon have track-focused pieces with real downforce claims backed by wind tunnel data. Budget-priced functional aero from reputable track suppliers often beats expensive show pieces in actual aerodynamic effect at speed.
Also worth noting - if you're doing track days with the car, your front lip is going to get scraped. Budget accordingly and consider running a more sacrificial urethane or even ABS piece at the front rather than an expensive carbon piece that you'll destroy in one day at a technical circuit.
Budget Build Done Right
If you're working with limited budget on an E46, E36, or older E90/E92, the smartest move is single-piece upgrades rather than trying to run a full kit. A good front lip alone, properly fitted and painted, does more for a car's visual impact than a cheap full kit with poor fitment. Buy one piece, do it right, live with it before deciding what comes next. A proper E46 M3 front lip in urethane or fiberglass from a reputable mid-tier brand runs $180-300 - affordable, impactful, correct.
Price Tiers at a Glance
Here's how the market breaks down in terms of what your budget actually gets you.
| Budget Range | What You Get | Best For | Reality Check |
| Under $300 | Single urethane or fiberglass lip, possibly an Alibaba full kit in fiberglass | Single-piece upgrade on a budget build, track car | Full kits at this price need significant body shop work; single pieces can be quality |
| $300-800 | Quality single carbon pieces from mid-tier brands, urethane kits for common platforms | Daily driver partial kit, older E-chassis upgrades | Good value zone, verify fitment carefully for your specific build date |
| $800-1,800 | Comprehensive urethane kits from reputable brands, partial carbon kits on popular platforms | Daily driver full kit, F-chassis non-M builds | Add $800-1,500 for paint; this is where most serious daily driver builds land |
| $1,800-4,000 | Premium carbon kits from Vorsteiner, Adro, 3D Design for M-cars | F80/F82 M3/M4, G80/G82 builds, show car orientation | Quality justifies price; installation and paint will add another $1,000-2,000 |
| $4,000+ | Comprehensive premium packages, wide-body conversions | Full builds, Liberty Walk conversions, dedicated show cars | Wide-body requires professional install, alignment, new wheels; total build cost multiplies fast |
Brand Comparison Table
| Brand | Primary Material | Best Platforms | Price Range | Fitment Quality | Recommended For |
| Vorsteiner | Dry carbon fiber | F80 M3, F82 M4, G80, G82 | $500-3,500+ per piece/kit | Excellent | Show cars, premium builds |
| 3D Design | Carbon fiber, ABS | Multiple BMW platforms | $400-2,500 per piece/kit | Excellent | OEM-coherent look, quality-first builds |
| Adro | Carbon fiber, PU | G20, G30, F80, F82 | $350-2,800 per piece/kit | Very Good | Aggressive street builds, G-chassis |
| Carbon KG | Dry carbon fiber | F80, F82, F87 | $300-2,200 per piece/kit | Very Good | Carbon quality at slightly lower price than Vorsteiner |
| AutoTecknic | Carbon fiber | F30, F80, F82, G20 | $150-500 per piece | Good | Mid-tier carbon pieces, daily drivers |
| RW Carbon | Carbon fiber | Wide BMW coverage | $200-600 per piece | Good (variable) | Carbon look at accessible price, verify specific part fitment |
| Seibon Carbon | Carbon fiber | E-chassis especially E46, E92 | $250-900 per piece | Good | Older platforms, hoods/trunks |
| Liberty Walk | FRP, steel | Select BMW platforms | $8,000-15,000 (conversion) | Professional install required | Full wide-body builds, dedicated show cars |
| Budget/Alibaba | Fiberglass, ABS | E36, E46, common platforms | $80-600 (full kits) | Poor to Fair | Track cars, budget builds with body shop budget |
How ECU Tuning Interacts with Aero Mods - The Other Performance Side
This might seem like a section that doesn't belong here, but hear me out. When I'm advising someone on a full build, the question of body aero and ECU tuning come up in the same conversation because they both address the same thing - how the car presents and performs. If you're spending real money on an aggressive body kit for an M car, you should be looking at engine tuning in the same build plan.
The reason this matters for body kit buyers specifically is weight. Carbon aero pieces are part of a weight-conscious build strategy that pairs with performance upgrades like a cold air intake or upgraded intercooler on turbocharged cars like my B48-powered G20 or the S55 in the F80 M3. If you're building a car that's supposed to perform as well as it looks, the exterior mods and the drivetrain/engine mods should be planned together. Aero for aero's sake is fine. Aero as part of a coherent performance build is better.
Also worth noting from a coding and diagnostics perspective - some modern G-chassis BMWs have active aero components like automatically adjusting front air dam flaps. Installing aftermarket front bumper pieces that block or remove these flap mechanisms can trigger fault codes and affect cooling. Know your car's factory aero systems before you replace anything. This is a G20/G21 specific concern more than older chassis, but worth checking via ISTA or similar diagnostic tools before ordering a bumper replacement.
Sourcing and Buying - Where to Actually Get These Parts
Where you buy matters as much as what you buy. My strong preference is to buy body aero from a retailer who does fitment verification for your specific chassis and build date, not from a marketplace that just ships what's in stock.
Brand direct is often the cleanest path for premium brands like Vorsteiner and Adro. You're buying from the source, fitment information is authoritative, and returns are handled directly. Shipping times can be longer for international brands but the reliability is worth it.
IND Distribution is the US retailer I'd point most people toward for F and G chassis BMW aero. They know the cars, verify fitment, and their customer service for fitment questions is genuinely helpful. They also do package pricing on multi-piece purchases.
BMW forums and vendor subforum feedback before buying from any source you haven't used before. This applies especially to mid-tier brands where quality and fitment can vary by production run. Recent forum threads on your specific chassis with the specific brand and part you're considering are the best pre-purchase research you can do.
For budget pieces on older cars, Alibaba-sourced BMW wide-body kits are a reality of the market - just go in understanding what you're buying, order samples before committing to a full set, and factor in body shop prep costs from the start. The per-piece price is low but the total cost to make them look good is not.
Frequently Asked Questions
Will a body kit fit my BMW without modification?
Almost never perfectly. Even premium brands with excellent fitment reputations typically require minor trimming of clip locations, minor gap adjustment, and test fitting before painting. Budget kits can require significant modification. Plan for test fitting and potential trimming as part of the install process, not as a surprise. The better the brand and the more precise their mold investment, the less you'll need to do - but zero modification is rare.
Can I install a body kit myself?
Front lips and trunk spoilers are reasonable DIY projects for someone comfortable with basic automotive work and proper tools. Side skirts require more patience and careful adhesive work. Full front bumper replacements are doable DIY but more complex - you're removing factory bumper trim, managing wiring for parking sensors or cameras, and reinstalling accurately. Wide-body kits should generally be done professionally. The limiting factor for most people isn't the mechanical work - it's the paint and body prep, which requires professional shop work regardless of who does the install.
How do I know if a kit fits my specific build date?
Use your car's VIN with a decoder to confirm your exact build date and trim level. Cross-reference against the kit manufacturer's fitment guide, and if you're not 100% sure, ask the seller directly. BMW's LCI refreshes mid-generation are a consistent source of fitment surprises - the F30 LCI in 2016 and E46 facelift in 2002 both changed front bumper specifics enough that kits designed for pre-LCI cars won't correctly fit post-LCI cars. If a seller can't answer specific fitment questions for your VIN, that's a red flag.
Is raw carbon or painted carbon better on a street car?
Raw (clear coated) carbon weave is more visually striking and saves weight vs paint, but requires more care - UV protection from quality clear coat or PPF is mandatory, and any stone chips through the clear coat need to be addressed quickly before moisture reaches the weave. Painted carbon in your car's body color is more practical for a daily driver and hides any minor surface imperfections. On a show car or weekend car, raw carbon reads beautifully. On a daily, I'd paint any pieces that are in the stone-chip zone (front lip, lower front bumper) and run raw carbon on protected areas like a trunk spoiler or mirror caps.
What's the deal with M Performance and M Sport kit prices?
Genuine BMW M Performance accessories and factory M Sport package body trim can be purchased through BMW dealers at prices that are often competitive with or lower than aftermarket equivalents, especially for G-chassis cars where the aftermarket is still developing. Genuine BMW M Performance front lips for G20/G30 run around $300-500 depending on trim. The fit is obviously perfect and they carry a BMW parts warranty. For subtle OEM+ builds on current cars, going genuine BMW aero is worth pricing before buying aftermarket - it's not always the more expensive option.
How much does paint add to the total cost?
Budget $150-300 per panel at a quality body shop for painting and clearing aftermarket body panels to match your existing paint code. A full kit with four or five separate pieces can add $600-1,200 in paint costs alone. Shops in major metro areas will be at the higher end; smaller markets can be cheaper. DIY painting is possible with quality equipment and experience, but mismatched paint on body panels hurts the look of the entire kit - if you're going to spend money on the kit itself, spend the money to have it painted correctly.
Do body kits affect my car insurance?
This varies by insurer and policy. Cosmetic modifications are generally not a coverage issue with most standard auto policies, but some insurers require disclosure of aftermarket modifications to ensure agreed value coverage applies correctly. Wide-body conversions that significantly change the vehicle's value or appearance are more likely to require a policy update than a front lip. Call your insurer and ask directly before major work - a five-minute call is worth it against a potential coverage dispute.
Are wide-body kits street legal?
Wide-body kits that extend the vehicle's track beyond the original fender line in most US states technically require the fenders to cover the new tire width. If you're running an extended-arch wide-body kit with appropriately wide wheels and tires, the new arches should be covering the tires - which means you're compliant. Some states have specific rules about fender extensions and coverage minimums. The practical reality is that police rarely enforce this on show cars, but it's worth knowing your state's specific vehicle code if you're running a significant widebody.
What's the safest way to remove factory clips without breaking them?
Use a proper trim panel removal tool set - not a screwdriver, which will crack clips and damage paint. BMW factory push-clips typically need a clip remover that gets under the edge of the clip head rather than leveraging against the body panel. Heat can help on cold-weather installs - a heat gun on low for 30 seconds around stubborn clips helps prevent brittle plastic breakage. Always have replacement clips on hand before starting removal on older cars.
How long does a quality body kit last?
A properly installed, properly painted urethane or carbon kit on a daily driver should last the life of the car in terms of structural integrity, assuming no major impacts. Paint longevity depends on your maintenance - wash the car regularly, use proper car care products, and apply PPF or ceramic coating to vulnerable front areas. The failure mode for most kits over time is stone chips on the front lip, paint fade on unpainted pieces, and adhesive tape failure on side skirts after 3-5 years. All of these are serviceable issues, not fatal ones.
Should I run PPF over my body kit?
Yes, absolutely, especially on a front lip and any forward-facing carbon pieces. Paint protection film on a front lip adds $80-200 for a professional install on the piece and dramatically extends paint longevity against stone chips and road debris. On raw carbon, PPF also adds UV protection that prevents yellowing of the clear coat over time. For a comprehensive kit on a car you care about, PPF on the front-facing surfaces is not optional in my view - it's insurance on the investment you just made.
What should I do if my kit arrives damaged?
Document the damage immediately with photos before you open the box fully, then photograph the packaging. File a damage claim with the seller promptly - most quality brands have policies for transit damage claims if you report within 24-48 hours of delivery. Do not install a damaged piece hoping to fix it later; get the replacement sorted before any work starts. This is another reason to buy from retailers with known return and damage policies rather than direct marketplace purchases where the dispute process can be painful.
Kamil Siegień
Founder of BimmerTalk. Five years wrenching on BMWs, currently dailying a G20 330i with the B48 turbo four. Spent a year doing marketing for BMW and MINI before going independent. I write everything on this site myself.
More about the site