
Front Splitters & Lips for BMW 3 G20
Affiliate disclosure. BimmerTalk is a proud partner of the Amazon Associates Program and Turner Motorsport. We may earn a small commission on qualifying purchases through our links, at no extra cost to you. Read the full disclosure.

Primary Auto M4C - B-Grade Front Splitter for G20
Primary Auto

Oasiland OA041 - Front Lip for G20 M Sport
Oasiland
Oasiland G20 M Sport - Front Lip Splitter for BMW
Oasiland

Maxton Design PSM Gloss Black Rear Trunk Spoiler BMW G20 G80 M3 330i M340i
YESENTECH
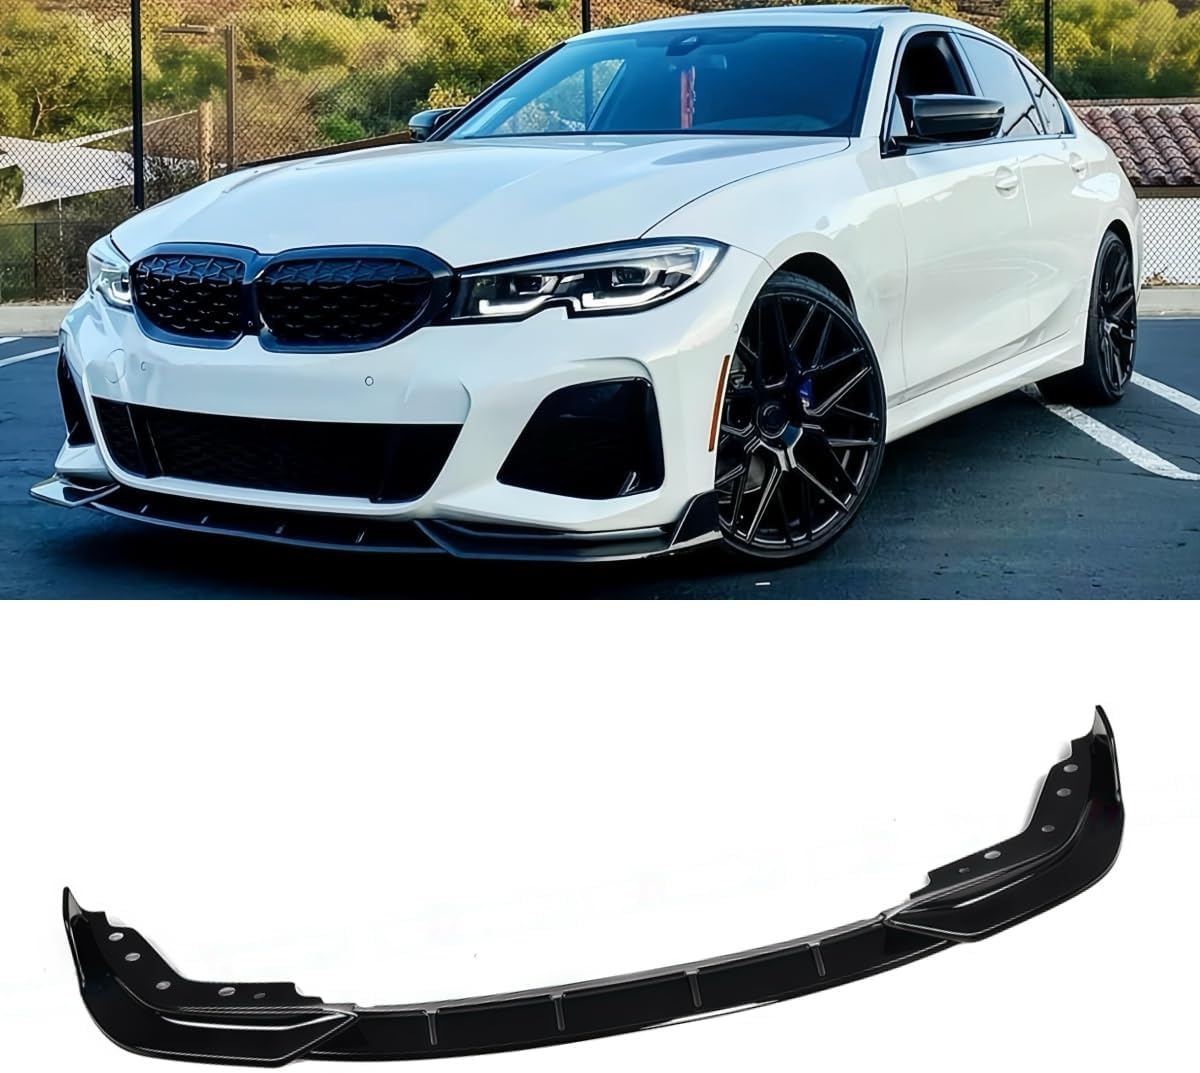
Dinan Front Lip Spoiler Splitter for BMW G20 3-Series 330i 330e 2019-2022
WheelX

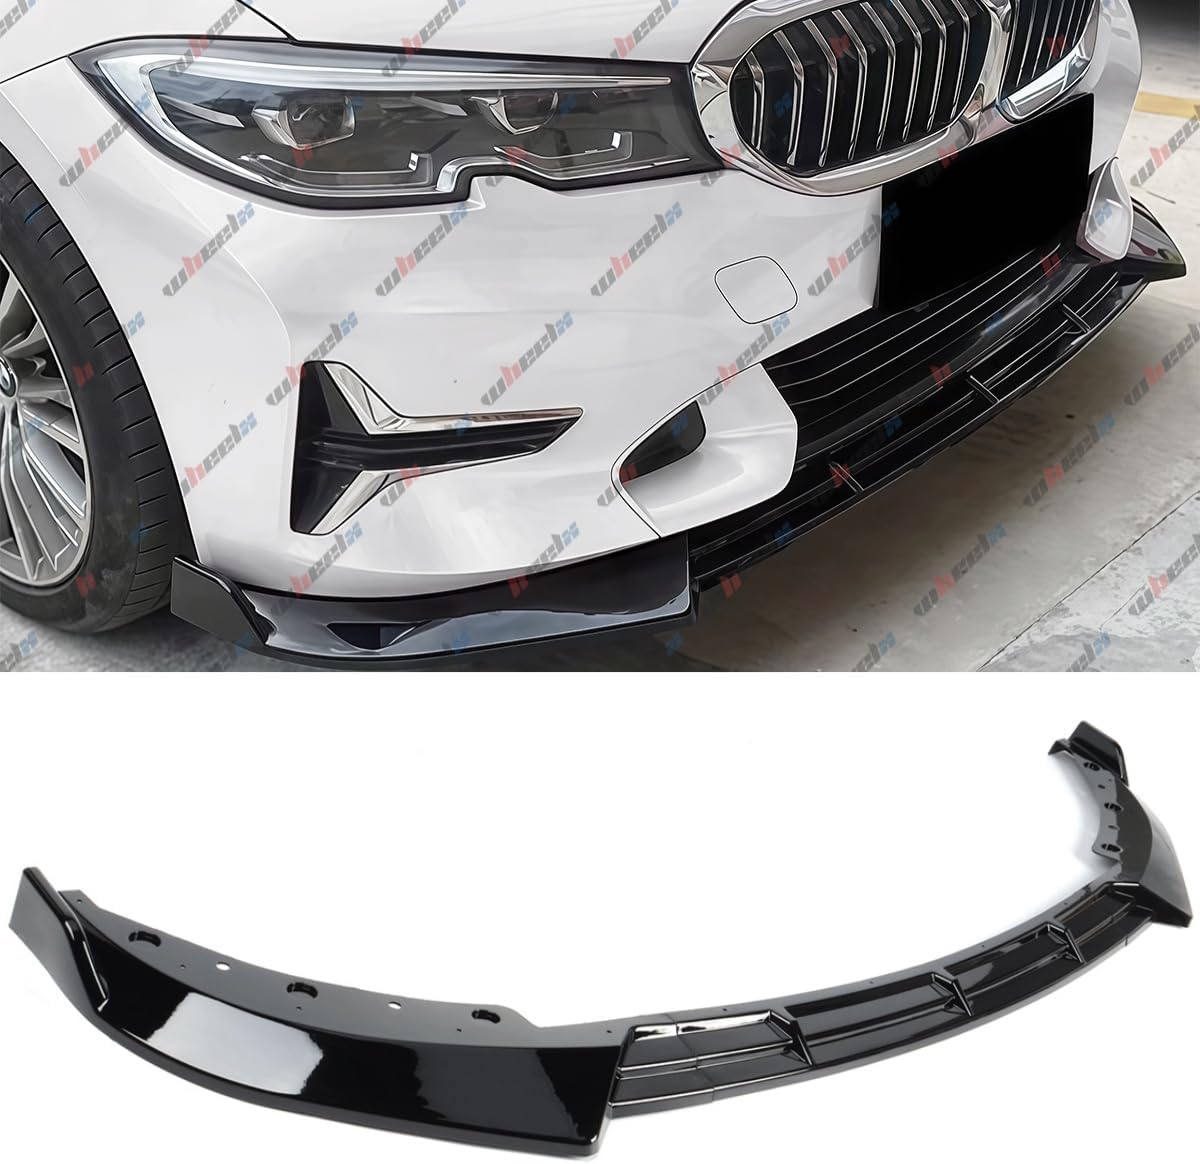
Dinan V-Style Front Lip Spoiler Splitter for BMW G20 3-Series 330i 330e
WheelX

Maxton Design Gloss Black Trunk Spoiler BMW G20 G80 M3 330i M340i
YESENTECH

Maxton Design Gloss Black Highkick Trunk Spoiler BMW 3 Series G20 G80 M3
MCARCAR KIT

GaofeiLTF Gloss Black Front Lip Splitter — G20 3 Series M Sport
GaofeiLTF

WheelX MP Style Front Lip Splitter — G20 3 Series M-Sport
WheelX

Maxton Design High Kick Duckbill Trunk Spoiler BMW G20 G80 M3
WheelX

Maxton Design Glossy Black CS Style High Kick Rear Spoiler BMW G20 3 Series G80 M3
Oasiland
More body and aero parts for the BMW G20
When it comes to body and aero upgrades for the BMW G20 3 Series, the aftermarket has matured quickly with some genuinely well-engineered options worth considering. The M Performance front splitter and side skirts are the most common entry point, offering clean OEM-plus aesthetics without sacrificing daily drivability. For those wanting a more aggressive stance, Maxton Design produces one of the most popular full aero kits for this chassis, including front lip extensions, side skirts, and a rear diffuser that integrates cleanly with the factory bumper. 3D Design and AC Schnitzer both offer front spoiler lips and trunk lid spoilers specifically engineered around G20 airflow dynamics, which matters if you're also tuning the powertrain. Carbon fiber trunk spoilers from Dry Carbon and Vorsteiner are worth the investment if weight reduction is part of your build goals. One piece of practical advice: always test-fit aero components before committing to any cutting or permanent adhesion, as even brand-name parts can require minor adjustments to align properly with the G20's panel gaps and bumper tolerances. Preparation prevents expensive mistakes.
Front Splitters and Lips for BMW - What Actually Works
A front splitter or lip is one of the few body-aero front-splitters-lips upgrades that does two things at once: it changes how your BMW looks from the curb, and it actually does something useful at speed. Done right, a properly fitted lip reduces front-end lift, helps keep the nose planted through fast corners, and gives the car a more purposeful stance without turning it into a body kit nightmare. Done wrong, you're scraping it off a parking garage ramp on day three, watching it flap at 80 mph, or peeling dried automotive tape off a bumper that never held anything. I've been on both sides of that experience. This page covers everything I've learned about buying, fitting, and living with front lips and splitters on BMWs from the E36 all the way through the G80/G82 generation, so you can skip the expensive lessons I already paid for.
What a Front Splitter Actually Does - And What It Doesn't
Let's get the physics out of the way first, because a lot of marketing around front lips is vague to the point of being meaningless.
At highway speeds, the air rushing under a car creates positive pressure - it acts like a wedge trying to lift the front end. The faster you go, the stronger that effect. A front lip or splitter interrupts that by forcing air to either go around the sides of the car or dramatically slow down before it enters the underbody. The result is less pressure under the front fascia, which means less lift. On a car that's already lowered and running stiffer springs, that translates into more consistent front-end feel through sweeping corners at speed. On a stock daily driver doing 70 mph on the freeway, you probably won't feel a night-and-day difference, but the physics are real.
A true splitter - the flat horizontal platform design you see on race cars - works harder than a simple lip. The platform creates a pressure differential: higher pressure above it, lower below. That differential generates actual downforce that pushes the front end down. A lip, by contrast, mostly just disrupts airflow direction without the same platform effect. Both have value, but they're not the same product. Most of what the aftermarket sells for street BMWs are lips with a slight forward extension. True flat-plane splitters are more common on dedicated track builds.
What a lip does not do is transform your car into an M3 or make a meaningful power difference. It doesn't improve your coilover setup or substitute for proper spring rates. It won't help you on a road surface with inconsistent grip. It's one piece of a larger picture - but it's a piece worth doing if you drive the car enthusiastically and care about how it presents.
When You Should Actually Buy a Front Lip
There's a practical checklist I run through before I recommend a front lip purchase to anyone who asks me. Here it is straight:
- Your car is already at or near final ride height. If you're still figuring out your suspension setup, wait. Lip clearance is ride-height dependent. A lip that just clears the ground on stock springs will drag constantly after you drop the car 30mm on coilovers. Decide your ride height first.
- Your bumper is in good condition. Lips attach to the bumper. If your bumper has cracks, loose clip towers, or previous repair work that changed the edge geometry, fitment will be inconsistent at best. Fix the bumper before adding hardware to it.
- You're not constantly navigating severe ground obstacles. If your daily commute involves steep commercial parking garage ramps, aggressive speed bumps, or unpaved driveways, a front lip will cost you money repeatedly. Be honest with yourself about your driving environment.
- You've sorted the interior and mechanical basics. A front lip on a car with worn control arm bushings and a broken subframe mount is money in the wrong direction. Spend on the drivetrain and suspension first. The aero can wait.
- You actually care about appearance. If you genuinely don't, a lip is pure maintenance burden. But if you're here reading this, you probably care, so move on.
The sweet spot for buying a lip is when the car is mechanically healthy, sitting at its target ride height, and you're ready to commit to occasionally checking the mounting hardware after track days or aggressive road use. At that point, a front lip is one of the better value modifications you can make.
Fitment is Non-Negotiable - How BMW Chassis Codes Work for This
This is the part where people make expensive mistakes, and I'll be direct about it. BMW completely redesigned its front fascia on nearly every generation, and even within a generation, the M-Sport / M Performance bumper and the standard bumper are different parts with different lower valance profiles. A lip designed for an F30 M-Sport bumper will not fit an F30 base bumper properly - the valance angle is different, the mounting clip positions are different, and the overall drop from the bumper edge to the ground is different. Getting this wrong means the lip either won't mount flush, will leave visible gaps at the ends, or will touch the ground before it should.
Here's the exact information you need before you click buy on any front lip:
- Chassis code - not the model name. Not "3 Series." The chassis code. E36, E46, E90, E92, F30, G20, etc. You can find yours on the door jamb sticker or use our chassis code lookup tool.
- Bumper variant - M-Sport, M Performance, base, or LCI (Life Cycle Impulse / facelift). The LCI front bumpers on the F30 and E90 are different from pre-LCI. List your bumper variant explicitly when buying.
- Model - within a chassis generation, an M-car has a completely different front end. An F80 M3 and an F30 328i are both on the F30 platform but share zero bumper components.
- Year - within a run, mid-cycle updates sometimes change fascia geometry. When in doubt, cross-reference the part number against your build date, not just your model year.
Most reputable manufacturers - Maxton Design, RW Carbon, AC Schnitzer, and iND Distribution - list fitments explicitly by chassis code and bumper variant. Trust that list. Call the retailer if you're unsure. Do not assume that a product listed for "BMW 3 Series 2012-2019" is a safe buy - that range spans the E90 facelift, the entire F30 run, and the very start of the G20. Three completely different cars with three completely different front ends.
Material Guide - Carbon Fiber, Polyurethane, ABS, and Fiberglass
The material a lip is made from determines how it looks, how it survives contact, how it paints, and what it costs. I've owned or installed pieces in all four of the main materials. Here's an honest breakdown.
Dry Carbon Fiber
Dry carbon is manufactured by laying pre-impregnated carbon fiber sheets in a mold and curing them under heat and pressure in an autoclave. The resin content is lower than wet carbon, which means the finished piece is lighter and stiffer. The weave is tight, uniform, and visually distinct. This is what you see on proper motorsport components and what serious M-car builds use when they want to show the weave.
Dry carbon looks exceptional. It's genuinely stiffer than polyurethane or ABS, which means it holds its shape aerodynamically. But that stiffness is a liability in street use - dry carbon cracks on hard impacts instead of flexing and recovering. One solid clip of a parking block and you're looking at a repair or replacement. The MHC-style dry carbon front lip for G80/G82/G83 from Midwest BMW Supply is a good example of this category - it's positioned as a premium piece aimed at owners who want the visual and weight benefits of true dry carbon on their M3 or M4. The G80/G82/G83 price tier for these pieces typically runs $600 to $1,500+, which reflects both the material cost and the complexity of the lower front valance design on those cars.
My take: dry carbon front lips belong on track cars or show builds. If you're daily driving in a city, the combination of urban parking obstacles and the material's intolerance for impact will cost you money. If the car lives at the track on weekends and you baby it otherwise, dry carbon is the right call and it will look better than anything else on the market.
Wet Carbon Fiber
Wet carbon is made by hand-layering dry carbon cloth and applying resin by hand before vacuum-bagging or pressure curing. It's less precise in resin distribution than autoclave-cured dry carbon, which means it's slightly heavier and sometimes has surface inconsistencies in the weave. It's also significantly less expensive to produce, which is why most "carbon fiber" budget lips you see listed for $300-500 are wet carbon, not dry.
The visual difference between wet and dry carbon is visible if you know what to look for - wet carbon often has a slightly cloudy or inconsistent surface under the clear coat, while dry carbon is crisp and uniform. Both look good from ten feet. Up close, the difference matters to detail-oriented enthusiasts.
Wet carbon is more impact-resistant than dry carbon but still cracks rather than flexes on hard hits. It's a reasonable middle ground for occasional track use or a car that mostly drives on clean roads. Just be specific when buying - ask the retailer whether it's wet or dry layup. Some sellers use "carbon fiber" to describe either, and on budget products, it matters.
Polyurethane
Polyurethane is the practical street choice, and I'll defend that position every time. PU lips flex on contact with speed bumps, parking blocks, and incidental road debris, then return to their original shape. They hold factory paint and aftermarket paint well. They're resistant to UV fading better than raw ABS. They're paintable to any finish. And they're significantly cheaper than carbon - quality PU lips for most BMW chassis run $150 to $350.
The trade-off is that PU doesn't look as sharp as carbon fiber. The material has a slight flex to it that means it's never quite as crisp visually, especially at the outermost edges on wider applications. It also won't show a carbon weave, obviously, so if you want the visual impact of exposed carbon, PU isn't your material.
For a daily-driven G20 330i like mine, PU is what I'd put on the car for street use. I can drive it normally without treating every parking lot like a minefield, it'll survive a Michigan winter without cracking, and when I inevitably clip something, I'm looking at a minor repair rather than a replacement piece.
ABS Plastic
ABS plastic is what Maxton Design uses for the majority of their lineup, and it's the dominant material in the mid-tier market. It's rigid enough to maintain a sharp visual profile, it can be molded to tight tolerances, and it takes gloss black finishes well in production. It's also considerably cheaper to manufacture than PU or carbon.
The problem with ABS is cold-weather brittleness. Below about 20 degrees Fahrenheit, ABS becomes noticeably more brittle, and a contact event that a PU lip would flex through can crack an ABS piece. If you live somewhere with genuine winters - I'm in the Midwest, so yes, I mean you - this is a real consideration. Either remove the lip for winter months or accept that the lip has a higher replacement risk during cold weather.
ABS also doesn't respond as well to minor impacts as PU. A flex-and-return response just isn't how the material works. That said, Maxton's fitment quality in ABS is generally solid for the price range, and for a car that's garage-kept through winter, ABS is completely viable.
Fiberglass
Fiberglass lips are common in the budget tier, especially for older chassis like E36 and E46 where production runs for better materials are smaller. Fiberglass can be shaped to complex profiles and it's cheap to produce, but fitment consistency on budget fiberglass parts is genuinely bad. The molds used by low-cost suppliers are often pulled from OEM parts without precision, and the resulting piece may need significant modification - sanding, filling, shimming - to fit cleanly.
Fiberglass cracks on impact (worse than ABS), is heavier than carbon, and requires more prep work before painting. For an E36 track build where cost is the primary driver and you expect to damage the lip eventually, fiberglass is fine. For a street car where you want a clean daily look, I'd spend the extra money on a quality PU piece instead.
The BMW Front Lip Market by Chassis - Where Aftermarket Support is Deep and Where It Isn't
Aftermarket support is not evenly distributed across BMW generations. Here's the honest picture by chassis group, based on what I actually see available from reputable retailers versus what's buried in generic marketplace listings:
| Chassis | Common Brands in the Market | Typical US Price Range | What to Expect |
|---|---|---|---|
| E36 | LTW-style replicas, polyurethane lips, fiberglass motorsport copies | $120 - $400 | Cheap visual OEM-motorsport look, mixed fitment quality - expect to do some test fitting |
| E46 | AC Schnitzer-style replicas, polyurethane splitters, carbon add-ons | $150 - $500 | Better availability than E36, OEM-plus styling well supported |
| E9X (E90/E92/E93) | M3-style splitters, carbon lip additions, polyurethane lips | $180 - $550 | Street and track balance, easier fitment than older chassis |
| F30 / F32 / F80 / F82 | Maxton Design, RW Carbon, iND, Vorsteiner-style copies | $200 - $900 | Best mix of price and visual impact, largest selection available |
| G20 / G30 | Maxton Design, RW Carbon, carbon fiber OEM-style lips | $250 - $1,000 | Modern daily-driver aero, cleaner fitment expectations |
| G80 / G82 / G83 | MHC-style dry carbon, premium dry-carbon lips, OEM M Performance pieces | $600 - $1,500+ | Higher spend, more scrutiny on clearance and finish quality |
E36 - The Budget Chassis
The E36 has been out of production long enough that the aftermarket has mostly settled into LTW replica-style lips and low-cost polyurethane alternatives. The genuine lightweight replica look is popular because the E36 M3 LTW had one of the best factory front lips BMW ever designed - simple, functional, flat. Replicas of it run $120 to $250 in polyurethane or fiberglass. Fitment is variable - the E36 bumper mounting points have had 30 years of owner modification at this point, and a lip that fits one car may need persuasion on another. Budget an hour or two for test fitting regardless of what the listing promises.
E46 - Solid Aftermarket, Good Value
The E46 sweet spot for front lips is the AC Schnitzer-style replica in polyurethane - it matches the organic curves of the E46 bumper better than anything else in the price range, and you can have it in the $200 to $350 range from reputable sellers. For the M3, there are carbon front lip additions specifically designed for the CSL-style lower valance that look excellent on a stock bumper. The E46 community has been doing this long enough that the common fitment problems are well documented on forums - search E46Fanatics before you buy anything and you'll find real-world owner reports on every major product in this space.
E9X - Where the Aftermarket Got Serious
The E90/E92/E93 generation marked the point where BMW's front bumper design got complex enough that the difference between M and non-M fitments became a major issue. An E92 M3 front lip is a different product from an E92 335i lip - completely different lower valance shape. If you're on an E92 M3, the factory CSL-inspired lower valance already has a pronounced lip character, and the aftermarket builds on that. Carbon additions from 3D Design and Arkym are the benchmark pieces for the M3 - they extend the existing OEM M lower section without looking like an afterthought. Expect $350 to $550 for quality pieces in this space.
For non-M E9X (E90 328i, 335i with M-Sport), the Maxton Design ABS lips are popular and fit well. Just confirm you have the M-Sport bumper - the standard bumper has a different lower valance profile and most lips are designed for M-Sport.
F30 / F32 / F80 / F82 - The Best Supported Generation
The F-chassis generation is where aftermarket support for front lips is deepest. The F30 3 Series was a massive global seller, which means volumes were high enough that everyone from budget ABS suppliers to premium carbon specialists built fitments for it. The F80 M3 and F82 M4 are even better supported because M car owners tend to spend more on modifications.
For F30 non-M with M-Sport bumper, the Maxton Design gloss black ABS lip is probably the most-installed front lip in BMW aftermarket history at this point - it's clean, it fits well, and it's genuinely affordable. I've bolted these onto several F30s in the 328i and 330i configurations and the fitment is consistently good. For F80/F82, the market stretches from $200 budget ABS pieces up to $900 for premium carbon work from RW Carbon, iND, and Vorsteiner. The Vorsteiner GTRS4 carbon splitter remains the benchmark reference for F80/F82 - it's expensive, but it's a purpose-built piece with functional aero geometry rather than just a styling add-on.
G20 / G30 - Current Generation, Growing Selection
The G20 is my current daily, and I've spent more time researching this chassis for front lips than any other. The G20's front bumper design - especially in M-Sport trim - already has aggressive lower valance geometry. Adding a lip extends that further, and the aftermarket has responded with solid options from Maxton Design and RW Carbon in the $250 to $400 range for quality ABS or PU pieces. Carbon options run higher, toward $700 to $1,000 for confirmed-fit carbon lips from reputable shops.
One thing I've noticed on G20 fitments: the front bumper lower section has slightly tighter tolerances at the outer corners than the F30, so corner fitment is where you need to pay attention. Lips that look great on center sections can have minor gaps at the outer edges on G20 if the manufacturer didn't get the curve geometry right. Read owner feedback specifically on corner fitment before buying for this chassis.
G80 / G82 / G83 - Premium Tier, Premium Expectations
The G80 M3, G82 M4, and G83 M4 Convertible have the most complex and aggressive front fascia of any current BMW production car. The M-specific lower valance is deep, the corner geometry is complex, and the factory already provides a reasonably aggressive visual profile. Owners who add lips to these cars are typically chasing a more pronounced street look or a track-ready visual package, and they're spending accordingly.
The MHC-style dry carbon fiber front lip for the G80 M3 and G82/G83 M4 from Midwest BMW Supply sits in the premium carbon category that defines this chassis group. Ground clearance is a real concern on G80/G82 - these cars sit lower from the factory than previous M generations, and any additional lip extension puts you closer to obstacles. If you're running the car on an adjustable coilover setup with even moderate drop, you need to measure clearance at your specific ride height before committing to a lip purchase for this chassis.
Brand Breakdown - Premium, Mid-Tier, and Budget Honestly Compared
Here's my take on the main brands operating in the BMW front lip space right now. I'm being honest about where each one succeeds and where they don't.
AC Schnitzer - The OEM-Plus Standard
AC Schnitzer is the name that comes up first when BMW owners talk about OEM-plus styling, and for good reason. Their front lip and splitter designs integrate with BMW factory styling language rather than fighting it. Fitment is consistently excellent - they manufacture to OEM tolerances with OEM-quality mounting hardware. Pricing reflects that: AC Schnitzer pieces for current chassis like the G20 and G30 run toward the top of the market at $500 to $900+ depending on chassis and material.
The AC Schnitzer advantage isn't just fitment - it's the fact that the design team clearly works from the OEM styling brief. The result is a lip that looks like it could have come from the factory, which is exactly what OEM-plus means. If that aesthetic appeals to you and you're willing to pay for it, AC Schnitzer is the right call. The downside is availability - not every chassis has current AC Schnitzer coverage, and delivery can be slow through US distributors.
Maxton Design - Volume Mid-Tier Done Right
Maxton Design has built their reputation on high-volume ABS production with reasonable fitment consistency at accessible prices. Their catalog covers almost every BMW chassis from the E36 forward, and the gloss black ABS finish looks clean on modern cars. For $150 to $300 depending on chassis and style, a Maxton lip is one of the most cost-effective visual upgrades you can make to an F30 or G20.
The honest limits of Maxton: ABS cold-weather brittleness I mentioned earlier is real, corner fitment on some older chassis templates is imperfect, and the gloss black ABS finish is not a factory color match for anything. They know their market and they price accordingly. If you want a clean visual upgrade and you're not expecting premium material or carbon-fiber longevity, Maxton delivers what it promises. I'd call them the default recommendation for F30 and E9X non-M owners on a reasonable budget.
RW Carbon - Carbon at a Mid-Market Price
RW Carbon occupies an interesting position - they bring carbon fiber products to a price point that isn't quite premium tier. Their BMW fitments are generally wet carbon, not dry, which explains the pricing. For F80/F82 and F30, their fitment reputation is solid based on forum feedback. Pricing runs $300 to $700 for most front lip applications.
The trade-off with RW Carbon is that the wet carbon finish isn't as visually crisp as true dry carbon, and quality control has been inconsistent on some production runs based on owner reports. The pieces I've seen in person have looked good at reasonable inspection distance, but up close on a concours-level build, you'd want to look at higher-tier suppliers. For a track-day car or a street build where you want the carbon look without paying premium pricing, RW Carbon is worth considering if you confirm your specific fitment has good recent owner reviews.
iND Distribution - Quality Without Compromise
iND is well known in the BMW community as a premium parts and installation specialist with a particular focus on visual modifications done properly. Their front lip offerings tend toward the premium end of the market, with excellent fitment documentation and product quality. iND is more a distributor and installer than a manufacturer, but they source quality products and stand behind them. If you're near one of their locations or comfortable ordering from their online store, iND is a trustworthy name for premium front lip work on current chassis.
Vorsteiner - Track-Influenced Premium Carbon
Vorsteiner's strength is in functional aero design. Their front lip and splitter pieces have genuine engineering behind them - not just cosmetic geometry. The GTRS4 carbon splitter for the F80/F82 M3/M4 remains the reference product for that chassis because it has real functional aero intent rather than just visual styling. Pricing is firmly in the premium tier: $700 to $1,200+ for most applications.
Vorsteiner's fitment documentation is thorough, which matters for complex installations on M cars. The carbon quality is dry or high-quality wet depending on the specific product, and the surface finish is consistently good. If you're building a track-capable car that you also want to look excellent on the street, Vorsteiner is the brand I'd put at the top of the list for F80/F82.
MHC-Style and Generic Carbon Copies - When Budget Carbon Makes Sense
The "MHC-style" designation you see on products like the G8X dry carbon front lip from Midwest BMW Supply refers to a design language inspired by premium manufacturers, produced by specialist carbon shops to a price point below full-custom fabrication. These pieces can be excellent - the dry carbon construction is real, the G80/G82/G83 fitment is confirmed, and the visual result is hard to distinguish from bespoke pieces at normal viewing distances.
The key question with MHC-style and similar carbon copies is consistency. Unlike a manufacturer with a full production QC line, smaller carbon shops may have more unit-to-unit variation. The best practice: buy from a retailer who pre-inspects inventory and has a clear return policy if the piece doesn't fit properly. Do not buy this style of product from a marketplace listing with no physical retailer behind it.
Strafe Design and Similar Value Brands
The budget end of the market is populated with brands like Strafe Design and similar value-focused suppliers who sell polyurethane and ABS lips at $120 to $250 for most chassis. These are functional products for owners who want the visual change without significant investment. Fitment varies more than with premium brands, and hardware quality (clips, screws, mounting tape) is often lower grade.
For a daily driver where you expect to scrape the lip occasionally and want a cheap replacement when you do, budget polyurethane makes complete sense. The math works: three budget lip replacements over three years costs less than one premium carbon piece. Just don't expect budget pricing to deliver premium fitment or carbon-level aesthetics.
Common Fitment Problems and How to Diagnose Them Before You Start
After installing and watching other people install front lips across multiple chassis, the problems that come up are consistent. Here's how to spot them and what to do about each one.
Corner Gaps
This is the most common issue. The center section of the lip fits flush against the bumper valance, but the outer corners splay away, leaving a visible gap between the lip and the bumper. Causes: the lip's corner radius doesn't match the bumper's corner radius, or the clip towers in that area aren't correctly positioned. Solution: heat the outer corners of the lip with a heat gun until they're pliable, then form them against the bumper by hand and hold them with painter's tape while they cool. Add supplementary mounting tape (3M VHB 5952 is what I use) to secure the corner once formed. On ABS pieces, this technique works well. On carbon fiber, heat forming is not an option - if a carbon corner doesn't fit, you need a spacer or a different product.
Uneven Drop Across the Width
The lip hangs lower on one side than the other when you step back and look at it. This usually means the bumper itself isn't sitting evenly - a common result of minor front-end impacts over the car's life that pushed one corner of the bumper back slightly. Before buying a lip, look at your bumper from the front and confirm the lower edge is level side-to-side. Also check that both bumper mounting bolts (usually accessible through the front wheel arch liners) are tight. A loose bumper will never give you a level lip installation.
Mounting Clip Failure
Budget lips often ship with low-quality plastic clip sets that break during installation or fail within a few months of driving. The fix is simple: replace the included hardware with quality OEM-spec BMW push-pin clips from the factory parts catalog. They're inexpensive and the difference in retention quality is significant. I keep a pack of assorted BMW push-pin clips in the shop at all times for exactly this reason.
Double-Sided Tape Failure
The lip separates along the tape line after a few weeks, usually starting at a corner. Almost always caused by insufficient surface prep before applying the tape. The surface must be clean of wax, polish residue, road contamination, and any mold release compound from the lip itself. Clean with 70% isopropyl alcohol and let it fully dry. Apply the tape, then press and hold with firm pressure along the entire taped length for at least 30 seconds. Allow 24 hours before exposing the joint to water or flexing. 3M VHB tape (the gray/red liner foam tape, not the clear stuff) is the only tape I recommend for this application.
Ground Clearance Surprises
The lip clears fine on flat ground but scrapes on parking garage transitions or steep driveways. This is a ride height and lip extension math problem. Before buying any lip, measure the current clearance from the bottom edge of your bumper valance to the ground. Then calculate what the lip will add based on the product spec. On a G20 with stock suspension, you have reasonable working clearance. On a G20 dropped 35mm on coilovers, you're already close to the ground, and adding even a 25mm lip extension puts you in constant contact territory on many real-world surfaces.
Installation Procedure - What the Process Actually Looks Like
I'll walk you through a typical front lip installation from start to finish. I'm describing the process for a quality polyurethane or ABS lip with clip and tape mounting, which covers 80% of what's on the market. Carbon fiber with hardware mounting has additional steps I'll note where relevant.
Tools and Supplies You Need
- Isopropyl alcohol (70% or higher) and clean microfiber cloths
- 3M VHB tape (5952 or equivalent, at least 1" wide) if not included or upgrading included tape
- Plastic trim removal tools (no metal pry bars near painted surfaces)
- Phillips head and flathead screwdrivers
- A drill with appropriate bit if self-tapping screws are included
- Heat gun (for PU and ABS fitment adjustment only)
- Painter's tape
- A flashlight for seeing clip tower positions on the bumper underside
- Potentially a basic socket set if the front undertray needs to come down (F82 M4, G80 M3, and some G20 configurations require this)
Step-by-Step Process
Step 1 - Prep the bumper surface. Wash the front bumper and lower valance thoroughly. After drying, wipe the entire lower valance mounting surface with isopropyl alcohol. Get into the corners. Let it dry completely. Don't touch the surface with your hands after this.
Step 2 - Dry fit the lip first. Before you open any tape or drill any holes, hold the lip up to the bumper and check how it sits. Look at the center section, the corners, and the ends. If anything doesn't line up, figure out why before you commit to mounting. This is where heat forming happens if needed - warm up problem areas with a heat gun, form them to the bumper geometry, and let them cool before proceeding.
Step 3 - Mark clip positions. If the lip uses push-pin clips, look at the bumper's lower valance for existing clip towers. Most BMW bumpers have a row of clip towers along the lower edge. Match these to the lip's clip holes. If the clip holes in the lip don't align with the bumper towers, you'll need to either redrill the lip or use mounting tape as the primary retention method.
Step 4 - Apply mounting tape. Peel the backing from one side of the VHB tape and apply it to the back of the lip, following the upper edge of the lip where it will contact the bumper. Press firmly. Leave the outer release liner on the other side for now.
Step 5 - Align and mount. Starting from the center and working outward to both sides simultaneously (this is a two-person job on wider lips), position the lip against the bumper at your predetermined position. Press the taped section firmly against the bumper for the full length. Then install push-pin clips from the front through the lip into the bumper towers. Install self-tapping screws if included, driving them into the bumper valance at the designated positions - don't overtighten on plastic.
Step 6 - Check and secure corners. The corners get extra VHB tape attention. Apply additional tape pieces behind the outer 4 inches of each corner and press firmly. Hold with painter's tape for 20 minutes if you want extra security while the tape bonds.
Step 7 - Inspect. Step back and look at the lip from the front, from each side, and from below. Check for gaps, uneven drop, and exposed tape edges. Address any issues now before the tape fully cures.
Step 8 - Cure time. Don't take the car through a car wash for at least 24 hours and don't flex the lip (speed bumps, etc.) for at least 12 hours. VHB tape needs time to reach full bond strength, especially in cold weather.
For carbon fiber lips with hardware mounting, the process is largely the same but replace tape-primary mounting with hardware-primary mounting. Use the included hardware plus supplementary tape for vibration resistance. On the G80/G82, removing the front undertray first gives you access to the mounting points that are otherwise blind.
Install Difficulty by Chassis and the One Step Everyone Skips
Install difficulty varies by chassis complexity. Here's a realistic time estimate:
- E36 / E46 - 45 to 75 minutes for a basic PU lip. Simple bumper construction means easy access to clip towers and a flat mounting surface.
- E9X - 60 to 90 minutes. Bumper is slightly more complex around the corners, and M3 models may require partial undertray removal for access.
- F30 / F32 non-M - 45 to 75 minutes. Clip tower positions are consistent and well-documented. Maxton Designs on these cars practically bolt on.
- F80 / F82 M3 / M4 - 90 to 120 minutes. The deeper lower valance and M-specific geometry means more fitting work. Undertray removal is required for most hardware-mounted carbon lips.
- G20 / G30 - 60 to 90 minutes. Well-designed bumper architecture but tight corner geometry requires attention.
- G80 / G82 / G83 - 90 to 150 minutes. Most complex install in this group. Front undertray removal is essentially mandatory. The lower valance geometry is intricate and hardware access is limited without proper access.
The one step that nearly everyone skips - and I mean this, I've watched people do it - is the isopropyl alcohol wipe before taping. People look at a freshly washed bumper and assume it's clean enough. It isn't. Car wash soaps leave a surfactant film. Polish and wax residue is often invisible to the naked eye. Wax is specifically designed to prevent adhesion, which is why it's used to protect paint. You are literally taping onto wax if you skip this step, and you will lose the lip on a cold morning when the tape lets go. Thirty seconds of wiping prevents this entirely. Do it every time.
When to Skip a Front Lip Entirely
I'll be direct: a front lip is not always the right call. Here are the situations where I'd tell you to put the money elsewhere.
If you're still running stock suspension on a car that drives uncomfortable. Your money is better spent on a quality coilover kit or at minimum a set of progressive lowering springs before you start modifying visual aero. The driving experience difference from suspension work vastly outweighs the experience difference from a front lip.
If your wheels need tires. Tires affect safety. A front lip doesn't. This is not a debate.
If your front bumper has structural damage. A lip on a cracked or poorly repaired bumper will look wrong and may fail. Fix the bumper first.
If your daily route has obstacles you can't avoid. Steep commercial driveway ramps, speed bumps that are poorly maintained, parking structures with aggressive transitions - if these are daily realities, factor in the replacement cost. A lip you scrape off twice a year is an ongoing expense that adds up.
If you're about to sell the car. A front lip rarely adds meaningful resale value. Buyers either want the car stock or they have their own vision for modifications. A lip that doesn't fit the buyer's style is a deduction, not an addition.
My Picks by Use Case
Here's where I give you a direct opinion instead of a balanced overview. These are the choices I'd make or recommend based on real experience:
Best for Daily Driving - The Practical Street Choice
For most daily-driven BMWs, I'd pick a quality polyurethane lip from a brand with confirmed chassis-specific fitment. For F30 / G20 owners, the Maxton Design ABS lip is the default recommendation at the $150 to $250 price point - it looks clean, fits well, and if you live somewhere with real winters, you can remove it in November and reinstall it in April in about 30 minutes. For E9X owners on a daily, an unlicensed AC Schnitzer-style polyurethane piece gives you the OEM-plus look without the AC Schnitzer price. For G20 owners who want to step up the look, a quality PU lip in the $300 to $400 range from a reputable carbon/PU specialist gives you flexibility without carbon's fragility.
If you only do one visual upgrade to your daily BMW, do a quality front lip in polyurethane over the bumper color. It's the single best dollar-per-visual-impact modification on the front end.
Best for Occasional Track Days - The Balance Pick
For a car that sees regular street use but also goes to the track a few times a year, I'd look at a wet carbon piece from a reputable supplier in the $400 to $700 range. You get the stiffness and weight advantage of carbon over PU, you get better visual quality than ABS, and wet carbon is marginally more forgiving on light contact than dry carbon. On an F80 M3 or G20 at this use case, this is the sweet spot. Pair it with a set of solid track-day brake pads and you're building a coherent track-capable package rather than just adding visual modifications.
Best for Dedicated Track Builds
Dry carbon, full stop. The weight difference over wet carbon and PU is real, the stiffness is superior for true aerodynamic function, and on a track car where street parking lot contacts aren't in the picture, the impact fragility concern largely disappears. For G80/G82 track builds, the MHC-style dry carbon pieces like the G8X dry carbon lip from Midwest BMW Supply give you proper material without paying fully bespoke carbon shop pricing. For F80/F82 track builds, Vorsteiner's GTRS4 is the piece with real engineering behind it.
Best for Show / Concours Builds
Premium dry carbon from a specialist shop that you specify and optionally clear coat to your preference. The name on the piece matters less than the quality of the carbon layup, the surface finish, and how well it integrates with the rest of your build. For show builds, I'd get the lip color-matched or finished in clear-over-carbon to match the car's overall visual direction. Budget $800 to $1,500 for this tier on modern chassis.
Best for Budget Builds and Beaters
Honest answer: budget fiberglass or polyurethane lips exist for this use case and they're fine. Spend $120 to $200, accept that fitment will require some adjustment, and move on. The visual upgrade is real even at this price point. On an E36 track rat or an E46 daily that gets scraped regularly, a cheap polyurethane lip that you can replace for $150 when it gets destroyed is smarter than a carbon piece you're afraid to use the car normally with.
Supporting Modifications - What Pairs Well With a Front Lip
A front lip in isolation can look incomplete depending on the car and the lip design. Here's how to think about the surrounding modifications that make a front lip look intentional rather than random.
Side skirts are the most important pairing. A front lip extends the visual line that the lower edge of the car traces from front to back. If that line doesn't continue along the rocker panels, the lip looks detached and odd. I strongly recommend a matching side skirt set from the same manufacturer as your front lip to maintain a coherent visual package. This isn't always cheap - matching side skirts add another $150 to $500 depending on material and brand - but the proportional difference is significant.
Ride height affects how the lip looks and functions. A lip on a car at stock ride height leaves a visual gap between the top of the lip and the bumper that looks less purposeful than the same lip on a car sitting 20-25mm lower. Appropriate spring rates from a quality lowering spring set change the car's visual stance in a way that makes front lip modifications look significantly more intentional.
Wheels are part of the overall aesthetic picture. A front lip on a car with stock wheels works fine, but the visual impact doubles when combined with a quality set of aftermarket wheels that fill the arches properly. The combination of correct ride height, matching side skirts, a front lip, and proper wheels is the full visual package that most enthusiast builds are working toward.
A rear diffuser balances the front aero work visually and functionally. If you're going track-focused, matching front and rear aero elements give you balanced downforce distribution rather than just adding front grip while leaving the rear effectively stock. Our rear diffuser section covers the options by chassis in the same depth we're covering front lips here.
If you're interested in a more comprehensive build approach that starts with the drivetrain, check out the BMW coilovers buyer's guide for suspension first - it's the foundation that makes everything else look and perform better.
Dry Carbon vs. Wet Carbon - The Question That Comes Up Every Time
Since I've mentioned this distinction throughout and it's a source of genuine confusion in forum discussions, here's a dedicated explanation.
Dry carbon (autoclave-cured pre-preg): The carbon fiber fabric comes pre-impregnated with a controlled amount of resin. Layers are stacked in a mold, vacuum-bagged, and then cured in an autoclave under heat and pressure. The controlled resin content and pressure cure eliminate voids and produce a consistent, dense laminate. The resulting piece is lighter and stiffer than wet carbon. The surface weave is crisp and visually uniform. This is the manufacturing process used for aerospace components, motorsport bodywork, and premium aftermarket pieces. Cost to produce is significantly higher due to autoclave time and pre-preg material cost.
Wet carbon (wet layup): Dry carbon fiber fabric is cut and laid into a mold by hand. Resin is applied by brush or roller during the layup process. The assembly is then vacuum-bagged and cured at room temperature or in a heated oven - but not an autoclave. Resin content is less precise, which can lead to resin-rich areas (heavier, slight surface cloudiness) or resin-starved areas (reduced strength). The surface finish requires more post-processing to achieve the same visual quality as autoclave-cured material. It's less expensive to produce and is what most "carbon fiber" parts in the $300 to $600 range are made from.
For a street BMW front lip, wet carbon is completely functional. The structural requirements of a front lip are not demanding enough to require autoclave-quality material. The reason to choose dry carbon over wet carbon for a front lip is primarily visual quality and weight. For a track build where weight savings matter, dry carbon is worth the premium. For a street build where you want exposed carbon finish, either will look good from a normal viewing distance, but dry carbon is unambiguously better up close.
When buying, ask the retailer explicitly whether the piece is dry carbon (autoclave/pre-preg) or wet carbon (wet layup). If they can't answer that question, that's information in itself.
Clear Coat, UV Fading, and Long-Term Carbon Care
This is an area where owners of carbon front lips frequently ask the same questions, so I'll address it directly.
Carbon fiber itself doesn't fade. The epoxy resin matrix that holds the fibers together is what degrades under UV exposure, turning from clear and slightly amber to yellow, and eventually becoming opaque and brittle on severely neglected pieces. All outdoor carbon fiber needs UV protection. The standard approach is a clear coat applied over the carbon surface, either from the manufacturer or applied by the owner after purchase.
Factory clear coat on most OEM-level carbon pieces is decent UV protection for several years. Budget carbon pieces often have thin or inconsistent clear coat that starts to yellow within 18 to 24 months of outdoor exposure. To extend the life of any carbon piece, apply a UV-protective ceramic coating or wax designed for carbon fiber every 6 months. This is cheap insurance against an expensive degradation problem.
If you buy a carbon front lip that arrives with no clear coat (some dry carbon track pieces are sold this way to save weight and let the owner choose their own finish), apply a UV-protective clear coat before installing it. Options range from rattle-can clear coat (adequate, not excellent) to professionally sprayed automotive clear coat (best, requires a paint shop). At minimum, a good UV-resistant carnauba wax applied every 3 months will slow fading significantly on an uncoated piece.
Rock chips are the other concern on front lips. The leading edge of any front lip is directly in the path of road debris, and chips are inevitable. On painted lips, touch-up paint applied with a fine brush handles minor chips. On carbon lips, a clear epoxy pen or UV-cure resin fills chips in the clear coat before moisture gets into the carbon. Check the leading edge of your lip every few months and address chips early - they grow if ignored.
Frequently Asked Questions
Will a front lip affect my ground clearance enough to be a problem on stock suspension?
On most stock-height BMWs with a quality lip that extends 25 to 40mm below the factory bumper edge, you'll have reduced clearance but not necessarily a constant scraping problem. The factory bumper lower edge on most BMW models gives you 120 to 150mm of ground clearance, and a 30mm lip leaves you with 90 to 120mm, which is workable on normal roads. Steep commercial parking garage entry ramps are the most likely problem spot. I'd do a clearance test in your own driveway's steepest angle before committing to a lip, just to know what you're working with.
Do I need to paint a front lip before installing it?
It depends on the material and finish. ABS and PU lips typically come in bare black, gloss black, or primer-ready finishes. Gloss black ABS (like most Maxton Design pieces) can be installed as-is if you're happy with gloss black as a finish. Primer-ready PU lips should be painted before installation - they're designed to be color-matched to the bumper for a seamless look, and painting them after installation is significantly harder. Carbon fiber lips are usually installed in their finished carbon or clear-coated state and not painted. Check the product listing for its intended finish before ordering, and plan your paint work into the timeline before installation.
Can I install a front lip myself or do I need a shop?
For PU and ABS lips with clip and tape mounting, this is solidly a DIY job. You need basic hand tools, patience, and an afternoon. Carbon fiber lips with hardware mounting on complex modern chassis like the G80/G82 require more mechanical confidence - you'll be removing underbody panels and working in tight spaces - but it's still within the capability of a competent home mechanic. If you've never done any car modification work and are nervous about it, having a shop do the installation on a premium carbon piece is reasonable insurance against fitment mistakes that could crack the lip.
How long does a front lip last?
A quality PU lip on a car that doesn't see heavy contact can last 5 to 8 years before UV or material fatigue becomes an issue. ABS lips in non-winter climates with no heavy contact last similarly. Carbon fiber lips with proper UV protection have indefinitely long lifespans if they don't see impact damage - the material itself doesn't degrade in normal conditions. The real limiting factor on front lips is physical contact: one solid hit from a curb, speed bump, or road debris can end any lip regardless of material. Accept this going in and price your purchase accordingly.
Is a more expensive carbon fiber lip always better than a budget polyurethane lip?
For street use, not necessarily. The more expensive carbon lip looks better and is stiffer, but on a daily driver that sees parking lots and city streets, the polyurethane lip's impact tolerance is a genuine advantage that the carbon piece can't match. The right choice depends on your use case and driving environment, not just budget. I'd take a quality PU lip on a daily driver over a budget carbon lip every time - the carbon will crack, the PU won't.
Do I need to buy a matching set (lip plus side skirts plus rear diffuser) or can I buy just the lip?
You can absolutely buy just the front lip. Plenty of great builds run a front lip without full body kit coordination. The visual case for matching sets is proportional cohesion - the car's aero language is more consistent when front, sides, and rear are treated as a system rather than individual pieces. But if your budget or priorities mean just a front lip right now, do it. You can add side skirts later when it makes sense. Brands like Maxton Design and RW Carbon have consistent design language across their product lines that makes adding pieces over time work reasonably well.
What's the difference between a lip and a splitter - am I buying the right thing?
A lip is a vertical or near-vertical extension below the bumper that redirects airflow. A splitter adds a horizontal platform in front of the bumper that creates a pressure differential and generates actual downforce. Most aftermarket products sold as "front splitters" for street BMWs are actually lips with a slight horizontal projection - they're not true flat-plane splitters. True splitters are primarily found on dedicated track cars or highly aggressive builds with proper aero engineering behind them. If you're buying for a street BMW, you're almost certainly buying a lip or a mild splitter, and that's appropriate for the use case.
How do I know if a front lip is compatible with my M-Sport bumper versus the standard bumper?
The product listing should explicitly state which bumper variant it fits. If it doesn't, call the retailer and ask directly before ordering. The key visual difference to look for: the M-Sport lower valance has a more pronounced lower section that drops further and has a different contour than the standard bumper. A lip designed for M-Sport will have mounting geometry that matches that deeper profile. Installing an M-Sport lip on a standard bumper will result in gaps at the mounting points and incorrect visual proportions. This is one of the most common and expensive mismatches in the BMW front lip market - verify bumper variant every time.
Can a front lip void my BMW warranty?
In the US, under the Magnuson-Moss Warranty Act, a manufacturer cannot void your warranty simply because you installed aftermarket parts, unless they can demonstrate that the aftermarket part caused the specific failure being claimed. A front lip attached with tape and clips to your bumper has essentially zero path to causing a warrantable mechanical failure. Your powertrain warranty, your electronics warranty, and your structural warranty are not affected by a front lip installation. The one area of caution: if the lip is involved in an actual collision, that becomes a body damage claim, not a warranty claim.
What is the best way to remove a front lip for winter storage?
Remove clips and screws first, then carefully peel the lip away from the double-sided tape using a plastic trim removal tool to avoid scratching the bumper. Heat the tape joint with a heat gun on low to soften the VHB adhesive before pulling - it significantly reduces the force required and minimizes tape residue on the bumper. Any remaining tape residue comes off cleanly with Goo Gone or 3M adhesive remover on a microfiber cloth. Store the lip flat in a climate-controlled space (avoid hot garages that cycle to extreme temperatures) to prevent warping. Reinstall in spring with fresh VHB tape - never reuse tape from a previous installation.
Are all "carbon fiber" front lips actually carbon fiber?
No. This is a real problem in the budget segment. Some listings describe ABS plastic with a carbon fiber-print vinyl wrap as "carbon fiber." Some describe fiberglass with a carbon fiber surface layer as "full carbon." Genuine carbon fiber construction means the structural material itself is carbon fiber reinforced polymer - not a vinyl wrap over plastic. The tell is the price and the supplier reputation. A genuine carbon fiber front lip that fits a current BMW chassis costs at least $400 to $600 at the absolute minimum for wet carbon construction. Anything marketed as carbon fiber for under $200 is almost certainly not what it claims to be. Buy from retailers who are transparent about the construction method - wet layup, dry pre-preg, or vinyl-wrapped ABS.
How do I prevent the front lip from scratching the bumper during installation?
Use painter's tape on the bumper edge before any test fitting or positioning work. Tape a strip of 1.5" painter's tape along the entire lower edge of the bumper where the lip will contact it. Do all your fitting, adjusting, and positioning work against the painter's tape. Only remove the tape once the lip is fully positioned and ready for final mounting. This prevents the rigid edge of the lip - especially ABS and carbon fiber - from leaving scratches on the bumper clear coat during the fitting process. A detail-level scratch from an ABS edge on a painted bumper is the kind of thing that ruins your whole Saturday, and it's easily prevented.
Quick Reference - Brand Comparison
| Brand | Typical Material | Price Range | Best For | Main Limitation |
|---|---|---|---|---|
| AC Schnitzer | PU / premium composite | $500 - $900+ | OEM-plus look, best fitment | Expensive, limited chassis coverage |
| Maxton Design | ABS plastic | $150 - $300 | Budget-to-mid street builds, F/G chassis | Cold-weather brittleness, not carbon |
| RW Carbon | Wet carbon fiber | $300 - $700 | Carbon look at mid-tier price | Variable QC, wet not dry |
| Vorsteiner | Dry / high-quality wet carbon | $700 - $1,200+ | Track and premium street builds | Price, limited chassis coverage |
| iND Distribution | Various (sourced premium) | $400 - $1,000+ | Premium fitment, backed service | Price, availability |
| MHC-style / carbon specialists | Dry carbon (pre-preg) | $600 - $1,500+ | G8X builds, track-focused carbon | Unit-to-unit consistency |
| Strafe / budget brands | PU / ABS | $120 - $250 | Budget builds, beaters, track trials | Fitment variation, hardware quality |
Final Thoughts - What I'd Actually Do With This Information
After five years of wrenching on BMWs, spending a year inside the BMW marketing ecosystem, and now dailying a G20 330i that I'm slowly building into something I'm proud of, the front lip question comes down to this: buy for your real use case, not your aspirational one.
If you daily drive the car through actual winters, park in commercial lots, and occasionally take it to a track day - that's the polyurethane tier, from a brand with confirmed fitment for your specific chassis code and bumper variant. Spend $200 to $350, install it properly with fresh VHB tape and the isopropyl wipe you won't skip, and enjoy it. You'll replace it in 4 to 5 years or when it finally gets its first parking block kiss, and that's fine.
If the car is your weekend enthusiast build and it sees track time seriously, step up to wet carbon from a reputable supplier, confirm the fitment against real owner reports for your chassis, and pair it with a set of matching side skirts so the full aero story reads correctly from the outside. Budget $500 to $800 total for the front and sides.
If you're building a dedicated M car - G80, G82, F80, F82 - with real performance intent, the dry carbon tier is where the engineering and visual quality align. The MHC-style dry carbon lip for G80/G82/G83 is a legitimate entry point for that tier without the full bespoke pricing. Understand the fragility trade-off, measure your clearance before buying, and remove the undertray for installation. Do it right and it looks exceptional.
Whatever tier you buy at, the fundamentals are the same: chassis code first, bumper variant confirmed, surface prepped with isopropyl before taping, VHB tape over cheap tape every time, and 24 hours before the first car wash. Follow those steps and your lip stays on the car where it belongs.
If you're figuring out the rest of the build that surrounds this modification, the BMW model guide is a useful starting point for understanding which modifications apply to your specific chassis, and the articles section has deeper dives on everything from coilovers to ECU tuning that rounds out the picture for a complete enthusiast build. And if you're running a performance setup on your engine side to match the visual work you're doing on the exterior, the combination of a cold air intake and a proper ECU tune on a B48 or B58 platform is where the real performance gains live alongside the aero work.
Do the research, buy the right product for your actual use case, and install it properly. Everything else is just details.
Kamil Siegień
Founder of BimmerTalk. Five years wrenching on BMWs, currently dailying a G20 330i with the B48 turbo four. Spent a year doing marketing for BMW and MINI before going independent. I write everything on this site myself.
More about the site