
How to Replace Brake Pads on BMW E90 - 328i, 335i DIY
Affiliate disclosure. BimmerTalk is a proud partner of the Amazon Associates Program and Turner Motorsport. We may earn a small commission on qualifying purchases through our links, at no extra cost to you. Read the full disclosure.
The E90 3 Series is one of the most worked-on BMWs in my shop. It ran from 2006 to 2011, covers the 325i, 328i, 330i, and 335i, and it still shows up regularly for maintenance because there are a lot of them out there and their owners tend to take care of them. The brake job on an E90 is genuinely beginner-friendly compared to the later F30 - there is no electronic parking brake, no software reset required, and the procedure is about as straightforward as BMW gets. That said, there are a few E90-specific quirks worth knowing before you get started, and I will cover all of them here.

The biggest thing that trips people up on the E90 is the caliper bolt size. The front caliper slide bolts on the E90 use a 7mm hex (Allen) key, not the 13mm hex head you might expect. Seven millimeters. I have watched people strip these by using the wrong tool or by applying torque at an angle. Use a quality 7mm hex bit socket on a 3/8-inch drive ratchet, make sure it is fully seated before you turn anything, and go slowly on removal because these bolts are often corroded in place. A penetrating oil soak the night before makes the job much smoother on high-mileage cars.
Rotor sizing on the E90 depends on the engine variant. The base 325i and 328i (N52 engine) came with 300mm front rotors. The 330i and 335i (N54 engine) got 330mm front rotors as standard, though the 335i was also available with the larger M Sport brakes in some markets. Check your rotor diameter before ordering pads - the caliper and pad shape differ between 300mm and 330mm applications. Measure from the back of the wheel well before ordering if you are not sure what you have.
300mm
Front Rotor Size (325i/328i N52)
330mm
Front Rotor Size (330i/335i N54)
300mm
Rear Rotor Size
No (mechanical cable parking brake)
EPB Required
7mm hex
Front Caliper Slide Bolt Size
110 Nm
Front Pad Carrier Bolt Torque
35 Nm
Rear Caliper Slide Bolt Torque
120 Nm
Lug Bolt Torque
Why No EPB Makes the E90 Easier Than the F30
The E90 uses a traditional mechanical parking brake - a cable that actuates a drum-in-hat mechanism on the rear rotors, not an electric motor. This means the rear caliper piston on the E90 is a standard push-in design. You compress it with a C-clamp just like the front. No scan tool, no software, no EPB service mode. This is one reason the E90 is such a good car for someone doing their first BMW brake job - the rear is essentially the same process as the front, just with smaller components.
The drum-in-hat rear parking brake on the E90 does require occasional adjustment. Inside the rear rotor is a small drum with two brake shoes that expand when the parking brake lever is pulled. Over time, as the shoes wear, the parking brake cable adjustment compensates, but eventually the shoes themselves need replacement. On an E90 brake job, I always check the adjustment by pulling the parking brake on a flat surface and trying to roll the car - it should hold firmly with 3-4 clicks of the lever. If it takes 6+ clicks or the car rolls, the shoes or cable need attention. The shoes cost about $30 and replacing them requires pulling the rear rotors off, so it makes sense to do it alongside a pad change if they need it.
One thing to watch on the E90 rear is the rubber accordion boots on the rear slide pins. The E90 rear caliper has two slide pins, and on high-mileage cars the boots deteriorate from road exposure and heat cycling. A torn boot allows water in, the pin corrodes, and the caliper sticks. A sticking rear caliper on the E90 causes the classic symptom of one rear wheel being hot after a drive while the other is cold. Inspect both rear slide pin boots every pad change and replace them if there is any cracking.
Tools List for E90 Brake Job
Front brakes: 7mm hex bit socket (critical - not a regular socket), 18mm socket for the carrier bolts, C-clamp or brake piston compression tool, wire brush, brake cleaner, caliper paste, torque wrench. Rear brakes: same tools, but the rear caliper slide bolts are also 7mm hex on most E90 variants. Have a quality 7mm bit that fits the socket drive cleanly - cheapo Allen keys strip these bolts easily, and a stripped slide bolt on an E90 caliper is a significant repair requiring a drill-out and helicoil or a replacement caliper bracket.
For pad selection, I use the same Hawk HPS 5.0 recommendation for E90 daily drivers that I use for F30s. These pads have a higher friction coefficient than OEM BMW pads, they are quiet, they produce less dust than the OEM compound, and they operate well from cold temperatures without the glazing issues you get with some aggressive street compounds. For an E90 335i that sees the occasional track day, step up to a Hawk DTC-30 or similar dual-purpose pad that can handle sustained heat without fade, while still being street-usable. Pure track pads like the Pagid RS29 are excellent for circuit work but require warmup time and are not pleasant for stop-and-go street use.

Front Brake Pad Replacement - E90 Step by Step
Jack the car, support it on stands, remove the wheel. Spray the caliper assembly with brake cleaner and wipe down. Before touching the caliper bolts, crack the fluid reservoir cap slightly to relieve pressure and prevent overflow when you push the piston back. Use a turkey baster to remove some fluid from the reservoir if it is close to the full mark - pushing a piston back will overflow the reservoir otherwise.
Locate the two slide bolt access ports on the back of the E90 front caliper. They are covered by small rubber dust caps or plugs - pull these off and you will see the hex recesses for the 7mm tool. Insert the 7mm hex socket bit squarely into the recess. I cannot stress this enough: fully seated, perpendicular to the bolt axis, before you apply any torque. These bolts corrode in place on high-mileage cars and they are notoriously easy to strip. If the bolt is seized, spray penetrating oil into the recess, let it sit for 10-15 minutes, and try again. If it still will not budge, heat the caliper body gently with a heat gun (not a torch) near the slide pin boss to help break the corrosion bond.
Once both slide bolts are out, the caliper body slides off the carrier. It will be stiff if the slide pins are corroded or dry - pull it straight away from the rotor. Hang it from the spring with a bungee or wire - do not let it pull on the brake hose. With the caliper off, both pads are now visible in the carrier. Pull them out by hand or with needle-nose pliers if they are stuck in the carrier channels.
Look at the carrier contact channels with the pads out. Scale and rust buildup here is extremely common on E90 cars of this age. Wire brush the channels until the metal is clean and smooth. This takes 3-5 minutes but makes a huge difference in pad behavior. Apply a very thin coat of dedicated brake caliper paste (not wheel bearing grease, not copper anti-seize) to the contact rails only. Keep it off the rotor face completely.
Compress the front caliper piston with a C-clamp and an old pad face against the piston. Push slowly and steadily until the piston is fully bottomed. Install the new pads - inboard first (with wear sensor if applicable), then outboard. Clip the wear sensor wire back to the routing clips on the caliper body. Slide the caliper back over the pads and carrier. Thread both slide bolts in by hand, then torque to 27 Nm. If you are reinstalling the carrier itself, carrier bolts are 110 Nm.
Wear Sensor Replacement on the E90
The E90 uses wear sensors on both front axles and the rear driver side. Each sensor is a single-use item that cannot be reused after it has been removed from a worn pad, even if it has not actually contacted the rotor. The sensor has a plastic housing that deforms during removal. Sensors cost $8-15 each and I replace all three on every E90 pad change.
The front sensor clips into the inboard front pad on the passenger side. The rear sensor clips into the inboard rear pad on the driver side. The wire routes back to a two-pin connector that plugs into the chassis harness at the strut tower (front) or near the trailing arm (rear). After installation, verify each connector clicks fully home - a partially connected sensor can cause a false brake warning light that drives owners crazy trying to diagnose.
On the E90, the brake wear indicator light in the instrument cluster does not self-reset after sensor replacement. You need to reset it via a scan tool or via the instrument cluster menu (hold the BC button on the turn stalk with ignition on, navigate to the service menu, find brake service, and reset). Not all E90 trim levels have the full iDrive menu for this - on base models you may need a scan tool. I use BimmerLink for this reset on every E90 that comes through my shop.
Rear Brake Pad Replacement - E90
The rear caliper on the E90 is similar in design to the front but smaller. The slide bolts are also 7mm hex. The caliper carrier bolts are 80 Nm. The key differences from the front: the rear parking brake shoes are housed inside the rear rotor hat, and the rear piston is a straight push-in design - no rotation required. A standard C-clamp works fine on the E90 rear piston.
One thing I always check on E90 rear calipers is the parking brake lever that sticks out of the back of the caliper. This lever is connected to the parking brake cable. On some higher-mileage E90s, the lever pivot corrodes and the lever sticks slightly in the applied position even when the parking brake is released. This creates constant slight drag on one rear corner. You can check by hand - with the parking brake fully released, the lever should spring back freely under light finger pressure. If it is stiff, clean the pivot with penetrating oil and work it through its range of motion. In severe cases the caliper needs rebuilding or replacement.
Compress the rear piston fully with a C-clamp, install the new pads, reinstall the caliper over the carrier, torque the slide bolts (7mm hex) to 35 Nm, reinstall the carrier bolts at 80 Nm if removed. Reconnect the rear wear sensor. Reinstall the wheel at 120 Nm. Pump the pedal 10-15 times to restore a firm pedal before moving the car.
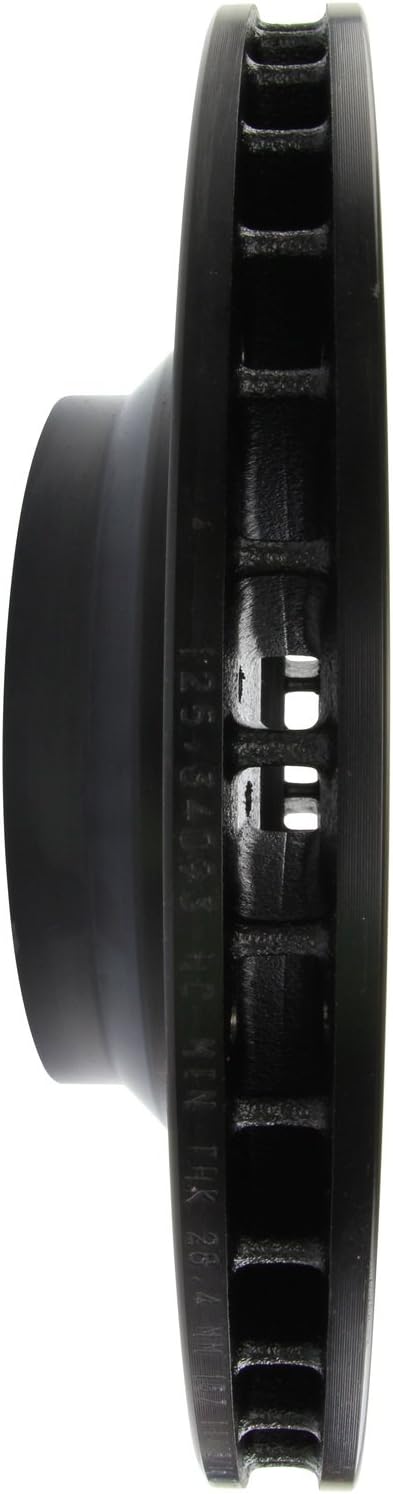
Rotor Inspection and Minimum Thickness
| E90 Rotor Location | Original Thickness | Minimum Thickness | Replace If Grooved |
|---|---|---|---|
| Front 300mm (325i/328i) | 28mm | 26mm | Grooves over 1.5mm deep |
| Front 330mm (335i/330i) | 30mm | 28mm | Grooves over 1.5mm deep |
| Rear 300mm (all) | 12mm | 10mm | Grooves over 1.5mm deep |
Front 300mm (325i/328i)
- Original Thickness
- 28mm
- Minimum Thickness
- 26mm
- Replace If Grooved
- Grooves over 1.5mm deep
Front 330mm (335i/330i)
- Original Thickness
- 30mm
- Minimum Thickness
- 28mm
- Replace If Grooved
- Grooves over 1.5mm deep
Rear 300mm (all)
- Original Thickness
- 12mm
- Minimum Thickness
- 10mm
- Replace If Grooved
- Grooves over 1.5mm deep
I measure rotor thickness at every pad change. A brake lathe can resurface rotors to remove light scoring, but only if the rotor is above minimum thickness after machining. On a 28mm rotor with 0.5mm of scoring depth, machining removes 1mm to get below the scoring and leaves you at 27mm - still fine if minimum is 26mm. But if the rotor is already at 27mm, machining is not viable and replacement is the right call. Replacement is also the right call any time you see deep heat checking (a network of fine cracks on the rotor face) or hard spots (dark blue circular patches on the surface that cause pedal pulsation).
On E90 335i cars, the front rotors take significant heat if the car is driven hard. The N54 generates good power and E90 335i owners tend to use it. I see more front rotor heat checking on 335i cars than on 328i cars for this reason. If you are running your 335i with any performance intent, upgrade to a quality aftermarket rotor rather than a cheap OEM replacement - the metallurgy difference is real and it shows up in rotor longevity. Drilled and slotted options help with heat dissipation and outgassing during harder use.
StopTech Drilled & Slotted Front Left Brake Rotor — E90 335i/335d/X1
$203.62
Bedding in E90 Brakes
Same bedding procedure as the F30 - 10 moderate stops from 50 mph down to 10 mph without fully stopping, then 5 harder stops from 60 mph to 15 mph. Cool the brakes for 5-10 minutes of normal driving between the moderate and hard sequences. The pads and rotors will smoke slightly and smell during the harder stops - this is normal and is the pad resin curing. Do not leave the car parked with the brakes applied during the heat cycle, as this can transfer a pad deposit onto the rotor at the contact patch and cause pulsation.
After bedding, the brake system should feel noticeably better than OEM-style worn pads. The Hawk HPS 5.0 pads in particular have a notably linear, progressive feel that most E90 owners prefer to the BMW OEM compound. The increased friction coefficient also means shorter stopping distances from the same pedal effort. This is the single best bang-for-buck upgrade on a daily E90 in my opinion.
When to Also Replace Brake Fluid
Since you have the car up on stands and you are already dealing with the brake system, this is the right time to check brake fluid condition. BMW recommends a two-year interval for brake fluid, but I see E90s come in for pad changes with fluid that is 5-6 years old and visibly dark. Old brake fluid absorbs moisture over time, which lowers its boiling point. Under hard use - a mountain road, a track day, emergency braking - degraded fluid can boil inside the caliper and cause sudden pedal softness. This is not a theoretical concern; I have seen it happen.
A simple test: digital brake fluid testers that measure water content are available for $15-20 and give you a definitive reading. If the moisture content is above 3%, replace the fluid. If it has been over two years since the last flush, replace it regardless of the test result. The procedure is simple - pressure bleed or vacuum bleed each corner starting with the rear passenger corner and working to the front driver. Use BMW-approved DOT 4 fluid. Never use DOT 5 silicone fluid in a BMW. Full procedure is in our brake fluid guide.

Akebono EURO Ceramic Brake Pads for BMW Front and Rear
$160.95

StopTech G-Coated Drilled & Slotted Front Brake Rotors for BMW 2/3/4 Series X1
$144.95

Motul RBF 600 Factory Line DOT-4 Racing Brake Fluid — 500ml 2-Pack
$37.89

For more on keeping the E90 brake system healthy, see the full brakes section, our pad selection guide, the rotor guide, and the BMW brake upgrade guide if you are considering a more comprehensive upgrade. The E90's brake system is robust and well-designed - keep the pads fresh, the rotors in spec, and the fluid clean, and it will give you confident stopping for many years.


